

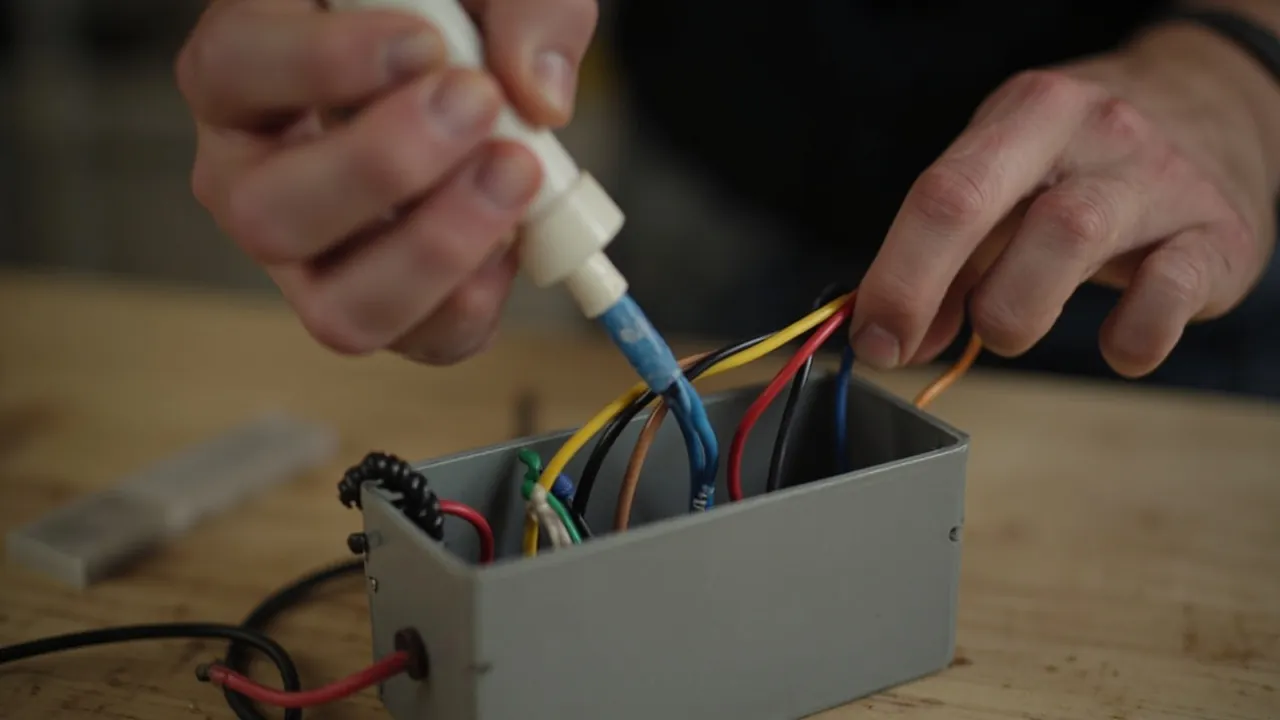
The conclusion comes first, so there is no misunderstanding. Part of installing and wiring a waterproof junction box you can do yourself, and part of it you absolutely cannot. The dividing line is not technical difficulty. It rests on three things: whether live conductors are involved, whether there is a compliance requirement, and whether the integrity of the sealing system is compromised. Those are the three red lines in this article.
That is not conservatism. Outdoor electrical work is distinctive because the environment is damp, body resistance falls, faults go unnoticed, and when something happens it is usually when nobody is watching. Dry skin resistance is roughly 1000 to 2000 ohms; when the skin is wet it can drop below 500. By Ohm's law, at 220 volts the same contact produces about 110 to 220 milliamps dry and potentially more than 440 milliamps wet, and sustained current above about 50 milliamps at mains frequency risks ventricular fibrillation. The same mistake is several times more serious outdoors in the wet.
So the structure here is to draw the boundaries firmly first, then give a complete, executable method inside them. If you want the one-sentence version: siting, brackets, conduit, labelling and inspection are yours to do; live wiring, increasing load, and breaking the sealed structure belong to a licensed electrician.
Contents
- Drawing the Boundary: What You May and May Not Do
- Red Line One: Isolation, Verification and Shock Protection
- Red Line Two: Compliance, Certification and Liability
- Red Line Three: Integrity of the Sealing System
- Six Things You Can Do Yourself
- Six Things Never to Do Yourself
- If You Must Do It: A Twelve-Step Procedure
- Tool and Material List
- Matching Glands to Cables in Practice
- Five Real Failures
- Self-Check List Before Energising
- When You Must Call an Electrician
- Frequently Asked Questions (FAQ)
- Closing Notes and Further Reading
Drawing the Boundary: What You May and May Not Do
A framework is easier to apply than a list of rules.
Test one: is the work on live conductors? Anything involving live parts, including connecting, altering, changing terminals or measuring insulation, raises the bar immediately. This is not a matter of being careful. It requires a full sequence of isolation, verification, lock-out and tag-out, and it requires a second person present. Working alone on live equipment is absolutely forbidden.
Test two: does it alter the existing distribution system? Replacing a luminaire or extending a lead is entirely different from bringing a new circuit out of a distribution board. The latter involves circuit capacity calculations, choice of protective device, earthing arrangements and possibly inspection and sign-off, and belongs to a licensed electrician.
Test three: does it break the product's protective structure? Drilling holes, fitting non-original seals, substituting sealant for a gasket, or putting two cables through one hole all invalidate the IP rating, permanently and irreversibly. Once you have done any of those, no subsequent water problem is the manufacturer's responsibility.
Test four: what kind of place is it? A small project in your own home is one thing; somewhere accessible to others, a rented property or a commercial premises is quite another, where a failure brings legal liability and insurance questions. Electrical alterations in rented or public premises should always be carried out by a qualified person and documented.
Apply those four and most do-it-yourself situations settle naturally into doing part of the job. How the box is mounted, where, how the cable is protected, how it is labelled: all fine. Drilling, connecting and energising need treating with real caution.
Red Line One: Isolation, Verification and Shock Protection
This is the most important of the three, because it concerns personal safety directly.
First, isolation is not a matter of flipping a switch. The correct sequence has five steps.
One, open the upstream device. Find the circuit breaker for the circuit and switch it off; where possible open the next level up as well, so nobody can close it by mistake.
Two, lock out and tag out. Fit a do-not-operate tag at the switch and, where possible, a lock. The purpose is to stop somebody else closing it in ignorance, which is among the most common and most unjust of electrical accidents.
Three, verify. Use a voltage tester or multimeter to confirm the absence of voltage. The tester must first be proved on a known live source to confirm that it works, then applied to the circuit in question. This step is skipped constantly, and testers that have failed have killed people.
Four, check every conductor. Measure each one: every phase to earth, every phase to neutral, and between phases. Testing one conductor and generalising is not acceptable.
Five, discharge and earth. Where the circuit contains capacitance or long cable runs, charge may remain after isolation and must be discharged.
Second, do not work with wet hands, in rain or on wet ground. Before starting outdoors, check three things: are your hands dry, are your shoes and the ground dry, and is the humidity excessive. If relative humidity is above about 80 percent or it is raining, stop. In damp conditions a voltage that would only tingle can become lethal.
Third, residual current protection is mandatory. Outdoor circuits and socket circuits in damp locations must have RCD protection with a rated residual operating current of no more than 30 milliamps, typically operating within 30 milliseconds. The significance of that figure is that 30 milliamps sits between the let-go threshold of around 10 milliamps and the fibrillation threshold of around 50. An ordinary circuit breaker is not a substitute: it protects cable and equipment against overload and short circuit, not people against electric shock.
An RCD also needs testing. Every one carries a button marked T or marked for monthly test. Press it once a month and it should trip immediately. If it does not, it has failed and must be replaced. The test takes three seconds and almost nobody does it.
Fourth, consider the voltage. 50 volts AC, or 120 volts DC, is the usual boundary for safety extra-low voltage, SELV, as set out in GB/T 3805. Limits are 50 volts in dry situations, 25 in damp ones and 12 in especially hazardous locations such as inside metal tanks or in water. Twelve or twenty-four volt landscape lighting, doorbells and low-voltage sensors carry an entirely different risk profile from 220 volts, and DIY tolerance is correspondingly higher. For an outdoor project, prefer a low-voltage scheme.
Fifth, have a second person present. This is not bureaucracy. The window for effective resuscitation after electric shock is a few minutes, and a person receiving a shock usually cannot release the conductor themselves. Somebody beside you can cut the supply and call for help.
Red Line Two: Compliance, Certification and Liability
The second red line is easy to overlook because it does not hurt until the day it matters.
One, qualifications. In China, electrical work is a special category of work requiring the appropriate licence. Enforcement varies for small jobs inside your own home, but for public areas, commercial premises and rented property, and for anything altering a distribution system, a licensed person is generally required and records are expected. When in doubt, assume a licence is needed.
Two, standards and inspection. Outdoor electrical installation falls under several codes, including GB 50054, the code for design of low-voltage distribution, and GB 50303, the code for acceptance of electrical installation work. These set out requirements for cable routing, earthing, protective devices and degrees of protection. A do-it-yourself project may be technically workable and still fail to meet the code, which puts you at a disadvantage at inspection or in any subsequent investigation.
Three, modification voids certification. Concretely: a waterproof junction box carrying CCC or CE approval loses that approval the moment you drill it, fit non-original parts or alter its structure. The consequences follow. If the product forms part of an approved assembly, such as a distribution board or an outdoor luminaire, the approval of the whole may fall with it. In an incident, findings tend towards unauthorised modification. And in an insurance claim, unauthorised modification is a standard ground for refusal.
Four, the chain of liability. A common real situation: a landlord fits an outdoor light in the yard of a rented house using a non-compliant box, and two years later a tenant is injured by leakage current. Liability turns on three questions: did it comply, was it installed by a qualified person, and is there a record of inspection. Fail all three and the liability is very hard to shift.
Five, landlords and neighbours. Outdoor electrical changes in residential compounds, industrial parks and factory premises usually require the consent of the manager, and some require a licensed contractor and formal notification. Asking first is far less trouble than rectifying afterwards.
The practical meaning of the second red line is that on compliance, the DIY boundary is much narrower than the technical one. Being able to do it does not mean you are entitled to, and it does not mean you are protected if it goes wrong.
Red Line Three: Integrity of the Sealing System
The third red line is about the product itself, and it is the core of this series: any action that breaks the manufacturer's sealing structure reduces the IP rating to nothing.
One, drilling is the commonest breach. A box rated IP67 left the factory verified as a whole. Drill a 20 millimetre hole in the side and fit a mismatched connector, and its real protection may not reach IP54. Three things decide the outcome afterwards: whether the hole diameter is correct, an M20 hole being 20.5 millimetres with a plus 0.5 tolerance; whether the edge is deburred; and whether a gland or plug of equal rating is fitted.
Two, cable diameter and gland must match. This is the most frequent error on site and the most deceptive, because it looks tight when finished while the sealing lip has never gripped. Measure the sheath in three directions with callipers and take the largest, then choose a gland whose clamping range covers it. A cable measuring 8.2 millimetres wants an M20 with a 6 to 12 millimetre range, not an M16 rated 4 to 8.
Three, never put two cables through one hole. The gap between two cables cannot be filled by a single gland, and there is no version of this that is acceptable. Drill one hole per cable, or use a multi-cable sealing plate.
Four, never use tape or sealant as the primary seal.
| Material | Problem | Consequence |
|---|---|---|
| --- | --- | --- |
| Ordinary PVC electrical tape | Fails outdoors under ultraviolet and temperature cycling within three to six months as the adhesive hardens and cracks | Seal lost, tape detaches, water enters |
| Acetoxy silicone sealant | Releases acetic acid while curing, attacking terminals and metal parts; cannot accommodate movement | Terminal corrosion, cracking of the bead |
| General epoxy or two-part adhesive | Rigid, with no elasticity; cracks and debonds with the slightest housing movement | Works briefly, then leaks |
Sealing comes only from structure: a gasket plus even closing force. Sealants are at best a secondary defence and can never be the primary seal.
Five, entry position. Bottom entry first, side entry second, top entry forbidden. Every cable entering the box should form a U shape inside, down and then up, so that water cannot wick along the sheath. This detail costs nothing and resolves a substantial share of mysterious water ingress.
Six, deal with breathing. Outdoor enclosures with a large day-night swing draw humid air in as they cool. A do-it-yourself box that seals perfectly but sees a wide temperature range can still collect condensation inside. The simplest countermeasure is a small sachet of desiccant plus a humidity indicator card, costing almost nothing and revealing the problem at the first glance.
How waterproof structural design for outdoor enclosures avoids these problems at the design stage is set out in more depth in that article, and the practical differences between ratings are covered in IP65, IP66 and IP67 compared.
Six Things You Can Do Yourself
Inside the three red lines there is plenty an owner can do, and doing it personally is often more careful work than hiring it out.
One, siting. This has the biggest influence on the outcome and is the easiest thing to get right. Four points: mount at least 300 millimetres above any likely water line; avoid west and south facing walls, preferring east or north where you can; put it somewhere that can be serviced later, not somewhere needing a ladder and the removal of other equipment; and keep it away from sprinklers, concentrated roof run-off and routes where it can be struck.
Two, brackets and back plates. Fix them with stainless expansion bolts, matching the fastener to the wall material, since brickwork, concrete, hollow block and profiled steel sheet all need different anchors. Leave an air gap of 50 millimetres or more between the back of the enclosure and the wall to help cooling and drainage.
Three, conduit protection. Cable run on the surface outdoors must be in conduit, commonly PVC electrical conduit or galvanised steel. Point conduit ends downward or form a drip bend so rain cannot run along it; where it meets the enclosure use a locknut with a waterproof washer; bury underground runs at a depth of at least 0.7 metres as a rule, with a steel sleeve where they pass under a road.
Four, labelling and warning. Put a danger-of-electric-shock label on the outside, together with the circuit reference and a contact number. It costs almost nothing and is invaluable during maintenance or an emergency.
Five, aids inside the box. Desiccant and a humidity indicator, a small wiring diagram, a short length of DIN rail for future additions, and photographs for the record.
Six, records and inspection. Keep a simple checklist: examine the seal, fasteners, labels and internal humidity every six months, and carry out a dedicated check after every typhoon, heavy storm or flood. Outdoor electrical faults almost never appear without warning; what matters is that somebody looks regularly.
Six Things Never to Do Yourself
One, connecting or altering anything live. Even on a 220 volt domestic circuit, this requires isolation, verification, lock-out and tag-out, done by someone competent.
Two, increasing the load or fitting a larger protective device. Swapping a 10 amp breaker for a 32 amp one will not stop nuisance tripping. It will let the cable burn before the breaker operates. Circuit capacity is set by the conductor cross-section, not by the breaker.
Three, adding circuits or altering a distribution board. This involves capacity calculations, protective coordination and earthing arrangements, and it is work for a licensed electrician, possibly with notification.
Four, altering the earthing system or removing an earth conductor. This is the single most dangerous category of work. Earthing is the last line of defence for personal safety, and any change to it belongs to a professional.
Five, any non-original modification in a hazardous area. For equipment certified for chemicals, oil and gas or combustible dust, any hole, replacement part or rewiring voids the certificate, and this one is a red line affecting the safety of others as well as yourself.
Six, breaking the sealed structure for convenience. Top entry, two cables in one hole, a few turns of tape, a ring of sealant: the price is a water-damaged rework a year or two later and unclear responsibility afterwards.
If You Must Do It: A Twelve-Step Procedure
The procedure below assumes low voltage of 220 volts or less, your own premises, work that can be completely isolated beforehand, and no alteration to the existing distribution system. If any one of those four does not hold, stop and call an electrician.
Step one, confirm the boundary. Work through the four tests above. If any is unclear, ask a professional first.
Step two, isolate, tag and verify. Follow the five steps of red line one, with a second person present. Prove the tester on a live source first.
Step three, choose the position and fit the bracket. Level it, mark the holes, drill, fit expansion bolts and fix the bracket. Size the bracket for at least three times the weight of the loaded enclosure.
Step four, assemble tools and materials from the list below, particularly the tester, insulated tools and the torque driver.
Step five, plan the holes. Mark positions on the enclosure, keeping to bottom entry, spacing of at least the hole diameter plus 6 millimetres, and an edge distance of at least half a hole diameter. Clean out the enclosure before drilling so swarf cannot fall inside.
Step six, drill. Use a step drill or a dedicated hole cutter for plastic; hole saws intended for wood tend to chip thin-walled plastic, so avoid them. For metal, use a metal cutter with cutting fluid. Run at low speed to avoid melting the plastic. Deburr afterwards, using a deburring tool or fine abrasive paper.
Step seven, fit the gland before pulling the cable. Order matters: fit the gland body to the wall with its sealing washer and a backing nut where needed, push the cable through, then tighten the compression nut. That avoids scoring the cable during pulling.
Step eight, pull the cable and form a drip loop. Bring it in at the bottom and leave a U shape inside, down and up. Strip just enough to fill the terminal, with no bare copper showing. Stranded conductors must have crimped ferrules or be tinned; never simply tighten them down, because splayed fine strands are the origin of future looseness and heating.
Step nine, make the connections. Follow the colour code: phase in red, yellow or green; neutral in blue; protective earth in green and yellow. Tighten with a torque driver to the terminal's nominal value, commonly 0.5 to 0.8 newton metres. Tug each conductor gently afterwards to confirm it is secure.
Step ten, check insulation and polarity. With the multimeter on resistance, check between conductors and between each conductor and earth. A new circuit should normally read above 0.5 megohms. Confirm that phase, neutral and earth are not crossed.
Step eleven, fit the aids. Add a 10 to 20 gram sachet of desiccant and a humidity indicator, attach a simple wiring diagram, and photograph the result.
Step twelve, close and re-check. Confirm the gasket is not twisted and the groove is clean, then tighten in diagonal sequence in two or three stages to nominal torque. Run the paper strip test around the lid to confirm even compression. Finally restore the supply and use the tester to confirm that the enclosure itself is not live, which matters especially for metal housings.
Tool and Material List
Safety items, essential and not to be economised on.
| Tool | Requirement | Note |
|---|---|---|
| --- | --- | --- |
| Voltage tester | Low-voltage test pencil or digital tester with self-test | Prove it on a live source before every use |
| Multimeter | AC volts and resistance, CAT III 600 V or better | For verification and insulation checks |
| Insulated screwdrivers | VDE approved, 1000 V rated | Ordinary screwdrivers will not do |
| Insulating gloves and dry footwear | Recommended when working in damp conditions | |
| Tag and lock | Do-not-operate label | Prevents others closing the supply |
Installation items.
| Tool | Requirement | Note |
|---|---|---|
| --- | --- | --- |
| Step drill or hole cutter | Covering M16 to M32 | A step drill gives the best result in plastic |
| Deburring tool or fine abrasive | Mandatory | |
| Stripping and crimping pliers | For 0.5 to 6 square millimetres | Ferrules are required on stranded conductors |
| Torque screwdriver | Adjustable 0.2 to 2 N.m | Ensures correct terminal and lid torque |
| Callipers | 0 to 150 mm at 0.1 mm | For cable diameter and hole size |
| Spirit level and marker | For positioning |
Materials: the waterproof enclosure to the required rating; glands whose clamping range matches the measured cable diameter; plugs of the same rating for spare holes; terminals and DIN rail; cable rated for outdoor use, meaning sheathed or rubber-sheathed cable rather than indoor single-core; crimped ferrules; heat-shrink sleeving; self-amalgamating rubber tape as an aid only and never the primary seal; desiccant and a humidity indicator; labels.
On insulating tape used correctly: self-amalgamating rubber tape bonds to itself when stretched and serves as supplementary water protection at a joint, with PVC tape over it for mechanical protection. Neither can replace the sealing structure of the enclosure, and neither belongs on a sealing face.
Matching Glands to Cables in Practice
This gets its own section because it is where do-it-yourself work goes wrong most often.
Measure with callipers in three directions on the cable sheath and take the largest value. Do not infer diameter from the marking on the cable, such as three core two point five, because cables of the same rating from different makers vary by one to two millimetres.
Typical threads and clamping ranges, which differ by manufacturer so the catalogue governs.
| Thread | Hole Diameter | Typical Clamping Range | Application |
|---|---|---|---|
| --- | --- | --- | --- |
| M12 | 12.5 mm | 3 to 6.5 mm | Thin signal and low-voltage lighting cable |
| M16 | 16.5 mm | 4 to 8 mm | Ordinary signal cable, small power cable |
| M20 | 20.5 mm | 6 to 12 mm | Common power cable, the most widely used |
| M25 | 25.5 mm | 9 to 16 mm | Thicker power cable |
| M32 | 32.5 mm | 13 to 20 mm | High current or armoured cable |
The rule: the measured diameter should sit in the middle of the range, not just reach it. A cable measuring 8.2 millimetres suits an M20 of 6 to 12 very well; an M16 of 4 to 8 exceeds its upper limit by 0.2 millimetres and the lip will not seal.
Fitting takes four steps. Pass the gland body through the hole with its sealing washer, or O-ring where used. On a thin wall, add a backing nut on the inside. Push the cable through the body, taking care not to displace the seal. Tighten the compression nut until the cable cannot be pulled out by hand, but not so far that the sheath distorts.
Choose a weather-resistant material. Polyamide 66 with glass fibre weathers well and insulates. Nickel-plated brass is strong and maintains screen continuity. Stainless steel suits coastal and corrosive service. Do not use an indoor-grade plastic gland outdoors, because ultraviolet embrittles it within a year.
Close spare holes with a plug of the same rating, with its sealing washer, tightened to nominal torque. Not tape, not a wooden bung, not a scrap of plastic.
Five Real Failures
Case one, a hole in the top, and one storm destroyed a controller. A surveillance enclosure on a plant was drilled at the top for convenience, a power cable passed through and a ring of silicone applied. Three months later, after two hours of heavy rain, water tracked down the cable and shorted the controller. On inspection, the silicone had debonded from the plastic all the way round, since it never adhered properly, and water had entered through the gap between cable and hole wall, which sealant could not have closed anyway. The correct answer was bottom entry, an M20 gland and a drip loop inside.
Case two, two cables through one hole saved a gland and cost a drive. On a pump control panel the installer passed the power and signal cables together through one M25 hole and filled around them with expanding foam. Water entered within six months and destroyed the variable speed drive at a cost of several thousand. The gap between two cables cannot be filled by any means. One hole each, one gland each.
Case three, PVC tape on a joint, and a year later the joint melted. A garden light had its joint made in a buried box and wrapped with ordinary PVC tape. Within a year the joint oxidised, contact resistance rose, it heated and eventually melted. Outdoors, the right answer is a waterproof enclosure with proper terminals, or gel-filled crimp connectors, never tape. Buried joints require a dedicated resin-filled waterproof kit.
Case four, a bigger breaker, and the cable burned first. A machine in a workshop tripped repeatedly, so someone replaced the 16 amp breaker with a 32 amp one. Two weeks later the cable overheated and the insulation melted, narrowly avoiding a fire. A breaker protects the cable; it is not there to prevent inconvenience. A 2.5 square millimetre conductor carries roughly 20 to 25 amps depending on the installation method, so a 32 amp breaker leaves it unprotected. Repeated tripping needs diagnosing: is the load genuinely too high, is it motor inrush, or is the wrong trip curve fitted, such as a C curve where a D was needed.
Case five, a failed tester, and no voltage where there was voltage. During maintenance, a worker tested, saw no indication and took hold, receiving a shock. The tester's battery was flat and it had been showing no voltage at all. The lesson: prove the tester on a known live source before every use, test the target, then ideally re-prove it afterwards. It is the step most often skipped and the one most likely to kill.
Self-Check List Before Energising
Work through this before restoring the supply. If any item fails, do not energise.
Safety.
- Isolation, tagging and verification carried out in full, in five steps
- Tester proved on a live source and confirmed working
- Every conductor measured and confirmed dead, phase to earth, phase to neutral and between phases
- The outdoor circuit has 30 milliamp RCD protection, and the test button has been pressed to confirm tripping
- A metal enclosure is properly earthed, with the earth bolt tight and the earth symbol present
- A second person is present
Sealing.
- All holes are in the bottom or the side; none in the top
- One gland per hole, never two cables in one
- The gland clamping range covers the measured cable diameter and sits mid-range
- Spare holes are closed with plugs of the same rating
- All holes deburred and swarf removed
- Cables form a down-and-up drip loop inside
- The gasket is not twisted or nicked, and the groove is free of debris
- The lid has been tightened in diagonal sequence, in stages, to nominal torque
Electrical.
- Phase, neutral and earth colours are correct and connections are right
- Terminals tightened to the required torque, each conductor tugged to confirm
- Stranded conductors have crimped ferrules or are tinned, with no stray strands
- Insulation resistance is acceptable, generally not below 0.5 megohms for low-voltage circuits
- Conductor size matches the breaker rating
- No tools, swarf or offcuts left inside
Finishing.
- Desiccant and humidity indicator fitted
- Wiring diagram fixed inside
- Danger label and circuit reference applied outside
- Photographs taken for the record
- Installation date and next inspection date recorded
When You Must Call an Electrician
In these situations, do not attempt it yourself. Contact a licensed electrician or electrical engineer.
One, anything inside a distribution board: new circuits, breaker replacement, changes to terminal blocks or protection settings.
Two, new cable runs: bringing a new circuit out of a board, through a wall, underground or overhead, all of which involve capacity calculations and installation rules.
Three, anything to do with earthing: installing an earth conductor, changing the earthing arrangement, or dealing with an earth fault.
Four, voltages above 50 volts AC or 120 volts DC where the circuit cannot be fully isolated. If it cannot be isolated, only a professional should work on it live, with the right protective equipment and supervision.
Five, public areas, rented property and commercial premises, where there are normally explicit qualification and sign-off requirements.
Six, hazardous areas with chemicals, oil and gas or combustible dust, where any modification voids certification and only a suitably qualified person may work, using the manufacturer's own scheme.
Seven, faults of unknown cause: repeated tripping, leakage, burning smells, hot terminals, or a live enclosure. Behind those symptoms lie insulation damage, earth faults or protection coordination problems needing professional diagnosis.
Eight, any situation where you are the slightest bit unsure. This is the most important item of all. In electrical work, not quite sure but probably fine is the most dangerous state there is. Asking costs nothing; getting it wrong can cost a life.
Frequently Asked Questions (FAQ)
Q: Can I install a waterproof junction box myself at all? A: In two parts. Siting, brackets, conduit, labelling, desiccant and periodic inspection you can do yourself, and doing it personally is often more careful. But three things you cannot do yourself: first, wiring work that is live or that alters the distribution system, which needs a licensed person; second, anything that breaks the product's sealing structure, such as drilling at will, two cables in one hole, or tape and sealant as the primary seal; third, alterations in public areas, rented property, commercial premises or hazardous areas. The four tests are whether live conductors are involved, whether the existing distribution system changes, whether the protective structure is broken, and what kind of place it is. Only when all four are clearly within the safe zone should you proceed.
Q: Can I wire up a low-voltage garden light in the yard myself? A: It depends on the voltage and on whether the distribution system changes. With a safety extra-low voltage system at 12 or 24 volts, such as landscape lighting with a transformer, where you are only extending cable, replacing connectors or adding a waterproof box, the risk is low and doing it to a proper standard is reasonable, with three cautions. Every joint must go inside a waterproof box. Never bury a joint that is merely taped. And the transformer itself must sit in a dry place with its own weather protection. If the work involves bringing a new 220 volt circuit out of the distribution board, chasing cable into a wall, or replacing breakers and socket outlets, it belongs to a licensed electrician. Even on a low-voltage system, buried joints need a resin-filled waterproof kit, because an ordinary box buried long term will be penetrated by water pressure.
Q: If I have RCD protection, am I safe? A: No. An RCD is the last line of defence, not the only one. Its function is to cut the supply quickly once leakage reaches 30 milliamps, limiting the duration of a shock and so avoiding fibrillation. It has three limitations. It does not prevent the shock, only shorten it. It does nothing for a shock between phase and neutral, where a person touches both conductors, because it senses the difference between current in and current out. And it can fail itself, which is why the test button must be pressed monthly to confirm it trips. The correct hierarchy is isolation first, insulation and guarding second, and the RCD third. Do not relax the first two because the third is present.
Q: Why should I not use silicone sealant on a junction box? A: Three reasons. Ordinary acetoxy silicone releases acetic acid as it cures, and that acid attacks copper terminals, plating and metal fasteners, raising contact resistance, causing heating and potentially causing failure. Silicone adheres poorly to low surface energy plastics such as polyethylene and polypropylene, so on a PP or PE housing the bead detaches all the way round before long. And even where it bonds, it is rigid, so the small dimensional changes the housing undergoes with temperature crack it. In field experience, sealed boxes fail within six months to a year at a very high rate. Sealing comes only from structure, meaning a gasket and even closing force. Sealant is at best an external water deflector and has no place on a sealing face.
Q: Does the enclosure still have a rating after I drill a hole in it? A: Strictly, the manufacturer's IP certification no longer applies. The rating was verified against the product as delivered, and drilling changes that. If a hole is unavoidable, the way to keep real protection close to the original is: cut it with a proper cutter at the standard diameter; deburr thoroughly; use a gland of the same rating as the enclosure whose clamping range covers the measured cable diameter; add a backing nut on a thin wall; tighten to nominal torque; and close spare holes with plugs of the same rating. Done properly, real protection can approach the design value, but there is no third-party report behind it and no warranty claim against the manufacturer. The safer route is to supply a hole drawing at the time of ordering and have the manufacturer drill and verify the assembly before dispatch.
Q: Can I just wrap outdoor joints in PVC electrical tape? A: No. It is one of the most common outdoor electrical mistakes. Under ultraviolet, temperature cycling and damp, ordinary PVC tape hardens, cracks and loses adhesion in three to six months, taking both insulation and water resistance with it. Worse, a taped joint outdoors forms a water pocket, and once water is in it evaporates slowly, accelerating oxidation. The correct approach has three levels. Best, put the joint in an enclosure of adequate rating and join with terminals rather than twisting. Next best, in an exposed but above-ground position, use gel-filled crimp connectors or a resin-filled joint kit. Buried joints require a dedicated resin-filled waterproof kit, since an ordinary box buried long term will be penetrated by water pressure. If tape is genuinely needed, apply self-amalgamating rubber tape first for sealing and PVC tape over it for mechanical protection, and treat that only as an aid, never as a substitute for an enclosure.
Q: How do I know the supply is really off? A: Five steps, none optional. Open the upstream device, and where possible the level above it. Lock out and tag, because somebody else closing the supply in ignorance is the commonest cause of electrical accidents. Verify with a tester, having first proved the tester on a known live source, then test the target and ideally re-prove the tester afterwards. Measure every conductor individually, phase to earth, phase to neutral and between phases, rather than testing one and generalising. And discharge, because circuits with capacitance or long cable runs retain charge after isolation. One further caution: consider whether a second source exists. Battery-backed equipment, a UPS, a photovoltaic system, or a supply borrowed from elsewhere can all re-energise a circuit you believe is dead.
Q: If a do-it-yourself waterproof box fails, is the manufacturer liable? A: Usually not; findings tend towards unauthorised modification. Three questions decide it. Was the product used as delivered, since drilling, fitting non-original seals and substituting sealant for a gasket all count as altering it? Was it installed to the code and the instructions, meaning correct torque, bottom entry and a correctly sized gland? And was it installed by a qualified person? Fail all three and the liability sits with the installer or the owner. Unauthorised modification is also a standard ground for refusing an insurance claim. The recommendation is therefore to supply hole drawings and configuration requirements at the time of purchase and have the manufacturer carry out the machining, keeping the records. That preserves both the protective performance and the basis for any later claim.
Q: Does a metal enclosure need earthing? A: Yes, without exception. If a damaged cable or a loose terminal makes a metal enclosure live, the whole housing carries a dangerous voltage, anyone touching it is at risk, and an RCD will not necessarily operate in time. The correct method: use the dedicated earth stud, normally marked with the earth symbol or in green and yellow; connect a green and yellow conductor of adequate size, generally not less than half the phase conductor size and not less than 2.5 square millimetres, to the earth bar or electrode; remove paint and oxide at the connection so it conducts properly; and tug it gently after tightening. Afterwards, measure between the enclosure and a known earth point with a multimeter, which should read close to zero. A plastic enclosure is itself insulating and needs no earthing, but the internal earth terminal bar still has to be connected to the protective conductor as required.
Closing Notes and Further Reading
To the question in the title: can you fit a waterproof junction box yourself? Yes, provided you stay inside three red lines.
Red line one, isolation and shock protection: isolate, tag, verify, check every conductor, and have someone present, five steps with none omitted. Fit 30 milliamp RCD protection on outdoor circuits and test it monthly. Do not work with wet hands or in rain. Prefer a 12 or 24 volt scheme.
Red line two, compliance and liability: live work and changes to the distribution system need a licence; changes in public areas, rented property and commercial premises need a professional and a record; drilling or modifying a product yourself voids its certification and can give an insurer grounds to refuse a claim.
Red line three, integrity of the sealing system: cut holes with the right tool and deburr them; the gland clamping range must cover the measured cable diameter and sit mid-range; one cable per hole, never shared; bottom entry with a drip loop; sealing from structure, not from sealant.
Inside those three lines, siting, brackets, conduit, labelling, desiccant and inspection are well within an owner's ability, and usually done more conscientiously than by contract. What is genuinely dangerous is not doing it yourself, but doing it without knowing where the boundaries are.
JUNZHJIA, made by kexinMaterials in Zhongshan, Guangdong, supplies waterproof junction boxes and sealed electrical enclosures machined to supplied hole drawings, with glands pre-fitted and the assembly verified, delivered with IP rating reports, recommended tightening torques and wiring guidance, and supports OEM and ODM work with global volume supply. Any work on live conductors must be carried out by a licensed electrician.
- Further reading: Performance limits of IP67 protective cases
- Further reading: Keeping rain and humidity out of outdoor enclosures
- Further reading: Seal structure and replacement for outdoor enclosures