

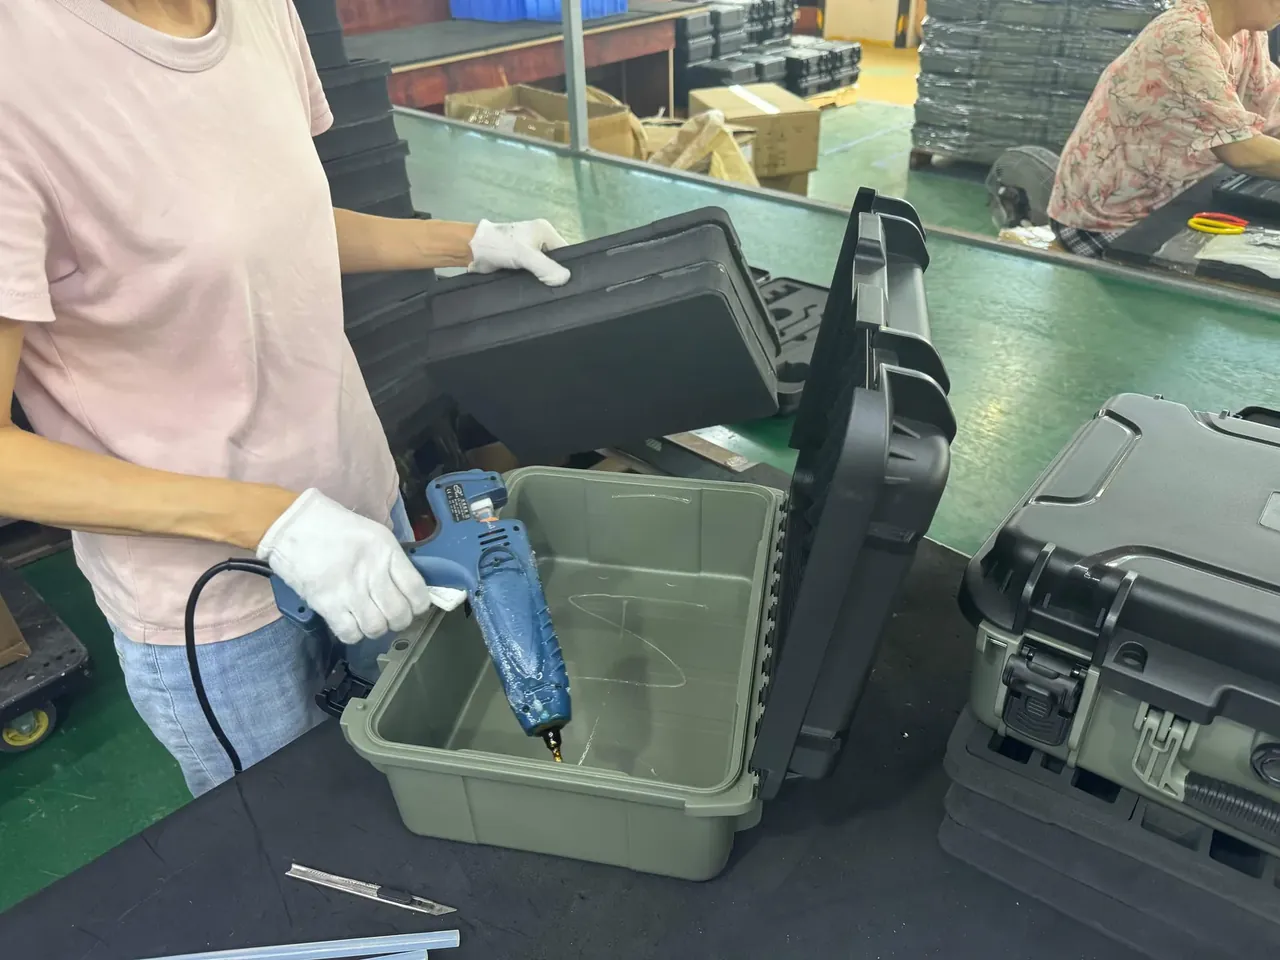
Quick answer: Foam insert installation comes down to three actions performed in order: bonding with a 0.15–0.25 mm adhesive layer pressed for 30 seconds, locating from the four corners once the base panel is set, and leaving 0.5–1.0 mm of side clearance so the foam compresses 10–15% through its thickness.
Table of contents
- Why the order of foam insert installation cannot be reversed
- Bonding: adhesive thickness and press time
- Location: datum from the base panel outward
- Clearance: side gap and compression
- Tools and sequence on the bench
- FAQ
1. Why the order of foam insert installation cannot be reversed
The cavity is molded in one shot, so the floor sits 1–3 mm from the walls through draft and every corner carries an R3–R5 radius. Line the walls first and each panel edge has nowhere to go but into the base, arching the corner.
Base first reverses that: the floor panel lands, its overhang slides under the wall panels, and the joint hides in the internal corner. Across one batch, reversing the order cost a fifth of the corner flatness yield.
| Action | Setting | Bench check |
|---|---|---|
| Bond | 0.15–0.25 mm adhesive, 30 s press | Peel test, even adhesive transfer |
| Locate | Corner offset within 1 mm | Square held to corner, no light gap |
| Clearance | 0.5–1.0 mm side, 10–15% through thickness | Lid resists, then snaps |
2. Bonding: adhesive thickness and press time
Adhesive thickness comes from the applicator, not from feel. The scraper notch sets a bead 0.15–0.25 mm deep at 8–12 mm spacing, laid as a wave rather than a full coat. A full coat pools under pressure, shrinks as it cools, and lifts the foam edge.
Thirty seconds is the working figure for polyether foam on an ABS shell. Pressure belongs on a roller, 30–40 mm at about 60 Shore A, pushed one way from the centre out; scrubbing pushes adhesive into ridges and starves the edges.
3. Location: datum from the base panel outward
Location needs a datum that does not move with the foam. The four internal corners are the most stable feature on a molded shell, usually within ±0.3 mm, so corner alignment outranks edge alignment, which flash and draft can shift by a millimetre.
Pins suit volume: two 5 mm pins engage process holes in the floor and repeatability holds at ±0.5 mm. Short runs use four 10 × 10 mm tape dots, then the bead, long side first, butt joints at the corners.
4. Clearance: side gap and compression
Clearance is the room the foam needs to work. Cushioning comes from deflection: below 10% compression the foam absorbs little, above 15% it takes a permanent set. Ten to fifteen percent through the thickness sits between those limits.
Side gap and thickness compression are separate numbers. The 0.5–1.0 mm allowance stops the foam buckling against the wall; compression through the thickness sets preload. A 0.5 mm feeler gauge around four sides should enter and drag.
5. Tools and sequence on the bench
Tools turn judgement into repeatable motion: scraper sets volume, roller sets uniformity, fixture sets position, gauge sets clearance. Remove one and the operator falls back on habit, which changes between shifts.
| Tool | Purpose | Note |
|---|---|---|
| Scraper | Bead width and depth | 0.2 mm notch, held at 45° |
| Roller | Press and evacuate air | 35 mm, one direction, about 5 kg |
| Pin fixture | Position at volume | Two pins, one face, periodic check |
| Feeler gauge | Side clearance | 0.5 mm blade, four sides |
The sequence is fixed: clean, apply, press, verify. Wipe with isopropyl alcohol, let it flash 60 seconds, keep application to pressing under 20 seconds, and leave the case still for 10 minutes.
| Wrong order | What shows up | Consequence |
|---|---|---|
| Walls before floor | Corners arch, floor edge exposed | Lid fouls, rework climbs |
| Long delay before pressing | Skinned adhesive, no tack | Full debond after 24 hours |
| Flipping the case at once | Insert shifts as a block | Side gap drifts past 0.5 mm |
Conclusion
Most variation in foam insert installation traces back to sequence, not to the foam itself. Bonding is judged by adhesive layer and press time, location by corners and datum, clearance by gauge and compression. Written into the workstation, those three make foam insert installation repeatable across shifts.
This article discusses only the container (case body) side of specifications and design intent, and does not cover any handling, loading or use of the contents.
Related Reading
- How to specify a foam lining for a case
- Foam structures used inside protective cases
- A custom foam insert project walkthrough
- Five factors that shape a custom foam build
Related Products
- 8 Series — Gun Cases; Military Equipment Cases; Camera Equipment Cases; Drone Cases; Watch Cases; Knife Cases; First Aid Cases; Electronics Equipment Cases
- WL8-2812 PP Gun Case — model WL8-2812
- All protective cases and toolboxes: 7 series, 158 models