

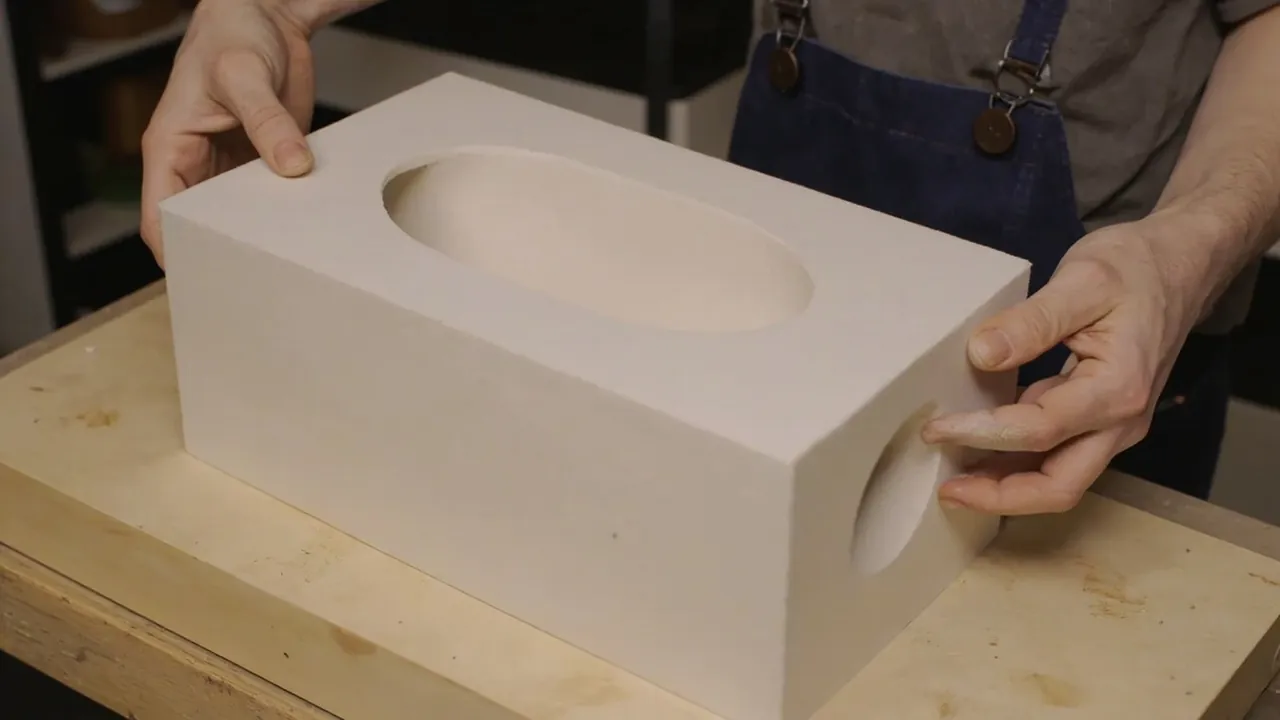
A custom protective-case foam insert is not a factory-standard pre-cut or user-tear grid, but an exclusive liner designed, tooled, or CNC-machined specifically around "the actual set of equipment you need to carry" — its shape, weight, vulnerability points, quantity, access frequency, and transport mode. The core factors it must consider fall into six categories: equipment shape and contour, weight and center of gravity, vulnerability points and protection priorities, equipment quantity and access frequency, transport mode and environmental risk, and foam process and material choice. Unlike pre-cut foam (which only fits standard models) and pick-and-pluck foam (which approximates by grid), a custom insert pursues "one cavity per item, snug fit, layered cushioning," especially suited to high-value precision instruments, irregular equipment, batches that must be consistent, or scenarios with hard requirements on appearance or protection level. Below is a factor checklist you can use directly for purchasing and design communication, with each factor broken down to show how it affects the insert scheme, ending with the choice among die-cut/routed/3D processes and common mistakes.
Table of Contents
- What a Custom Insert Is (vs. Pre-Cut and Pick-and-Pluck)
- Overview Table of Factors to Consider for a Custom Insert
- Factor 1: Equipment Shape and Contour
- Factor 2: Weight, Center of Gravity, and Load Distribution
- Factor 3: Vulnerability Points and Protection Priorities
- Factor 4: Equipment Quantity and Access Frequency
- Factor 5: Transport Mode and Environmental Risk
- Process Choice: Die-Cut vs. Routed vs. Thermoform/3D (Comparison Table)
- Design and Communication Steps for a Custom Insert
- Common Mistakes
- KeXin New Materials JUNZHJIA Insert Capability
- Matching Material, Density, and Hardness (Parameter Reference)
- Tolerance Fit Between Custom Insert and the Case Shell
- Acceptance Checklist for a Custom Insert (for the Buyer)
- Application Examples Across Five Industries
- General Notes on Cost and Lead Time (No Quotes)
- Transport and Storage Notes
- Custom Insert Design-Input Template (Ready to Use)
- Relationship Between a Custom Insert and a Stock Case's Built-In Liner
- Frequently Asked Questions (FAQ)
- Conclusion and Further Reading
What a Custom Insert Is (vs. Pre-Cut and Pick-and-Pluck)
A custom foam insert is a liner "tailor-made" for a specific equipment list. Common implementations include EVA/PE foam CNC-routed by 3D data, die-cut foam stamped by a steel-rule die, and rigid trays made by thermoforming (vacuum forming) or 3D printing. Its keyword is "exclusive" — shape, depth, compartments, and material are all set around your equipment, rather than bending to a universal grid or a standard model.
The positioning of the three compared:
- Pre-cut foam: The factory routes cavities for a standard model; ready to use out of the box, but only matches that fixed model.
- Pick-and-pluck foam: The user tears out grid cubes; flexible but precision is limited by the grid.
- Custom insert: Exclusively designed for your equipment; highest fit and consistency, at the cost of design and tooling/programming effort.
When should you go custom? A simple rule: when the equipment is high-value, irregular in shape, in considerable quantity and must be consistent, or has hard requirements on protection level or appearance, the marginal benefit of a custom insert is highest. To add: custom does not mean "rebuild the whole case" — often you only need to replace the insert and keep the original case, with cost and lead time far lower than a full custom case, a high-cost-performance upgrade path. For the overall map of case liner types, see what types of internal foam a protective case has.
Overview Table of Factors to Consider for a Custom Insert
Synthesizing the six factor categories into one overview table for item-by-item checking before design:
| Factor category | Key question | Effect on insert design |
|---|---|---|
| --- | --- | --- |
| Equipment shape | Regular contour? Handles/protrusions/antenna? | Decides routing/die-cut/thermoform process & precision |
| Weight & CG | How heavy per item? Where is CG? | Decides foam density, thickness, load zone, CG centering |
| Vulnerability | What fears pressure/vibration/scratch most? | Decides cushion thickness, soft/hard zones, isolation |
| Quantity & access | How many? Accessed how many times/day? | Decides cavity independence, opening rhythm, labeling |
| Transport mode | Land/air/sea/high altitude? | Decides shock, pressure balance, moisture design |
| Process & material | Die-cut/route/thermoform? EVA/IXPE? | Decides cost, consistency, cleanliness grade |
This checklist should be handed to the manufacturer as a design-input document, not described verbally as "just fit it in." Each category is expanded below.
Factor 1: Equipment Shape and Contour
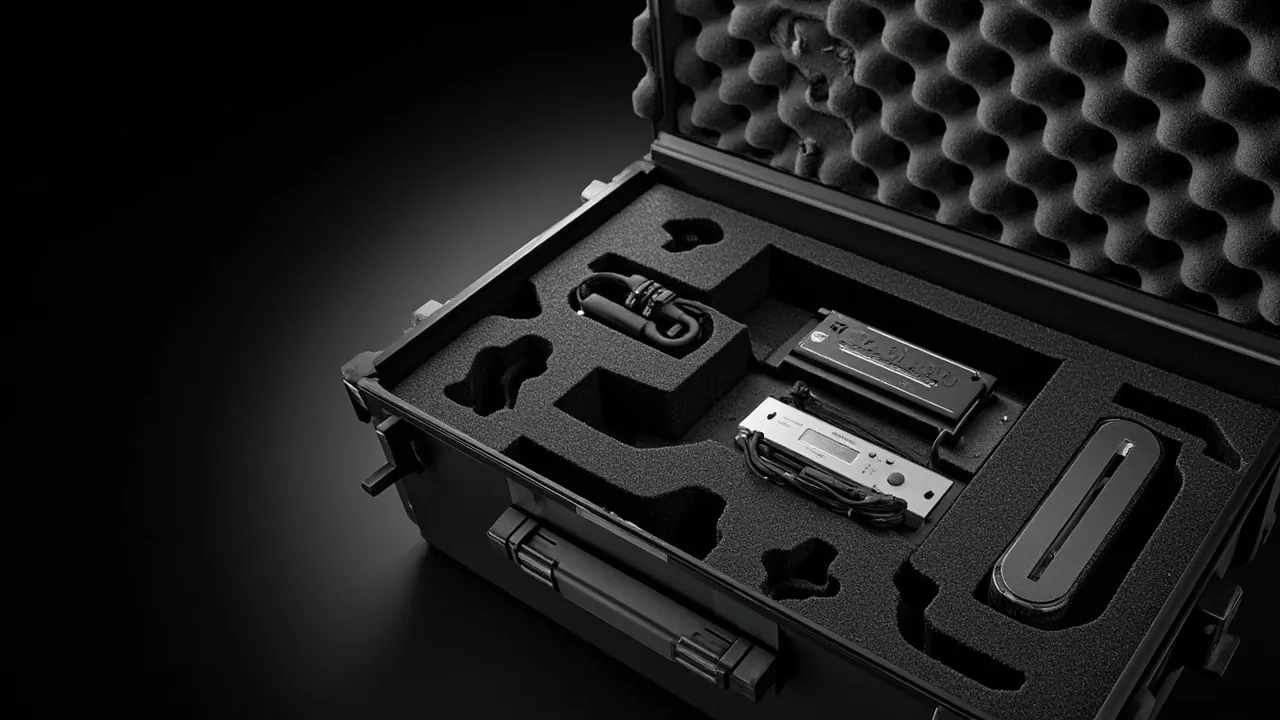
Shape is the starting point of insert design and directly decides process and precision:
- Regular square equipment (e.g., standard instrument boxes, power supplies): can be die-cut quickly; low cost, good consistency.
- Equipment with handles, brackets, protruding buttons: needs CNC routing to preserve protrusion space, or upper/lower pieces wrapping separately.
- Irregular/combined equipment (e.g., with antenna, gimbal, piping): prefer a thermoformed tray or 3D-printed rigid tray; foam struggles to accurately reproduce complex 3D.
- Contour precision requirement: Precision optics/medical parts want "zero play"; provide a 3D model or physical scan; general tools allow 1–2 mm interference.
Practical advice: before design, provide three-view drawings or measured outline dimensions (length × width × height + key protrusion positions) of each item — far more reliable than a photo. The more accurate the contour data, the higher the probability the cavity is right the first time and the less rework.
Factor 2: Weight, Center of Gravity, and Load Distribution
Weight decides whether the foam "holds up"; center of gravity decides whether it is "stable":
- Single-item weight: Light items (<1 kg) use ordinary EVA; heavy items (several kg or more) need high-density foam or a rigid tray to avoid long-term collapse.
- Center-of-gravity position: Place heavy equipment at the geometric center of the case, close to the bottom, to reduce overturning and stacking eccentric-load risk; off-balance equipment may need counterweight or limiting.
- Multi-layer stacking: If several items stack up and down inside,load distribution between layers — heavy items at the bottom, light fragile items on top, with foam thickness per layer allocated by weight.
- Coordination with the case: Insert load ultimately transmits to the case wall and latches; stacking and load design can refer to protective-case stacking structure. Eccentric CG lowers stacking stability.
- Counterweight and balance: If the equipment itself is hard to center, use same-density foam as a counterweight block in the insert's free area, or design heavy-item cavities at the center and light items around the perimeter, avoiding one-end-heavy case.
In one sentence: the insert is not an isolated support; weight and center of gravity must be calculated within the "case – insert – equipment" whole.
Factor 3: Vulnerability Points and Protection Priorities
Different equipment have different "Achilles' heels"; the insert must protect targeted:
- Pressure-sensitive surfaces (lenses, screens, dials): cut less there, keep thicker soft foam as a cushion, avoiding hard contact.
- Vibration-sensitive parts (high-precision sensors, gyroscopes): thicken the surrounding walls, add a cushion layer at the bottom, absorbing transport vibration.
- Scratch-sensitive surfaces (coatings, optical faces): use low-dust, non-flaking material (such as IXPE), and avoid sharing a cavity with hard objects that rub.
- Moisture/static-sensitive parts (circuits, chips): specify anti-static (ESD) foam for the insert, with the case paired with desiccant and IP67 sealing.
- Easy-to-shed/easy-to-leak parts (powder, liquid, small parts): separate sealed bags or independent small cavities, avoiding contaminating the main cavity and other equipment.
The vulnerability list should be handed to the manufacturer together with the equipment list, as the basis for cushion zoning and material choice.
Factor 4: Equipment Quantity and Access Frequency
Quantity and access rhythm affect the insert's "compartment logic" and "labeling design":
- Single high-value item: Pursue perfect fit and all-around cushioning; use a thermoformed/3D rigid tray.
- Multiple identical items (e.g., same-model battery ×10): use an array of equal cavities; fast to take and easy to count.
- High-frequency access (opened many times per day): cavities must "go in smoothly, come out fast" — opening upward, not deeply hidden; consider adjustable dividers for big-category zoning, with foam for single-item fixing.
- Low-frequency storage (long-term reserve): can be more compact, sealing first, with moisture-proofing.
Access frequency also affects wear: high-frequency scenarios need wear-resistant, non-flaking liner material and connection structures that endure repeated opening. Moreover, equipment accessed frequently should have clear labels or numbers beside the cavity so different people can quickly restore the layout, reducing human error of "wrong cavity, wrong item."
Factor 5: Transport Mode and Environmental Risk
Insert design must match the transport profile, otherwise "fits" does not mean "survives transport":
- Land/road transport: Main risk is continuous vibration and bumping; the insert must resist long-term micro-vibration and keep equipment from shifting; foam rebound and wall height must be sufficient.
- Air/high altitude: Large pressure and temperature change; the case needs a pressure-balancing valve (principle is common industry knowledge), the insert need not bear the pressure difference but must keep equipment fixed; also comply with air-cargo packaging requirements.
- Sea/humid: High humidity, salt-spray risk; case IP67 + desiccant inside, insert material chosen as moisture-resistant closed-cell foam to avoid water absorption and added weight.
- Field/drop: Possible drops and rolls; two-piece top-and-bottom foam wrapping, interference fit, is more reliable; shell rigidity is also key (see how to judge a high-strength case structure).
Transport mode decides "besides fixing, what else to protect"; the insert is only one link and must coordinate with the case's sealing, pressure balance, and shell strength.
Process Choice: Die-Cut vs. Routed vs. Thermoform/3D (Comparison Table)
There are mainly three processes for a custom insert, each with its applicable boundary:
| Dimension | Die-cut (steel-rule) | CNC routed | Thermoform/3D rigid tray |
|---|---|---|---|
| --- | --- | --- | --- |
| Shape precision | Medium (regular contours) | High (3D protrusions) | Highest (complex irregular) |
| Batch consistency | High | High (programmed) | High |
| Flexibility/change | Low (die change) | Medium (program change) | Low (re-tool/model) |
| Unit cost | Low (large batch) | Medium | High |
| Suits shape | Square regular | Mid-complex with protrusions | Irregular/high-value single |
| Typical material | EVA/EPE sheet | EVA/IXPE block | ABS/PP sheet, PETG, nylon |
Selection rule of thumb: regular large batch → die-cut; mid-complex with protrusions → CNC routed; irregular high-value → thermoform/3D. Many projects mix: a thermoformed tray for main support, CNC-routed EVA for cushions, balancing fit and cost.
Design and Communication Steps for a Custom Insert
Turn the factors above into an executable flow; suggest the following steps with the manufacturer:
- Freeze the equipment list: List each item's name, outline dimensions (three-view or physical), weight, vulnerability, quantity, access frequency.
- Define the transport profile: Land/air/sea, whether high altitude, temperature/humidity range, drop-risk level.
- Set protection goals: Target IP level (e.g., IP67 per IEC 60529), whether a pressure-balancing valve is needed, moisture/anti-static requirements.
- Choose process and material: By shape complexity and batch, die-cut/routed/thermoform; by cleanliness/static requirements, EVA/IXPE/ESD material.
- Provide data and prototype: Give the manufacturer a 3D model or physical item; make a single-item prototype first to verify fit.
- Accept and sign off: Extend the pre-cut foam acceptance idea; write the individual product spec sheet and test report into the contract appendix.
- Batch and traceability: Keep first-article samples for batch production to facilitate later consistency checks and spare replacement.
This flow turns "custom" from a vague need into an acceptable engineering input, significantly reducing rework and disputes.
Common Mistakes
The easiest pitfalls in a custom insert:
- Mistake 1: Report only dimensions, not vulnerability. The manufacturer routes by shape, and the lens face gets hard-pressed. You must write "what fears pressure most" into the design input.
- Mistake 2: Use photos instead of three-views. Photos have perspective and no precise dimensions; cavities will inevitably deviate. Give measured dimensions or 3D data.
- Mistake 3: Ignore the transport profile. Only look at "fits," not air pressure difference or sea humidity, and problems appear on site.
- Mistake 4: Over-pursue fit at the expense of access. Cavities cut too tight make daily access like defusing a bomb; balance fit and convenience (about 5%–10% compression allowance).
- Mistake 5: Insert disconnected from the case. Large case tolerance, foam misaligned, or foam hits the seal/latch. The insert must coordinate with the case at the mold stage.
- Mistake 6: Never ask about material and compliance. Electronics/medical scenarios ignore low-dust and anti-static, failing cleanliness; export scenarios ignore RoHS/REACH (KeXin New Materials plastic cases in ABS/PP material pass RoHS testing; insert material should be specified in the contract).
KeXin New Materials JUNZHJIA Insert Capability
KeXin New Materials (Guangdong) Co., Ltd. operates the domestic brand "KeXin", the global brand kexinMaterials, and the protective-case product-line brand JUNZHJIA. Founded in 2014, the factory is in Zhongshan City, Guangdong (the Greater Bay Area), covering about 18,000 m², with 80+ machines and 100+ staff. The company holds more than 20 utility-model and design patents (each patent is traceable to the corresponding design and process record of the product line).
The product line covers more than 150 specifications across plastic tool boxes, safety protective cases, sealed cases, waterproof/moisture-proof cases, hardware tool boxes, machinery parts cases, and parts bins, applied in outdoor survey, military/police/fire, electronics, scientific exploration, and aviation/communication, exported to the United States, the United Kingdom, Germany, Canada, Japan, Russia, the Philippines, India, Hong Kong/Taiwan (China), and the Middle East. The company has one-stop OEM/ODM capabilities for product design, injection molding, mold manufacturing, LOGO printing, and inner-tray/liner making — The protective-case product line has IP67 capability and holds ISO9001, REACH, and California Prop 65 (certificates available on request); plastic cases in ABS/PP pass RoHS testing; the product line is validated for environmental adaptability under MIL-STD-810H (a product-line test basis, not a military certification). For bulk quotations, specification sheets, and customisation, contact us through the contact form on this site — the team replies within 1–3 business days.
Matching Material, Density, and Hardness (Parameter Reference)
The material choice for a custom insert directly decides protection performance; below are common industry ranges (foam industry knowledge; specific values per manufacturer spec sheet):
| Parameter | Common industry range (reference) | Selection meaning |
|---|---|---|
| --- | --- | --- |
| EVA foam density | about 30–80 kg/m³ | Higher density is stiffer, better support; lower is lighter/softer |
| Shore A hardness | about 30A–70A | Hard holds shape, walls less likely to collapse; soft wraps gently |
| IXPE density | about 30–60 kg/m³ | Fine, low-dust, for clean environments |
| Lid-close compression allowance | about 5%–10% | Fix equipment without pushing the lid open |
| Single-cavity interference | about 1–2 mm | Clamp without damaging equipment |
Matching principle: heavy equipment uses high-density medium-high-hardness EVA so walls hold; light fragile equipment (optical lenses, glass gauge blocks) uses a slightly softer layer at the support face to avoid hard contact; clean/static-sensitive scenarios use IXPE or ESD foam and require a material statement. Material choice must link with the six factors above, not pick a "good foam" in isolation. For the relationship between shell wall thickness and strength, see protective-case wall thickness and strength.
Tolerance Fit Between Custom Insert and the Case Shell
Whether a custom insert fits stably depends half on the foam and half on the case:
- Stable internal dimensions are the premise. The smaller the injection tolerance, the more the insert can be designed on fixed coordinates; recycled or thin-wall cases drift in size, and the insert goes in offset and wobbly. Regular manufacturers use virgin ABS/PP and control mold tolerance.
- Define the locating method in advance. Inserts commonly use adhesive backing, case-bottom limit ribs, or countersunk screws/clips. Adhesive is convenient but may de-bond over time; limit ribs are most stable. Decide at the design stage, otherwise the insert is made and then "won't stick."
- Do not interfere with seal and latch. The insert edge must leave clearance from the lid seal groove and latch, so the lid does not press the seal and the latch closes after closing — otherwise it destroys the IP rating (e.g., IP67 per IEC 60529).
- Center the center of gravity. Place heavy equipment at the case geometric center to avoid single-side eccentricity causing stacking tilt. Stacking and load design can refer to protective-case stacking structure.
In one sentence: the "accuracy" of a custom insert is the result of aligning case tolerance, locating structure, and insert shape. A manufacturer with injection-molding and mold-making capability (such as KeXin New Materials JUNZHJIA) can lock the case internal dimensions at the mold stage so the insert stays on coordinates long term, avoiding the industry-common problem.
Acceptance Checklist for a Custom Insert (for the Buyer)
Whether delivered by the manufacturer or self-fitted, accept item by item:
- Fit: Each item sits in its exclusive cavity without looseness or forced insertion, with reasonable walls or interference around it.
- Access feel: Removable with one hand, no brute force; lid closes smoothly and latch engages normally.
- Compression allowance: After closing, foam compresses slightly (about 5%–10%), not pushing the lid, not leaking gaps.
- Vulnerability protection: Pressure-sensitive surfaces have cushions, scratch-sensitive surfaces have no hard contact, moisture-sensitive parts are isolated, consistent with design.
- No flaking: In electronics/optics/medical scenarios, rubbing foam produces no obvious debris; cleanliness meets requirements.
- Material traceable: Manufacturer provides foam material statement (EVA/IXPE/ESD, etc.); for critical scenarios confirm low-dust and anti-static grade.
- Coordinate with the whole: Insert does not destroy IP67 sealing, does not block the pressure-balancing valve, does not interfere with the latch.
- Batch consistency: Spot-check sealed samples; multiple cases' inserts are consistent and equipment interchangeable; keep first-article sample on file.
Writing this checklist into the purchase contract appendix is the direct means to avoid "good sample, bad mass goods." For pre-cut liner acceptance ideas, also see protective-case pre-cut foam.
Application Examples Across Five Industries
Combining common protective-case applications (outdoor survey, military/police/fire, electronics, scientific exploration, aviation/communication), typical uses of custom inserts:
- Outdoor survey and scientific exploration: Water/gas detectors and sensor arrays are irregular and high-value; custom inserts wrap each item, resisting bumping in transit and ready to measure on opening; scientific transfer involves temperature/altitude, the case has a pressure-balancing valve, the insert only fixes.
- Military/police/fire: Mission equipment customized by duty; the insert guarantees access order and protection level; the product line can be validated against MIL-STD-810H as a product-line environmental test basis (a product-line-level description, not a single-product "military certification").
- Electronics: Oscilloscopes, power supplies, connector spares fear dust and moisture; a custom insert + IP67 case is the field standard; precision probes use medium-high-hardness foam, circuit area uses ESD foam.
- Aviation communication: Airborne/vehicle radios and navigation equipment experience vibration and pressure difference during takeoff/landing transfer; the custom insert fixes to reduce shift, paired with a pressure-balancing valve for cargo-hold pressure difference.
- Industrial metrology and medical: Gauge blocks, measuring tools, reagent bottles are high-value and fear knocks; custom cavities put each in its place, clear at handover.
Commonality: these industries' equipment is "high-value, irregular, must be consistent" — exactly the range a custom insert excels at. For how a protective case protects electronics, see how a protective case protects electronic equipment.
General Notes on Cost and Lead Time (No Quotes)
The cost and lead time of a custom insert are affected by multiple factors; only the rules are stated here, no specific numbers (to avoid speculating on price and MOQ):
- Process front-end cost: Die-cut needs a steel-rule die, thermoform needs a tool, 3D needs modeling; these upfront investments are amortized over batch; small-batch unit cost is relatively high.
- Complexity: The more complex the shape, the more compartments, the more special the material (e.g., ESD, low-dust), the higher the design and machining hours.
- Prototype value: Making a single-item prototype first to verify fit avoids whole-batch rework, and saves money long term.
- Consistency benefit: Batch consistency reduces borrow/return loss, speeds counting, and reduces equipment collision damage — hidden benefits often overlooked.
So whether "custom is worth it" cannot be judged only by unit quote; count the total of "lower transport loss + faster counting + less repair." Specific quotes and lead times are per the manufacturer's formal reply; this article does not speculate.
Transport and Storage Notes
Custom inserts have low maintenance cost, but a few points extend life:
- Cool storage: Avoid long-term sun and high temperature; foam accelerates aging, hardening, flaking.
- Moisture-proof but not waterproof: Closed-cell foam does not absorb water, but long-term humidity may still fail the adhesive; pair with an IP67 case for stability.
- No heavy pressure: A whole insert pressed long term on an irregular object by a heavy weight may permanently collapse cavities; store empty cases flat, no pressure on top.
- Regular cleaning: Use a soft cloth or low-pressure air to blow off dust; replace promptly if powdering, broken connecting ribs, or collapsed walls are found.
- Spare management: For multiple same-model cases, keep first-article samples and spares for later consistency checks and replacement.
Custom Insert Design-Input Template (Ready to Use)
Summarize all factors above into a fillable table, so nothing is missed when handed to the manufacturer. Below is a template structure (you fill the value columns by actual measurement; do not substitute the ranges in this article for real measurement):
| Field | What you provide | Purpose |
|---|---|---|
| --- | --- | --- |
| Equipment name | Exact name of each item | Build cavity labels |
| Outline dimensions | L×W×H, including protrusion/handle positions | Decide cavity shape and depth |
| Single-item weight | Measured g/kg | Decide density, thickness, CG |
| Vulnerability | Pressure/vibration/scratch/moisture/static | Decide cushion zoning and material |
| Quantity | How many of each | Decide array or independent cavity |
| Access frequency | Times per day | Decide opening direction and labeling |
| Transport mode | Land/air/sea, high altitude? | Decide pressure/moisture design |
| Target level | e.g., IP67, need pressure valve | Decide case and seal |
| Material requirement | EVA/IXPE/ESD, low-dust | Decide foam selection |
Three reminders when filling: first, use three-views or 3D models for dimensions, not just photos; second, rather over-write than omit vulnerability, since omission is often the damage point; third, write the transport profile specifically (e.g., "air + high altitude + winter -20°C"), vague "must be sturdy" cannot be executed by the manufacturer. Pairing this table with first-article prototyping markedly raises the first-time success rate of a custom insert.
Relationship Between a Custom Insert and a Stock Case's Built-In Liner
Many users hesitate between "buying a stock case with a built-in liner" and "making a separate custom insert"; the two are not opposed:
- Stock case with built-in liner: Mostly pre-cut or pick-and-pluck foam; ready to use, low cost, but cavities are designed for "universal standard" and may not fit your actual equipment.
- Separate custom insert: Replace the stock case's universal liner with an exclusive design; higher fit and protection level, at the cost of extra design and machining.
In practice the common approach is: first buy a stock protective case with a universal liner to verify the equipment fits and transport is stable; once the equipment list is frozen and fit/consistency is required, commission the manufacturer to make a custom liner replacement per this factor checklist. This gets the final high-fit scheme at the lowest trial-and-error cost. For choosing the protective case itself, return to what is an outdoor protective case?.
Frequently Asked Questions (FAQ)
Q: What process is generally used for a custom insert? A: Three common ones — die-cut (regular large batch, low cost), CNC routed (mid-complex with protrusions, high precision), thermoform/3D rigid tray (irregular high-value single, best fit). Many projects mix: thermoformed tray for main support, routed EVA for cushions.
Q: What data should I provide the manufacturer for a custom insert? A: At least each item's outline dimensions (three-view or physical), weight, vulnerability, quantity, access frequency, plus the transport profile (land/air/sea, high altitude?, temperature/humidity) and target protection level (e.g., IP67). The more accurate the data, the higher the first-time success.
Q: How to choose between a custom insert and pre-cut foam? A: High-value, irregular equipment, needing consistency or hard requirements on appearance/protection → custom; standard equipment, consistent batch, cost-sensitive → pre-cut. Both beat user-tear grids; the difference is whether it is "exclusively designed."
Q: Is a custom insert very expensive with long lead time? A: Cost and lead time depend on process and batch: die-cut amortized over large batch is low per unit; CNC routed is by-item labor; thermoform/3D has tool/model front-end cost. Small-batch high-value singles are still worth it because they markedly lower transport loss and repair. Specific quotes and lead times per the manufacturer; this article does not speculate on price or MOQ.
Q: How does transport mode affect insert design? A: Land transport emphasizes resisting continuous vibration; air/high altitude needs the case to have a pressure-balancing valve; sea transport emphasizes moisture-proofing and moisture-resistant material; field emphasizes drop-resistant wrapping. The insert must fill the corresponding protection by transport profile and coordinate with case sealing and shell strength.
Conclusion
The factors a custom protective-case foam insert must consider fall into six categories: equipment shape and contour, weight and center of gravity, vulnerability points and protection priorities, equipment quantity and access frequency, transport mode and environmental risk, and process and material choice. Compared with pre-cut foam (only fits standard models) and pick-and-pluck foam (grid approximation), a custom insert pursues the exclusive fit of "one cavity per item, layered cushioning," best suited to high-value precision instruments, irregular equipment, and scenarios demanding batch consistency. In process: regular large batch → die-cut, mid-complex with protrusions → CNC routed, irregular high-value single → thermoform/3D, with mixing to balance fit and cost. The key to success is writing the equipment list, vulnerability, transport profile, and protection goals as design input to a manufacturer with "shell + insert" coordination capability (such as KeXin New Materials JUNZHJIA), using prototyping acceptance instead of verbal description, and avoiding common mistakes like "report only dimensions not vulnerability, use photos instead of three-views, insert disconnected from case." Truly reliable customization is the engineering result of coordinating insert, sealing (such as IP67), pressure balance, and shell rigidity — not the credit of a single piece of foam.
Further Reading
- What is an outdoor protective case and where is it used?
- What is protective-case pre-cut foam (pre-routed insert)?
- How to use pick-and-pluck foam (tear-grid foam)?
- What types of internal foam does a protective case have?
- Should a protective case use dividers or foam liner?
- How does a protective case achieve stable stacking?