

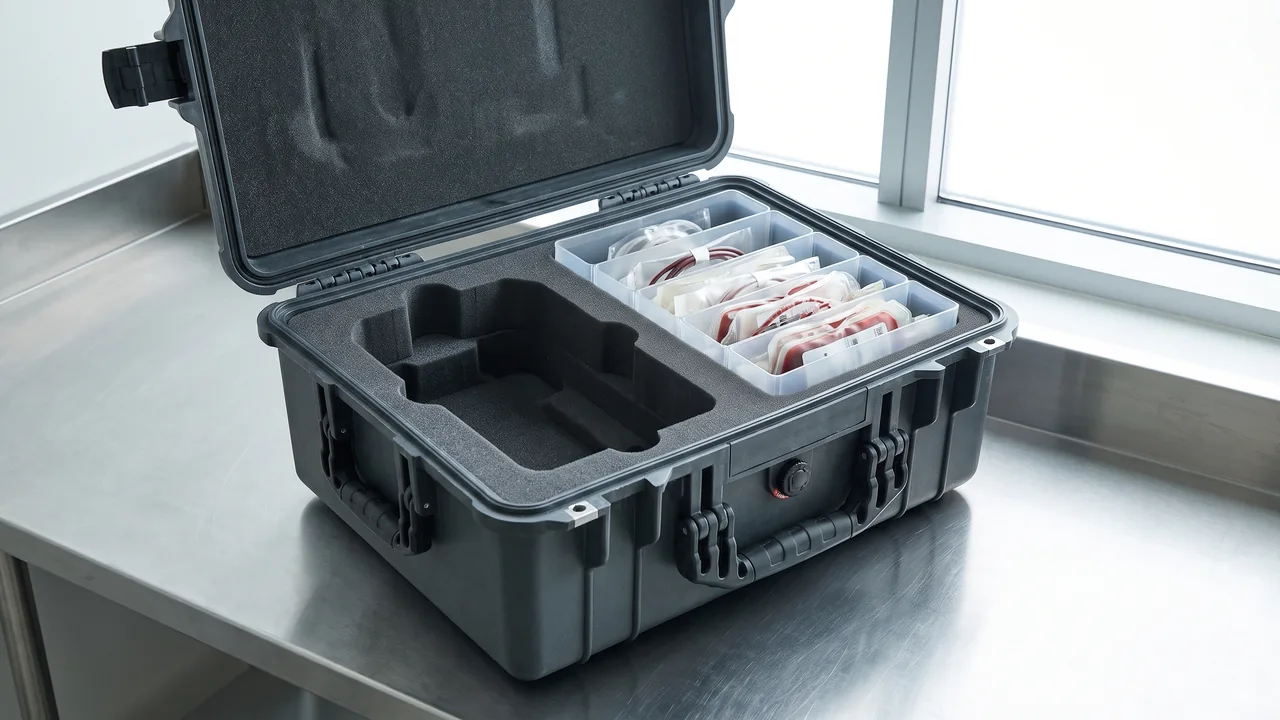
A first aid case looks simple. A shell, a few dividers, some supplies. Anyone can build one, or so it seems, until the case has to work under pressure. The hard part of a First Aid Kit Case is never the shell itself; it is the configuration. What goes inside, how the interior is divided, and whether the case can still be opened and used three or five years after it was packed. The industry term MEDCHEST describes exactly this idea: not a random box that happens to hold medical supplies, but a systematic, configured kit built as a protective container. This article examines the container side of that standard only, covering structure, liners, sealing, temperature control, labeling, and acceptance, and deliberately leaving aside any evaluation of the supplies themselves.
Seen through the lens of protective packaging, a first aid case is a bundle of contradictions. It must be light, because someone has to carry it. It must be tough, because ambulances, helicopters, and off-road vehicles are unforgiving. It must be sealed, because rain, disinfectant, and blood can all end up on the shell. And it must open quickly, because nobody has time to study a latch during an emergency. When a manufacturer takes on a first aid container program, the sensible starting point is to rank these requirements together with the user, and only then choose a material and structural route. Deciding on a box first and forcing supplies into it second is how projects go wrong. The configuration standard for a medical chest is, in the end, the translation of a rescue workflow into the language of packaging.
Why a First Aid Case Is an Engineered Product, Not a Storage Box
An ordinary storage box answers a single question: where does this item live. A configured medical chest has to answer four: where the item lives, how a responder finds it quickly, whether it stays in place under vibration, and whether it survives years of storage without degrading. Those four questions place the product in a different category entirely. Practical designs cluster into three routes. There is the small shoulder or belt-carried case for individual responders, the medium case mounted in vehicles and at fixed stations, and the full system carrier used by pre-hospital teams and field medical units. The demands on the shell differ so much across these routes that mixing them up produces a product users quietly abandon.
The most useful entry point into this category is a tiered protection model. Tier one covers dust and splash resistance for clinic and office kits, usually an injection-molded shell with simple latches. Tier two adds water resistance and impact tolerance for vehicles, vessels, and field stations, which requires a gasket, dependable latches, and a molded liner. Tier three is full environmental protection for pre-hospital, disaster response, and military medical service, where temperature extremes, disinfectant exposure, pressure changes, and stacking all enter the specification. A buyer who cannot state which tier applies will receive the most conservative and expensive proposal a supplier can justify. A parallel discussion of zoning and sterilization compatibility appears in the medical case guide, and its methodology transfers well, although the configuration logic itself must be rewritten for emergency use.
Translating the Rescue Workflow into Compartment Layout
The most common mistake in interior planning is dividing by item size rather than by order of use. Large items sink to the bottom and small ones fill the gaps, which looks efficient on paper. In practice it produces the familiar frustration of knowing an item exists but being unable to reach it. The sound method starts by breaking a rescue sequence into action blocks, such as assessment and hemorrhage control, airway and breathing support, circulation support and medication, and splinting and transport. Each block then maps onto a distinct physical region. The user no longer memorizes item positions; the user remembers actions.
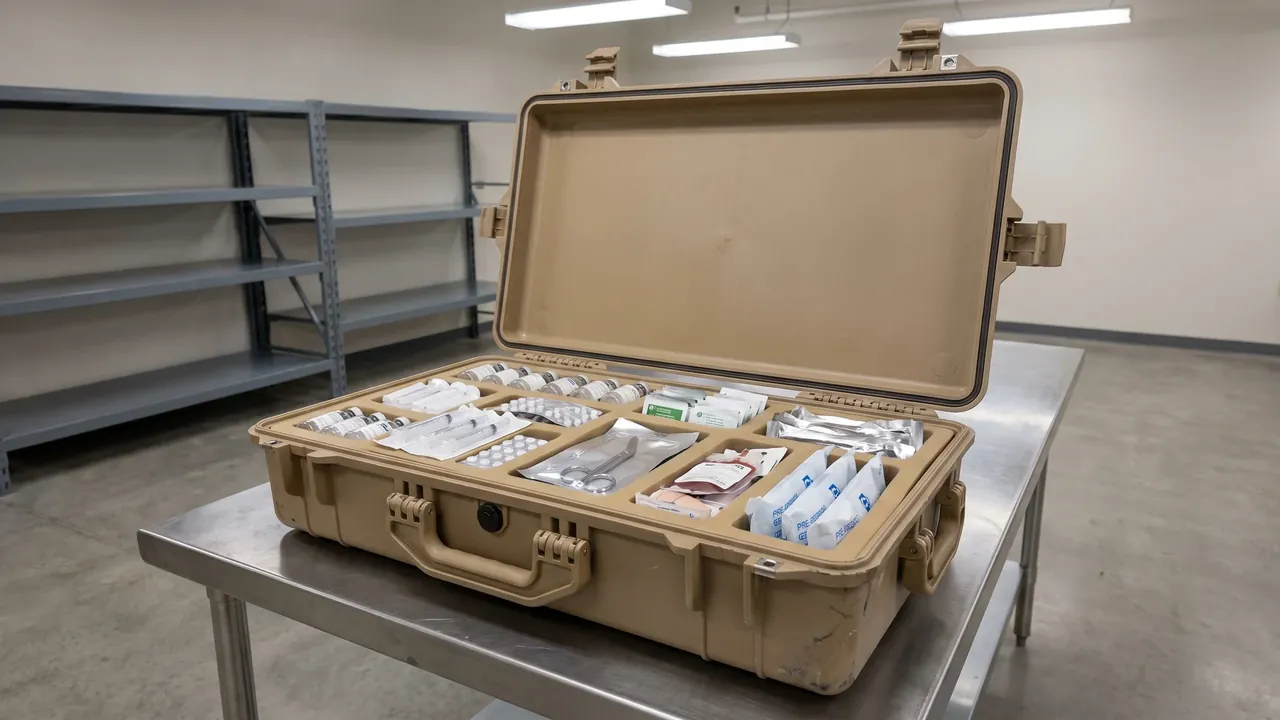
Within that framework, physical boundaries between zones matter more than layers. A zone can be a molded foam cavity, a hard divider forming a cell, or a removable module tray. Divider-based zoning is inexpensive and easy to reconfigure, which suits civilian kits whose contents change; molded foam zoning offers precise positioning and excellent vibration performance for fixed professional inventories; module trays sit between the two and preserve some reconfigurability. There is a blunt test for any layout: hand the case to a clinician unfamiliar with it, dim the lights, add gloves, and see whether the required item appears within a few seconds. If it does not, the layout serves storage rather than access.
Case Body Materials: Injection Molding, Rotomolding, and Soft Carriers
Shell materials fall into three families with clear boundaries. Injection-molded shells, typically ABS, PP, PC, or blends, offer dimensional precision, clean surfaces, and high tooling efficiency, which suits small and medium standardized cases; their weakness is that large sizes need multiple parts, and every joint becomes a weak point for sealing and strength. Rotomolded shells in HDPE or LLDPE are seamless, impact-tolerant, and highly resistant to deformation, which suits medium and large carriers that must stay sealed and stackable; the price is higher weight, looser dimensional tolerance, and a reliance on liner components to create complex interiors. Soft carriers built from coated fabric or EVA laminate are the lightest option, deformable and easy to compress for individual carry and air transport, but they cannot provide rigid protection, so fragile instruments and glass vials inside them need secondary hard shells.
Material economics deserve more than a unit price comparison. Injection molding has high initial tooling cost and low unit cost, which favors volume programs. Rotomolding has comparatively modest tooling cost and a gentle cost curve as size grows, which suits many sizes in modest quantities. Soft carriers need almost no tooling and therefore support rapid design iteration. The real hazard is choosing the wrong tier: a thin-walled injection case intended for a clinic fails within months on an ambulance through latch fatigue and liner collapse, while a rotomolded case carried on a person's back gets left behind because of its weight. The practical approach is to establish how often the case will be opened each year, what environment it will face, and how far a person will carry it, and only then lock in the material tier.
Liners and Retention: Molded Foam, Elastic Pockets, Modular Trays
Liners are the first place cost gets squeezed and the first place failures appear. Consider molded foam. Closed-cell EVA and PE foams hold cavities well, recover from compression, and tolerate alcohol and common disinfectants, which makes them good positioning materials. EPE and PU foams are softer and cushion better, but they lose resilience after repeated compression, cavities loosen, and contents migrate. A sensible arrangement assigns functions rather than using one foam everywhere: closed-cell material for structural support, semi-open-cell for cushioning, and a removable washable layer at contact surfaces.
Retention options come in three strength levels. The first is cavity fit, relying on foam deformation to nest an item, which suits light, regularly shaped objects. The second is elastic webbing and straps, which suit soft-packed consumables and rolled items, trading strong restraint for fast access. The third is rigid pressure plates and tie-down straps for heavy or tip-prone devices, at the cost of extra handling steps. Every first aid case design has to accept that restraint and access speed pull in opposite directions. That is why mixed strategies are normal: webbing for high-frequency consumables, cavities for mid-frequency instruments, and straps for the heavy devices used less often. Foam selection criteria such as density and compression set, described in the toolbox foam guide, apply here as well.
Sealing and IP Ratings: Balancing Water Ingress Against Opening Speed
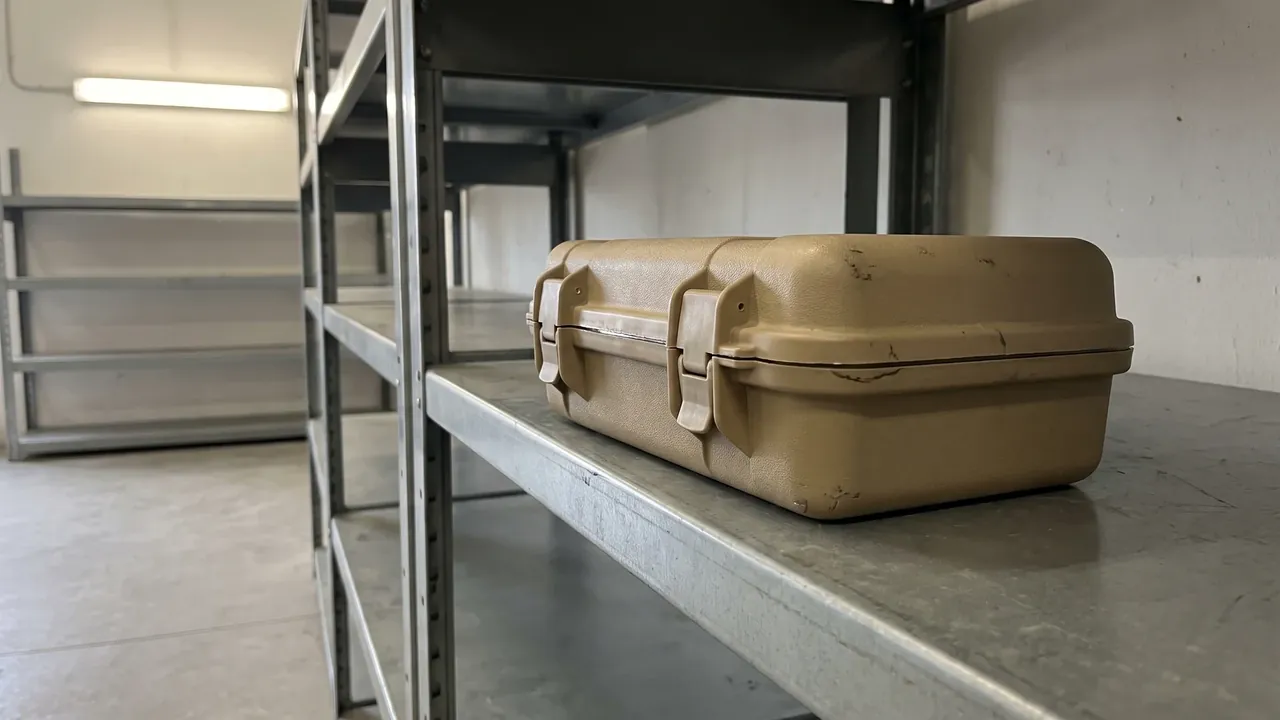
Two directions of sealing matter. From outside, water and dust must stay out. From inside, spills and cross-contamination must stay contained. IP ratings express the first requirement, with the first digit covering solids and the second covering water. Common targets in first aid service run from IP54 to IP67: IP54 is sufficient for an indoor kit, IP65 and above is typical for vehicle and field cases, and IP67 only becomes necessary where short immersion is realistic. Higher is not automatically better. A tighter seal demands a gasket with more compression and latches with more force, which makes the case harder to open and accelerates gasket aging, both of which work against the need for speed.
The way out is to decouple the sealing interface from the opening force. A twin-lip gasket forms two water barriers with modest compression. An over-center latch with a compound lever geometry reduces the effort of the final compression stroke. A pressure-equalization valve lets the differential across the shell fall to zero, so altitude and temperature swings neither deform the gasket nor hold the lid shut. Internal containment deserves equal attention. Liquids are unavoidable in a medical kit, so a sound design gives each zone its own shallow well and absorbent layer, keeping a spill inside one cell. Cleaning then means removing and washing a single module rather than the whole case.
Temperature Control: Insulation Layers and Phase-Change Modules
Medical kits often sit in hot vehicles or cold field conditions, and internal temperature follows the environment. On the container side there are two levers: slow the rate of change, and prevent extremes. Slowing change comes from insulation, such as a foam layer, aerogel blanket, or vacuum panel placed between the shell and the liner, which lengthens the thermal path. Preventing extremes comes from phase-change material, held in a dedicated cavity so it absorbs or releases latent heat and pins the interior within a band. Both are container engineering tasks, and neither should be pushed onto the supply vendor as their responsibility.
Integrating phase-change modules involves several details worth stating plainly. Position matters: a module should sit against the wall rather than next to consumables, or a cold module can damage adjacent items during freezing. Sizing matters too, because the total latent capacity sets the hold time, and hold time depends on ambient temperature and insulation performance together, so it must be verified against the worst case rather than extrapolated from a mild day. Condensation also deserves attention, since cooling surfaces produce moisture, and a liner that absorbs it will support mold growth. Low-absorption liners and a drain path at the lowest point address that risk. Military medical programs formalize this thermal chain, and the field medical case standard offers a useful reference even for civilian kits.
Labeling and Access Interfaces: Color Codes, Symbols, One-Handed Use
In an emergency, the labeling system may matter more than the shell. An effective scheme follows three rules: readable at a distance, readable in low light, and not dependent on language. Distance is a matter of color blocks and character size; low light calls for retroreflective material and high contrast; language independence comes from standardized symbols. Zone labels work best when color and symbol are redundant, so a color identifies the action block while a symbol identifies the item class. That redundancy lets users trained under different systems build the same mental map quickly.
The substrate and process behind the label matter as much as its design. Paper labels curl and fall off in damp, disinfected environments. Molded-in graphics, screen printing with a protective overcoat, or engineering-plastic nameplates hold up far better. Medical symbols such as the cross are regulated in many jurisdictions and must not be distorted or combined with commercial marks, a point that matters especially on exported products. Inside the case, a configuration checklist card lets the user spot missing items at every opening; it should be mounted away from high-traffic zones, or it will be the first thing lost. One more interface metric is habitually underestimated: whether the case can be opened one-handed. When a user is applying pressure to a wound with one hand, the other must complete the entire open, retrieve, and close sequence, which constrains latch type, lid support angle, and liner friction.
Gaskets and Liners as Serviceable Parts
The service life of a first aid case rarely ends with the shell. It usually ends with the gasket and liner, which is why serviceability deserves design attention from the start. A gasket is a consumable. Over time it hardens, shrinks, and loses compression recovery, and water resistance falls with it. If the gasket is a molded ring that lifts out of its groove, replacement takes minutes. If it is bonded in place, the repair becomes a factory operation. Confirming how the gasket is replaced and where spares come from is one of the highest-value questions a buyer can ask, because that single detail often determines whether a case serves ten years or three.
Liners deserve the same treatment. Molded cavities loosen with repeated use, positioning accuracy drops, and contents eventually shift during transport. Modular liners, built as individually replaceable trays or blocks, cut maintenance cost sharply and allow a change in inventory to be handled by replacing one module instead of the whole interior. Cleanability belongs in the same conversation: interior surfaces should avoid narrow crevices, drainage and drying paths should be clear, and hardware should tolerate common disinfectants without corroding. These requirements look minor on a specification sheet, yet together they decide whether the case is genuinely ready for use when it is needed.
Transport, Stacking, and Tie-Down Interfaces
A first aid case is almost never stationary. It rides an ambulance, goes aboard a helicopter, disappears into a cargo hold, and moves between temporary treatment points. The core requirement across all of these is secure restraint: the case must be fastenable to a platform rather than relying on friction. Ambulance mounting usually works through straps and floor rails, so the shell needs webbing slots or mounting channels. Rotary and fixed-wing transport follow separate tie-down rules, which is why explicit tie-down and lifting points belong on the shell.
Stackability belongs to transport design as well. Cases are stored in groups, so upper units transfer weight through the lower ones. If the lid is the weak face, prolonged stacking causes lid creep, seal failure follows, and the case starts leaking. Separating the stacking face from the sealing face solves this: stacking bosses or recesses at the corners let upper and lower cases locate against each other and carry load through the corners, leaving the lid responsible for sealing alone. Air transport adds pressure and temperature swings, which makes a pressure-equalization valve a required component rather than an option. General air transport considerations are covered in the outdoor case air transport reference.
Inspection and Acceptance: Container Checks and Configuration Checks
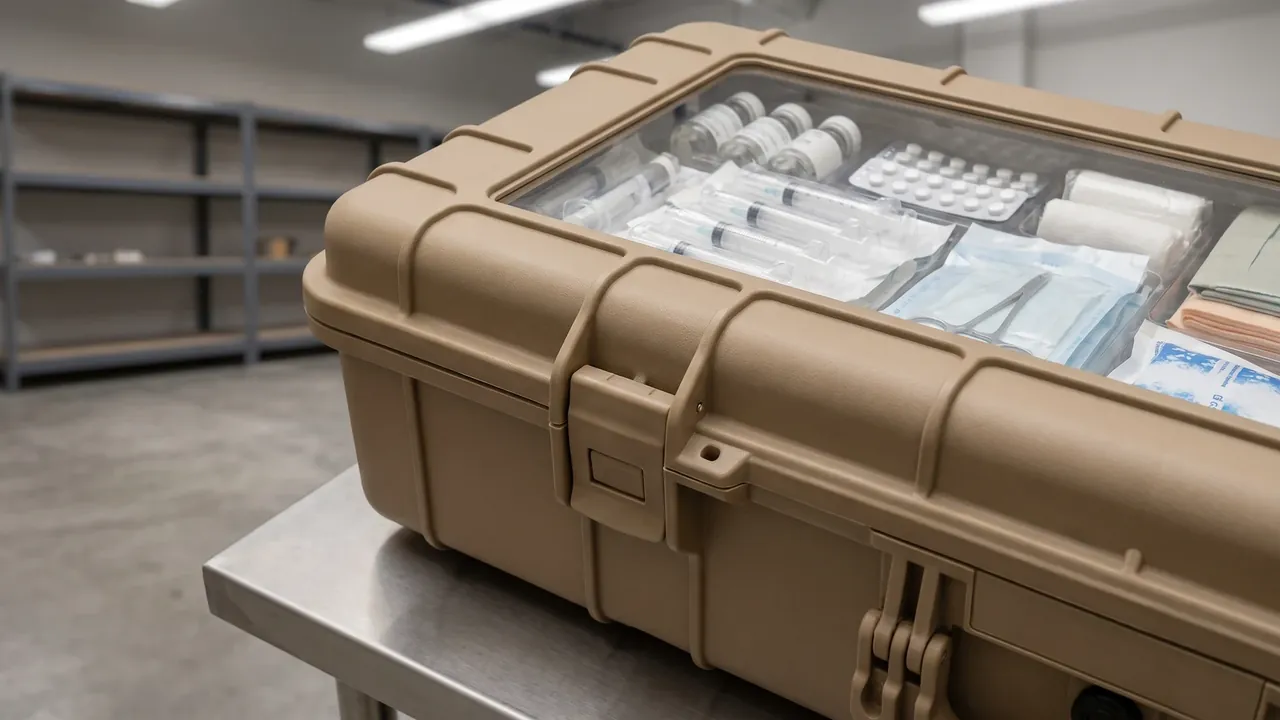
Acceptance for a first aid case is a double process, because the container and the configuration each need verification. On the container side, the list includes external dimensions and volume, sealing performance through spray or immersion testing, cycle testing of latches and hinges, liner positioning accuracy and compression, hardware corrosion resistance and fastener torque, and label adhesion. On the configuration side, the check is item by item: whether every cavity matches its assigned supply, whether batch numbers and expiry dates fall within range, and whether quantities agree with the checklist card. Skipping either half creates predictable problems: container-only acceptance produces missing items after delivery, and configuration-only acceptance produces a case that comes apart in transit.
Batch consistency is not optional in professional procurement. First aid cases are ordered in tens or hundreds, and if liner dimensions, compression, or latch feel vary noticeably between batches, the user's muscle memory stops working and retrieval slows down. Technical documents should therefore fix tolerance ranges for critical dimensions, density and compression-set limits for liner materials, and hardness and compression ranges for the gasket, with sampling verification at acceptance. For long programs, liners and gaskets belong in the spare parts catalog, delivered with the cases or replenished on a schedule, so that a material discontinuation years later does not scrap an entire inventory. Zoning and sterilization requirements discussed in the medical instrument case guide make a useful cross-reference.
Common Failure Modes and Their Design Countermeasures
First aid case failures cluster tightly, and nearly all of them can be designed out before purchase. The first is spill-driven cross-contamination: with no zone-level containment, one broken bottle spreads liquid through the entire case, contaminating packaging and dissolving labels. Independent wells and absorbent layers in the zoning layer prevent it. The second is liner positioning failure: foam cavities loosen, or excessive compression set lets contents leave their positions and collide during vibration. Matching foam density to item weight and adding strap restraint over heavy items addresses it.
The third is seal aging and water ingress: a hardened, shrunken gasket loses recovery, and the case admits water in humid or rainy conditions. Aging-resistant materials, a controlled compression ceiling, and a replaceable gasket prevent it. The fourth is label loss or fading: ultraviolet exposure and disinfectants strip away legibility, so responders cannot locate items quickly. Molded-in or over-coated high-durability graphics prevent it. The fifth is hardware corrosion and seizure: latches and hinges rust in salt fog or disinfectant environments until the case cannot be opened. Stainless steel or properly surface-treated hardware, with opening force included in life testing, prevents it. Mapping these five failure modes back to design inputs removes most of them at the drawing stage.
Procurement Pitfalls: Buying a First Aid Case Like a Storage Tote
The first pitfall is comparing volume as if it were the primary parameter. Value density varies enormously between soft-packed consumables and rigid instruments, so identical volumes use space very differently. Buyers should supply an item list with dimensions and let the supplier design the liner around it, rather than negotiating on volume alone. The second pitfall is evaluating the shell while ignoring the liner, which drives most of the usability and carries the most cost flexibility. A proposal with a thin liner will fail after delivery. The third is neglecting opening force and gloved operation while treating a high IP rating as the only virtue, and then discovering the case cannot be opened at the scene.
The fourth pitfall is assuming chemical tolerance. Alcohol and chlorine-based disinfectants are routine, and without compatibility verification a shell can whiten, crack, or shed its labels. The fifth is having no spare parts plan: if gaskets, liner modules, and latches lack a stable supply channel, the shortest-lived component sets the life of the whole case. The sixth is accepting without documenting, leaving no unique identifier or configuration record for inventory, replenishment, and traceability. Checking a quotation and technical proposal against these six items substantially improves the reliability of the decision. The emergency equipment case requirements provide a useful comparison for container-level expectations.
Closing Perspective: Ready When the Moment Arrives
The configuration standard for a medical chest is ultimately a set of engineering constraints that ties workflow, material, structure, labeling, and maintenance into one package. It asks designers to trade weight against toughness, sealing against speed, and zoning precision against reconfigurability, until the result can be used without conscious thought at the scene. The most reliable way to judge such a case is not a specification sheet but a simulation: gloves on, lights low, time short, and see whether the container helps the user finish the job. Buyers who share their actual inventory, environment, and maintenance resources with the supplier get a case designed for a real workflow, which is the only way to avoid a container that arrives on time and fails in use. For the storage and protection baseline of comparable emergency supply containers, the first aid case reference is a good companion.
Frequently Asked Questions
Q: What is the essential difference between a medical chest configuration standard and an ordinary storage box? A: The difference lies in the design inputs. An ordinary storage box takes only item dimensions and quantity, aiming to hold things and keep them tidy. A configured medical chest takes four inputs instead: the rescue workflow, the operating environment, the required retrieval speed, and long-term storage reliability, aiming to remain usable under pressure. Its interior is therefore divided by order of action rather than by space efficiency, with each zone matching one step of care. Sealing level, opening force, liner positioning accuracy, and label durability are all derived from field conditions rather than chosen for appearance. A second difference is serviceability: gaskets and liners wear out and must be replaceable in the field, or the shortest-lived part determines the life of the whole case. Buying a medical chest as if it were a storage tote usually yields a shell that looks adequate while the liner is too thin, the zoning is illogical, and the labeling fades, after which users simply stop carrying it.
Q: At what level should the waterproofing rating of a first aid case be set? A: It should be set by environment in tiers rather than pushed to the maximum everywhere. A kit kept in a clinic or office needs dust and splash resistance only, roughly IP54, and benefits from a lighter shell with easier opening. Cases used in vehicles, on vessels, and at field stations must survive rain and washdown, which points to IP65 or above. Only where short immersion or whole-case rinsing is realistic does an IP67-class seal justify its cost. Each step up in rating demands more gasket compression and more latch force, and opening effort rises with it, while emergency use is precisely where opening speed matters. The practical approach is to meet the environmental requirement with one tier of margin, then invest the remaining effort in serviceability. A molded gasket that lifts out as a complete ring and a latch with compound leverage let a crew restore sealing performance on site when the gasket ages, which matters far more across a service life than an extra digit on a rating sheet.
Q: Should the interior use molded foam or dividers? A: These are not substitutes; they suit different conditions. Divider-based zoning reconfigures easily, costs less, and ventilates well, which suits kits whose inventory changes and whose contents are mostly soft-packed consumables; its weakness is limited restraint, so rigid instruments tend to migrate under vibration. Molded foam zoning delivers precise positioning, strong vibration performance, and a tidy appearance, which suits fixed professional inventories containing rigid instruments; its weakness is reconfiguration, since an inventory change often means retooling or recutting. Hybrid layouts are the norm in practice: dividers with elastic pockets for high-frequency consumables, molded cavities for instruments and ampoules, and strap plates over heavier items. A simple test guides selection. Where items are light and soft-packed, dividers win on cost and flexibility. Where items are heavy or irregularly shaped, molded foam wins on protection. Assigning each material to the zone it serves best balances cost against protection, and avoids the common error of applying one solution to the entire interior.
Q: What can the container itself do if a liquid supply breaks and leaks? A: The container can limit the spread of the leak and make cleanup practical. The first measure is an independent shallow well under each zone, so escaping liquid collects inside its own cell instead of flowing over the dividers into the rest of the case. The second is a replaceable absorbent pad at the bottom of each well, which locks the liquid locally and restores the zone once the pad is removed. The third is a liner material that absorbs little moisture and resists solvents, so nothing soaks in and lingers to support contamination. The fourth is a disassembly design in which a contaminated module can be lifted out, washed, disinfected, dried, and reinstalled without dismantling the whole case. The fifth is a drain and drying path at the low point of the shell, so rinse water leaves quickly and hardware does not sit wet. All of these are structural measures independent of the supplies involved, so a buyer can ask the supplier to demonstrate them on a sample case during evaluation.
Q: How often should the gasket be replaced, and how should procurement prepare for that maintenance? A: Gasket life depends on material, compression, temperature, and how often the case is opened, so no single interval applies everywhere. Condition-based judgment works better than a calendar: replace when the gasket hardens, loses elasticity, cracks at the surface, stays flattened instead of recovering, or begins admitting water in a spray test. Preparing for this takes three steps. First, confirm at purchase that the gasket is a molded ring that can be replaced as a whole, with its own spare part number, rather than a bonded design that cannot be serviced. Second, specify the material and hardness range in the technical document so that later spares match the original and compression force does not drift with a change of vendor. Third, build gasket condition into routine inspection, checking appearance and opening force quarterly and repeating a spray test annually. Writing the replacement criteria into the maintenance manual lets users act before the seal fails, instead of discovering the problem after water has already entered the case.
Q: Why does the labeling system emphasize not depending on language? A: Because conditions at the scene rarely favor reading. Users may be wearing gloves, working in dim light, and short of time, and they may include relief personnel unfamiliar with local language or with a unit's naming conventions. A scheme that relies entirely on words slows recognition and increases the chance of taking the wrong item. A language-independent scheme typically uses color to mark action blocks and symbols to mark item classes, forming a visual language that travels well, while high-contrast colors and retroreflective material preserve legibility in poor light. Text is not eliminated; it becomes supporting information for specifications, expiry dates, and special notes. The benefit is a low learning cost, so anyone can use the case after a brief explanation. The cost is the discipline of a consistent symbol standard and compliance with local rules on medical marks for exported products. Buyers should request the labeling layout drawing and run a recognition test on the key zones.
Q: What design points matter for stacking and transport restraint? A: Two areas dominate: the load path and the restraint interface. For stacking, the weight of upper cases must travel through primary structure such as corners and posts, so the shell needs interlocking stacking bosses or recesses at top and bottom. Locating and load bearing then happen through designed faces, while the lid handles sealing alone and avoids creep deformation under long-term stacking. For restraint, ambulances, vessels, and aircraft each follow their own systems, so the shell should provide webbing slots, mounting channels, or lashing points with a stated load rating, so users know what may be strapped and what may be lifted and under which conditions. Restraint points must be rated against inertial loads rather than static weight alone. Air transport also brings pressure changes that can make a sealed case hard to open, which a pressure-equalization valve prevents. Separating the stacking face from the sealing face, and tying restraint interfaces into primary structure, are the two principles worth holding firm.
Q: How can consistency be maintained across multiple production batches of first aid cases? A: Consistency rests on fixing key parameters in the technical document and agreeing on sampling methods. Parameters worth locking include liner material density and compression-set limits, cavity dimensional tolerances, the acceptable opening force range of latches, gasket hardness and compression ranges, label adhesion criteria, and hardware material and surface treatment. These determine whether a user's muscle memory remains reliable, because noticeable batch-to-batch differences in feel slow retrieval down. Acceptance should sample and re-measure these parameters per batch, with retained samples as a baseline. For programs with long service lives, liner modules, gaskets, and latches should enter a long-term spare parts catalog, with replenishment intervals and material stability requirements agreed with the supplier, so that a discontinued material or a changed formulation does not strip the inventory of its maintenance source. It also helps to inspect incoming batches against a retained reference unit, checking latch feel and liner fit by hand rather than by drawing alone, because some deviations only become visible in use. Writing these requirements into the contract annex is far more effective than negotiating batch by batch later.