

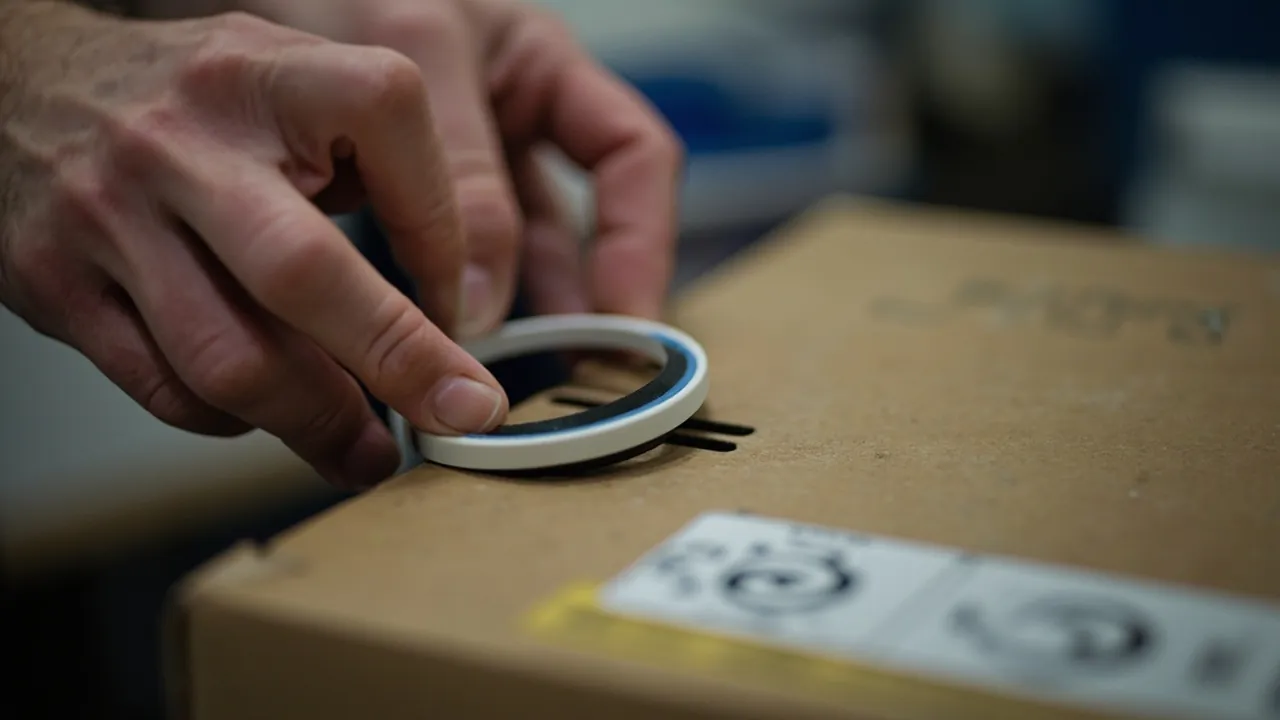
Ask ten suppliers how often a gasket should be replaced and you will get ten answers, ranging from never to once a year. The reason is simple: gasket life is not a constant. It is a function of five variables, namely temperature, ultraviolet exposure, compression, the media present, and how often the enclosure is opened. Talking about an interval without the service conditions says nothing at all.
But engineering needs a number to plan against, or maintenance never gets scheduled. So this article gives a graded interval table you can put straight into a plan, explains how it was derived and how to adjust each factor, then sets out a nine-step inspection, three free field tests, a standard replacement procedure, and how to manage spares and records.
The answer in one sentence: mild indoor service eight to twelve years, ordinary outdoor service five to eight, hot and high-ultraviolet or coastal service two to three, and for critical equipment a mandatory five-year change regardless of condition. That number is then corrected by an annual inspection, because fitting a gasket and forgetting it is not maintenance.
Contents
- A Usable Answer: Replacement Intervals by Environment
- Seven Paths by Which Silicone Ages
- Compression Set: The One Number Worth Remembering
- Ageing Rate: How Temperature, Ultraviolet and Ozone Rank
- Five Variables and How to Adjust for Each
- Nine-Step Inspection From Visual Check to Record
- Three Free Field Tests
- Standard Replacement Procedure
- Lubrication and Cleaning: Four Things Never to Do
- Silicone, EPDM and Nitrile Compared for Service Life
- Buying and Storing Spares Correctly
- Keeping Records: One Table for a Whole Fleet
- Frequently Asked Questions (FAQ)
- Closing Notes and Further Reading
A Usable Answer: Replacement Intervals by Environment
The table below gives two dates for each environment: when to carry out the first inspection, which establishes a baseline, and the replacement interval, which drives the plan.
| Environment | Typical Application | First Inspection | Replace After | Dominant Degradation |
|---|---|---|---|---|
| --- | --- | --- | --- | --- |
| Mild indoor | Switchrooms, equipment rooms, dry workshops at 15 to 30 C | Year 5 | 8 to 12 years | Stress relaxation mainly |
| Ordinary outdoor, temperate | Eastern, central and south-western China; mean skin 20 to 35 C | Year 3 | 5 to 8 years | Ultraviolet plus day-night cycling |
| Hot and high ultraviolet | Southern China, the north-west, the Middle East; skin peaks at or above 65 C | Year 2 | 3 to 5 years | Thermal oxidation plus ultraviolet |
| Coastal salt spray | Within 5 km of the sea, ports, offshore platforms | Year 2 | 3 to 5 years | Salt, damp heat and ultraviolet |
| Industrial corrosive | Chemical plants, sewage works, plating shops with H2S or acid mist | Year 1 | 2 to 3 years | Chemical attack |
| Frequently opened | Commissioning and inspection boxes opened more than once a day | Year 2 | 3 to 5 years or by cycle count | Mechanical wear plus stress cycling |
| Critical equipment | High cost of outage, unattended, hard to reach | Year 2 | Mandatory at 5 years | Combined; take the most severe |
Three points on how to read it.
First, the interval is a ceiling, not a guarantee. Reaching it does not mean the gasket has failed, but it does mean risk rises sharply beyond it. The real criterion is compression set, discussed below. The interval only exists so that work can be planned.
Second, where several factors apply, take the most severe and do not average them. An enclosure that is in southern China, at the coast and opened daily takes the most severe line, two to three years, rather than an average of the three.
Third, the first inspection matters more than the interval. Too many projects never open a box while the gasket is still healthy, so when a leak appears nobody can tell whether it was normal ageing or a batch defect. Opening one in year two or three, taking photographs and recording dimensions to establish a baseline, is the highest-value action in the whole maintenance system.
Seven Paths by Which Silicone Ages
One, thermal oxidation. The silicone backbone is a silicon-oxygen bond with an energy around 452 kilojoules per mole, considerably higher than the carbon-carbon bond at about 348, and that is the fundamental reason for its heat resistance. But the organic side groups, methyl and vinyl, still oxidise at elevated temperature, forming carbonyl and hydroxyl groups, which shows up as hardening and either a tacky or a crazed surface. Temperature is the dominant accelerator on this path.
Two, ultraviolet. Ultraviolet reaching the ground is mainly UV-A at 315 to 400 nanometres with some UV-B at 280 to 315. UV-B carries enough energy to break some bonds. Silicone tolerates ultraviolet better than most general-purpose rubbers, but long exposure still chalks the surface, dulls it and produces fine crazing. Compounds carrying carbon black or titanium dioxide resist far better, which is one reason outdoor seals are usually black: carbon black is among the most effective ultraviolet screens available, so the colour is functional, not cosmetic.
Three, ozone. This is the property that separates the materials. Ozone attacks carbon-carbon double bonds and produces ozone cracking, with fissures running perpendicular to the stress direction in a characteristic alligator pattern. Silicone has a saturated silicon-oxygen backbone with no double bonds, so it is inherently ozone resistant. EPDM is likewise saturated and also performs well. Nitrile, whose backbone is rich in double bonds, will craze visibly outdoors within months unless antiozonant is present. Nitrile seals outdoors are therefore living on borrowed time.
Four, hydrolysis and damp heat. Silicone is stable in water at ordinary temperature, but in steam above about 120 degrees the siloxane bond hydrolyses and the material softens and becomes tacky. For an outdoor enclosure this is not the primary path under normal conditions, but it accelerates where damp heat cycling combines with high temperature.
Five, compression set. This is the dominant failure mode for outdoor enclosure seals and gets its own section below.
Six, mechanical wear and tearing. Every opening applies small shear and abrasion to the sealing lip. Damage at assembly, from a sharp housing edge or a burr at a screw hole, is a common origin. On frequently opened enclosures, mechanical damage usually appears long before ageing does.
Seven, chemical media. Oils swell most rubbers. Acids, alkalis and solvents extract plasticiser and antidegradant, shrinking and stiffening the material. Silicone has only moderate resistance to mineral oil, better than natural rubber but well short of fluoroelastomer.
Compression Set: The One Number Worth Remembering

If you take one figure from this article, take compression set.
Definition and calculation. Compress a specimen to a specified height, hold it at a specified temperature for a specified time, remove it and let it recover freely, then measure:
CS equals (h0 minus h2) divided by (h0 minus h1), times 100 percent
where h0 is the original height, h1 is the height in the compressed state, set by the spacer, and h2 is the height after recovery.
The physical meaning is direct. CS of zero means full recovery; CS of 100 percent means no recovery at all, permanently flattened. The methods are ASTM D395 Method B and GB/T 7759.
Typical values. General-purpose silicone shows 10 to 20 percent after 22 hours at 70 degrees, 20 to 35 percent after 70 hours at 100 degrees, and 30 to 50 percent after 70 hours at 150 degrees. EPDM gives roughly 20 to 40 percent at 100 degrees for 70 hours, nitrile 25 to 45 percent, and fluoroelastomer is best at 15 to 30 percent.
| Compression Set | Condition | Action |
|---|---|---|
| --- | --- | --- |
| 20 percent or less | Good | Continue in service, review on the normal interval |
| 20 to 30 percent | Degrading | Halve the inspection interval, order spares |
| 30 to 40 percent | Significant | Replace within the current maintenance round |
| Above 40 percent | Near failure | Replace now, do not wait for the next window |
Why is 30 to 40 percent the threshold? Because seals are normally designed for 20 to 30 percent compression. At 40 percent compression set, roughly half the recovery capability is gone, so the moment the housing moves slightly under thermal cycling, wind loading or minor installation shift, the gasket cannot follow and a gap appears.
Compression set and stress relaxation are often confused but are different. Compression set asks whether the material returns to shape once the load is removed, a geometric question. Stress relaxation asks how much sealing force remains while the deformation is held, a mechanical question. For an enclosure, stress relaxation is closer to reality, since the gasket is always compressed and what matters is whether it is still pushing. But compression set is easy to measure, needing only callipers and an oven, so it serves as the proxy. As a rule of thumb, at 30 percent compression set the sealing force has already fallen by around 40 to 50 percent.
Finer gradings appear in the discussion of seal ageing criteria and replacement points, and material choice is covered in the article on seal materials.
Ageing Rate: How Temperature, Ultraviolet and Ozone Rank
Temperature carries the greatest weight. Rubber ageing follows an Arrhenius relationship, and the engineering approximation is that between room temperature and 100 degrees, every rise of 10 kelvin roughly doubles the rate, corresponding to an activation energy of about 90 to 110 kilojoules per mole.
In life terms, raising the mean skin temperature from 25 to 45 degrees cuts seal life to roughly a quarter. That explains a fact routinely overlooked: identical gaskets in the sun-facing and shaded sides of a batch, or in dark and light shells, can differ in life by a factor of two or more. When building a maintenance plan, the sun-facing units go first.
Ultraviolet ranks second, but it acts on the surface. Penetration is limited, producing a degraded layer 0.1 to 0.5 millimetres deep that chalks, dulls and finely crazes. Ultraviolet alone rarely causes total failure, but it does two damaging things: surface crazing becomes a stress concentrator that propagates into a through crack under compression, and chalking changes the friction coefficient so the seal tears more easily on opening.
Ozone depends entirely on material. For silicone and EPDM the weight is near zero. For nitrile and other unsaturated rubbers it is decisive: with stress present, which a gasket always is, and ozone present, failure by cracking can occur within months. Using nitrile outdoors is essentially betting against time.
Damp heat is a multiplier rather than an addition. It does not itself cause much ageing, but it accelerates thermal oxidation and hydrolysis and is a precondition for condensation and corrosion. In southern China and at the coast, damp heat combined with high temperature does far more than the two separately.
Chemical media are a switch. If a medium is present and the material does not resist it, failure is a matter of months; if it is absent, the contribution is zero. So this one is a yes or no judgement, not a matter of degree.
Five Variables and How to Adjust for Each
Compress all of the above into five workable variables, each of which corrects the baseline interval.
Variable one, mean annual skin temperature. The baseline is 25 degrees. The temperature factor follows the doubling rule.
| Mean Annual Skin Temperature | Factor | Interval on an Eight-Year Baseline |
|---|---|---|
| --- | --- | --- |
| 20 C | 1.4 | About 11 years |
| 25 C | 1.0 | 8 years |
| 35 C | 0.5 | 4 years |
| 45 C | 0.25 | 2 years |
| 55 C | 0.125 | 1 year |
Variable two, ultraviolet exposure. Shaded or indoors, 1.0. Partially exposed, shaded above but lit from the side, 0.8. Fully exposed, 0.6. Dark shell fully exposed, 0.5.
Variable three, compression and design. Ideal design compression of 20 to 30 percent, 1.0. Over-compressed beyond 35 percent, 0.7. Under-compressed below 15 percent, 0.6, because at that level the seal was never reliable and small changes leak.
Variable four, opening frequency. Fewer than five times a year, 1.0. One to four times a month, 0.85. More than once a week, 0.7. Daily or more, 0.5.
Variable five, chemical media. None, 1.0. Light oil mist, 0.8. Continuous oil or solvent contact, 0.4, and change to fluoroelastomer. Chlorides or strong acid and alkali, 0.4, and seek a specific assessment.
Combined interval equals baseline times temperature factor times ultraviolet factor times compression factor times opening factor times media factor.
A worked example. An enclosure at a port in southern China, dark shell, fully exposed, mean annual skin temperature estimated at 38 degrees, a factor of about 0.35, no shading so 0.6, designed compression of 25 percent so 1.0, opened quarterly so 0.85, salt present but no oil so 0.8.
Combined interval = 8 times 0.35 times 0.6 times 1.0 times 0.85 times 0.8, which is about 1.14 years.
That sits well below the three to five years in the table, which is instructive. The value of this factor table is not precision; it is showing which variable is worth attacking. In the example, the temperature factor of 0.35 and the ultraviolet factor of 0.6 do the most damage, so the effective measures are a light-coloured shell, a sun shield, and a waterproof vent to bring the internal temperature down. Do those three and the product becomes 0.7 times 0.9 times 1.0 times 0.85 times 0.8, which is 0.43, returning the interval to about 3.4 years.
That is what maintenance is really about: not replacing gaskets more often, but making them last longer.

Nine-Step Inspection From Visual Check to Record
This needs no special equipment, only a torch, a pair of callipers and a stick of chalk, and takes five to ten minutes per enclosure.
Step one, photograph for the record. On opening, take three pictures: the whole interior, the four corners of the groove, and the most suspect area. Dated photographs are the only basis for judging trends later.
Step two, visual examination of the gasket. Look for five things in turn: cracking, concentrating on corners and the deepest part of the impression; chalking or loss of gloss, which you test by rubbing with a finger; tackiness or softening, the classic sign of high-temperature hydrolysis; discolouration, where local darkening usually means thermal ageing; and mechanical damage such as cuts, nicks or extrusion.
Step three, the fingernail test. Press hard with a fingernail and release, then watch the recovery. Recovery within a second is good. One to three seconds means degradation. More than three seconds, or an impression that does not disappear, means recovery is seriously compromised and the gasket should be replaced. It is the most sensitive and cheapest field test there is.
Step four, measure the section. Use callipers on the height and width of the section and compare against a new part. Loss of more than 15 percent of the original section height means replace. Measure on an uncompressed free length, since the compressed part is flat by design.
Step five, check impression continuity. Dust the gasket lightly with chalk or talc, close the lid, tighten, reopen and read the impression. It must be continuous and of even width. A broken or variable impression means the flange is not flat or the closing force is uneven, so the fault lies with the housing or the assembly rather than with the gasket.
Step six, inspect the groove. Look for grit, salt crystals, old sealant residue and insect nests. Any of these lifts the gasket and creates a local bridge. Clean with a soft cloth and a plastic scraper; never use a screwdriver or other metal tool, which scores the groove floor and creates a permanent leak path.
Step seven, inspect the housing flange. Look for distortion, warping and cracks. Run a straightedge or feeler gauge across the face; a local gap beyond 0.5 millimetres is a warning.
Step eight, check fastener torque. With a torque driver, retighten to nominal. Without one, check for loose screws and adequate latch force. This step is skipped most often and may be the most effective, because plenty of apparent gasket failures are simply loose screws.
Step nine, record and file. Enter the date, location code, conclusion, meaning good, monitor or replace, and the next inspection date into the log. Keep photographs where possible.
Three Free Field Tests
Where opening the enclosure is not even practical, three cruder methods serve as a first screen.
The tissue method. Place a dry tissue inside, ideally stuck to the inside of the lid, since condensation and seepage appear there first. Check after the wet season or after three months. A damp tissue means water or heavy condensation is present. It will not locate the fault, but it answers the question of whether a thorough inspection is warranted.
The torch method. In the dark, or at night, hold a strong torch against the outside along the sealing line and watch from inside. Where light shows through, the compression is inadequate. This is very effective for finding where the seal is not seating, particularly at the midpoint of a long side, which is the least stiff part of the housing and the most likely to bow.
The paper strip method. With the lid closed and tightened, trap a strip of paper 20 to 30 millimetres wide between lid and base, outboard of the seal rather than on it, and pull. Work your way around: resistance should be even, and any slack section indicates insufficient closing force there. It quickly finds flange distortion and latch failure.
Each answers a different question. The tissue asks whether water is getting in, the torch asks where compression is inadequate, and the paper asks whether the closing force is even. They are screening tools and do not replace opening the box.
How the seal structure itself affects these results is set out in the article on outdoor enclosures, rain and humidity.
Standard Replacement Procedure
Replacing a gasket is simple, but the rate of botched jobs in the field is high, and the problems are nearly always in the details.
Step one, isolate and confirm safe. For enclosures carrying mains voltage, isolate, lock off, tag and verify before starting. Outdoors and in damp conditions this matters especially: working on live equipment with wet hands is absolutely forbidden.
Step two, remove the lid and clean up. Put the lid on a clean surface, not on sand or wet ground. Take out the old gasket, noting any twist, misalignment or local extrusion, because those marks tell you what went wrong at assembly.
Step three, clean the groove. Wipe out dust, salt and old sealant with a soft cloth and anhydrous alcohol or clean water. Do not soak a plastic housing in organic solvent, because acetone and similar will stress-crack ABS or polycarbonate. Use a plastic scraper, not metal.
Step four, inspect groove and flange as in steps six and seven above. Deal with the housing before fitting the new part.
Step five, confirm the new part. Three checks: material, meaning silicone or EPDM outdoors and fluoroelastomer with oil present; section dimensions, compared against the old part and within 0.3 millimetres; and length or inside diameter, which should let the gasket seat naturally in the groove without stretching.
Step six, fit it. Start at one corner and press in progressively along the groove. Do not stretch it on, because stretching thins the section and leaves a wavy, uneven seat once it recovers. Where an extruded strip rather than a moulded ring is used, cut the joint at 45 degrees and place it midway along a straight run, never at a corner, with a trace of the specified adhesive.
Step seven, confirm there is no twist. Work round the whole perimeter checking for rolling, twisting or local lift. A twisted section will always leak.
Step eight, close and tighten. Tighten in diagonal sequence, in two or three stages, to nominal torque. Do not tighten one fastener fully at a time, which seats one side while lifting the other. Without a torque driver, the feel to aim for is compression to roughly 75 to 80 percent of the original height, a compression of 20 to 25 percent.
Step nine, re-check. Work the paper strip test around the perimeter to confirm even compression, and if possible run a spray screen, three minutes with an IPX5 nozzle, or an immersion screen. Finally record the date.
Lubrication and Cleaning: Four Things Never to Do
One, never use petroleum-based grease, whether general-purpose grease or petroleum jelly. Mineral oil swells silicone and EPDM, softening them and reducing strength. Grease lasts weeks on a gasket before becoming a soft paste that collects dirt, and it accelerates rubber degradation besides. It is the most common mistake in the field and the cause of many new gaskets failing within six months.
Two, do not substitute acetoxy silicone sealant for a gasket. It releases acetic acid while curing, which corrodes terminals and metal fasteners, and it is not an elastic sealing structure, so it cracks and debonds the moment the housing moves. Sealant is an aid only; it can never replace structural sealing.
Three, do not wipe down with organic solvents at length. Anhydrous alcohol is acceptable; acetone, thinner and toluene are not, because they attack the housing plastic and extract plasticiser from the rubber.
Four, never paint or spray the gasket. Paint hardens and cracks, turning an elastic seal into a rigid shim. Protect the gasket during printing and finishing, or fit it afterwards.
On whether to lubricate at all: most enclosures are designed for dry assembly, with nothing on either the gasket or the groove and sealing achieved by compression. Lubrication is considered in only two situations: assembly is difficult at low temperature, where a little silicone-based grease compatible with the rubber may be used; or the gasket tends to shift during assembly, where a trace holds it in place. If grease is used at all, it must be silicone-based and compatible, and the quantity should leave no visible gloss.
Silicone, EPDM and Nitrile Compared for Service Life
| Property | Silicone VMQ | EPDM | Nitrile NBR | FKM Fluoroelastomer |
|---|---|---|---|---|
| --- | --- | --- | --- | --- |
| Outdoor weathering, ultraviolet | Excellent | Excellent | Poor | Excellent |
| Ozone resistance | Excellent, saturated backbone | Excellent | Poor unless protected | Excellent |
| Upper temperature limit | 200 C | 130 C | 100 C | 200 C |
| Lower temperature limit | -55 C | -40 C | -30 C | -20 C, special grades -40 C |
| Mineral oil resistance | Poor, marked swelling | Poor | Excellent | Excellent |
| Hydrolysis and damp heat | Good, watch high-temperature steam | Excellent | Good | Excellent |
| Compression set, 100 C for 70 h | 20 to 35 percent | 20 to 40 percent | 25 to 45 percent | 15 to 30 percent |
| Expected outdoor life | 5 to 12 years | 5 to 10 years | 1 to 3 years | 8 to 15 years |
| Relative cost | 1.0 | 0.7 to 0.9 | 0.6 to 0.8 | 4.0 to 8.0 |
How to read it: silicone and EPDM are the mainstays outdoors, and both weather and resist ozone well, so the choice between them comes down to temperature. Choose silicone for sustained service above 100 degrees or below minus 40. Choose fluoroelastomer where oil or chemicals are present. Nitrile suits indoor, unlit, oily locations only, and using it outdoors is a clear selection error.
Buying and Storing Spares Correctly
A gasket is the classic spare that cannot be found when needed and has already aged by the time it turns up.
Quantity. Carry spares at 10 to 20 percent of the installed population, with a minimum of five of each size. For critical equipment, where the replacement window is rare and outage is expensive, carry one hundred percent.
Get three things right on the specification: material, section dimensions, and ring diameter or strip length. The reliable way is to send the old part to the supplier as a sample rather than describing it, because sealing grooves vary slightly between production batches and old products are sometimes retooled.
Storage conditions, five rules. Keep it dark, since ultraviolet is the worst enemy and a clear polythene bag does not block it. Keep it cool, ideally below 25 degrees. Avoid compression or hanging, which causes permanent set, so lay it flat or coil it loosely. Keep it away from oil and solvent by storing separately. And keep it away from ozone sources, meaning motors, high-voltage equipment and photocopiers, all of which generate ozone.
Shelf life. Silicone parts stored correctly typically keep for five to ten years; EPDM and nitrile should be used within three to five. Spares belong in the log too, with the date received, and the stock should rotate first in, first out. A batch bought and left in a corner for ten years will have hardened long ago, and this happens constantly.
Replace as a set rather than singly. Where an enclosure has several seals, a lid seal, gland seals and plug seals, change them together, because they will have aged similarly and changing one only means opening the box again later.
Keeping Records: One Table for a Whole Fleet
The log does not need to be elaborate, but it decides whether maintenance is actually happening.
| ID | Location | Model | Installed | Gasket Spec | Last Inspection | Result | Replaced | Next Inspection | Notes |
|---|---|---|---|---|---|---|---|---|---|
| --- | --- | --- | --- | --- | --- | --- | --- | --- | --- |
| A-01 | Pump station 1, east side | JZ-3020 | 2023-05-12 | Silicone, 4 mm section | 2025-04-08 | Good, compression set about 15 percent | - | 2026-04 | Sun-facing, review first |
| A-02 | Pump station 1, west side | JZ-3020 | 2023-05-12 | Silicone, 4 mm section | 2025-04-08 | Monitor, about 28 percent | - | 2025-10 | Spares held |
| B-07 | Junction 3 signal box | JZ-2520 | 2022-11-03 | Silicone, 3.5 mm section | 2025-04-08 | Replaced | 2025-04-08 | 2027-04 | Original badly crazed |
Three principles for using it.
One, sort by next inspection date rather than by ID. The maintenance plan should be generated from this table, not from memory.
Two, record the basis for the judgement, not just the conclusion. Writing compression set about 28 percent is far more useful than writing monitor, because next time you can see the trend. Without callipers, nail recovery of two seconds is equally valid.
Three, record abnormal events too. Typhoons, flooding, nearby works, impact, submersion: any of these should trigger a dedicated inspection afterwards. A gasket that has been submerged or exposed to sustained high temperature should be replaced regardless of appearance, because it has been loaded well beyond its design condition.
Frequently Asked Questions (FAQ)
Q: How many years does a silicone gasket last? Can I just have a number? A: No single number exists, because it depends on five variables: mean annual skin temperature, ultraviolet exposure, designed compression, opening frequency, and contact with chemical media. The usable grading is: mild indoor eight to twelve years, ordinary outdoor five to eight, hot and high-ultraviolet or coastal two to three, industrial corrosive two to three, and a mandatory five-year change for critical equipment. The reliable measure of actual condition is compression set: 20 percent or less is good, 20 to 30 is degrading, 30 to 40 should be replaced in the current round, and above 40 should be replaced at once. Open one enclosure in year two or three to establish a baseline, photographing, measuring the section and recording nail recovery time, then review on the interval. That beats any rule of thumb.
Q: How do I tell whether the gasket needs replacing, without instruments? A: Three methods, in order of sensitivity. First, the fingernail test: press hard with a fingernail and release; recovery within a second is good, one to three seconds means degradation, and more than three seconds, or an impression that does not disappear, means replace. Second, appearance: crazing, chalking that comes off on the finger, a tacky surface, obvious hardening or local discolouration are all signs of ageing, and tackiness in particular indicates high-temperature hydrolysis and deserves the most attention. Third, measure the section height with callipers against a new part; loss beyond 15 percent means replace. One supporting check: dust the gasket with chalk, close and tighten, reopen, and see whether the impression is continuous and even. A broken impression means the fault is in the flange or the closing force, not in the gasket.
Q: Can I smear grease or petroleum jelly on the gasket to make it last longer? A: No. That shortens life rather than extending it. Mineral oil swells silicone and EPDM, softening the material and reducing its strength, and the grease itself collects dust into an abrasive paste that accelerates wear. Grease is effective on a gasket for weeks at best, after which it is a soft sludge that also degrades the rubber. Most enclosures are designed for dry assembly, sealing by compression with nothing applied. Lubricate only where low-temperature assembly is difficult, or where the gasket tends to shift during fitting, and then use a small amount of silicone-based grease compatible with the rubber, in a quantity that leaves no visible gloss. Note also that acetoxy silicone sealant must never replace a gasket, since the acetic acid released as it cures corrodes terminals and metal parts.
Q: I fitted a new gasket and it still leaks. Why? A: Work through five causes, most likely first. One, uneven closing force: fasteners not tightened in diagonal sequence in stages, or a latch not fully engaged on one side. The paper strip test around the perimeter will find it. Two, flange distortion or a fine crack in the housing: lay a straightedge across the face and look for gaps; more than 0.5 millimetres locally means the housing must be replaced. Three, debris in the groove: grit, salt crystals or old sealant lifts the gasket, and cleaning must be done with a soft cloth and plastic scraper, never a screwdriver. Four, the new part does not match: half a millimetre on the section can leave compression inadequate, and if it was stretched during fitting the section thins and the seal sits in waves once it recovers. Five, the gasket is twisted or rolled on installation, so check the whole perimeter after fitting. If all five are eliminated, suspect condensation rather than ingress, check the day-night swing and internal humidity, and consider a waterproof vent.
Q: Must I use the original manufacturer's gasket, or will one of the same size from an online supplier do? A: It will do, but check three things rather than just the size. Material first: outdoors it must be silicone or EPDM, since nitrile crazes within months under ultraviolet and ozone, and fluoroelastomer is needed where oil is present. Hardness second: commonly 40 to 60 Shore A, and a difference of more than 10 points from the original can affect sealing, since too hard will not seat and too soft extrudes. Section third: compare against the original and stay within 0.3 millimetres. Sending the old part to the supplier as a sample is much safer than buying from a description. Also note that a moulded ring beats a strip joined on site, because the joint is the weak point; if a strip is used, cut it at 45 degrees, put the joint midway along a straight run and never at a corner. Finally, if the equipment is under warranty or carries explosion-protection or food-grade certification, a non-original part may void it, in which case the genuine part is required.
Q: An enclosure has stood unopened for years. Does the gasket deteriorate on its own? A: Yes, and being left alone is itself a risk. Under sustained compression a gasket undergoes stress relaxation, meaning the deformation stays constant while the sealing force decays, and that process depends on time and temperature, not on how often the box is opened. As a rule of thumb, at 30 percent compression set the sealing force has fallen by roughly 40 to 50 percent. Heat accelerates it: by the doubling rule, an enclosure with a mean skin temperature of 45 degrees reaches in five years the condition one at 25 degrees reaches in over a decade. So a never-opened seal is not necessarily better than a frequently used one. Even with no need for access, open one in year three to establish a baseline, then review on the interval for the environment. For critical equipment, replacing at five years regardless of appearance is the safer policy.
Q: Will the gasket freeze and fail at minus 30 degrees in winter? A: Silicone will not; its low-temperature limit is around minus 55, far below minus 30. Two real risks exist. The first is retraction. Every rubber has a TR10 retraction temperature: silicone around minus 50 to minus 60, EPDM about minus 30 to minus 45, nitrile about minus 20 to minus 30. Near that temperature the rubber loses elasticity and cannot follow small movement at the sealing face, so at minus 30 silicone works normally, general-purpose EPDM is close to its limit, and nitrile is unusable. The second risk is ice. If water is trapped at the sealing lip or in a thread clearance, freezing expands it by about nine percent, lifting the lid or tearing the lip, and after a few freeze-thaw cycles the face is permanently uneven. Before winter, inspect, clear water and debris from the groove, confirm drain holes are open, and make sure the closing force is adequate.
Q: Some enclosures in a batch leak and some do not. Is it a bad batch of gaskets? A: Rule out installation and location first. Nearly always the difference comes from three places. Orientation: the sun-facing side runs 10 to 20 degrees hotter than the shaded side, so it ages at more than twice the rate and leaks first. Installation attitude: wall-mounted flush, drilled on top, or entered from above, all raise the probability of ingress substantially. Closing force: whether the installer tightened in diagonal sequence varies between crews. The way to check is to classify the leaking and non-leaking units by location, orientation, mounting method and installation crew; if leaks cluster in one category, that is the cause. Only if leaks are randomly distributed and the seals show widespread crazing or abnormal hardening well inside their expected life should you suspect a batch defect, at which point retain samples and ask the supplier for material retesting.
Closing Notes and Further Reading
Back to the opening question: how often should a silicone gasket be replaced outdoors? The answer is not a number but a routine: set a starting interval from the environment, correct it by inspection, and use compression set as the final arbiter.
Six actionable items. One, set the interval by environment: mild indoor eight to twelve years, ordinary outdoor five to eight, hot and high-ultraviolet or coastal two to three, and a mandatory five-year change for critical equipment. Two, establish a baseline in year two or three by opening one, photographing, measuring the section and recording nail recovery time. Three, inspect annually using the nine steps, judging good at 20 percent compression set or below and replace at once above 40. Four, when replacing, match material, section and hardness, fit dry, apply no grease, do not stretch, and tighten in diagonal stages. Five, hold spares at 10 to 20 percent, store dark and cool, rotate stock, and watch shelf life. Six, put the sun-facing, wall-flush and top-drilled units at the front of the plan.
One last point worth stressing: slowing ageing saves more than replacing often. A light-coloured shell, a sun shield and a waterproof vent together roughly double gasket life, at a fraction of the cost of extra replacements plus the labour and downtime that come with them.
JUNZHJIA, made by kexinMaterials in Zhongshan, Guangdong, supplies waterproof junction boxes and sealed electrical enclosures together with genuine spare gaskets in silicone, EPDM and fluoroelastomer, each with a material declaration and recommended tightening torque, and supports OEM and ODM work with global volume supply.
- Further reading: Seal structure and replacement for outdoor enclosures
- Further reading: Waterproof structural design for outdoor enclosures