

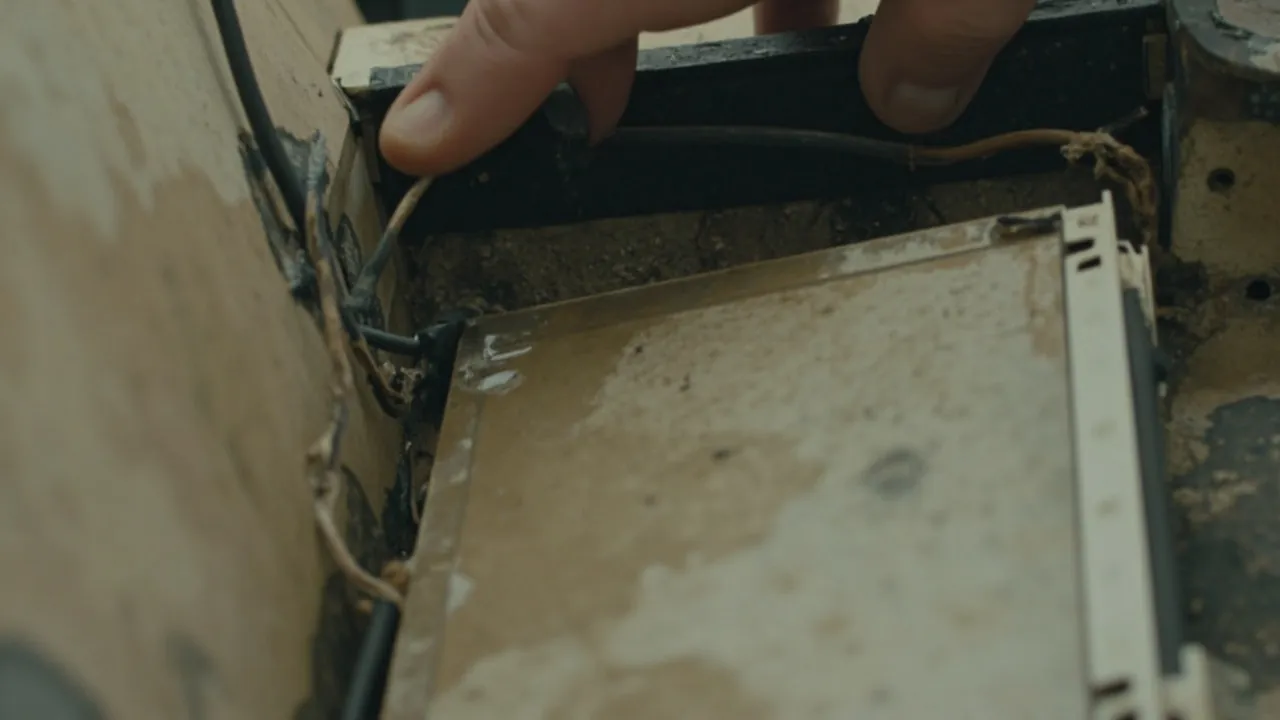
Almost every engineer working on outdoor low-voltage or distribution equipment has met this situation: the enclosure is rated IP67, installation followed the drawing, and six months later the inside is wet. The instinctive reaction is to blame the product. Yet when failed units are stripped and analysed in quantity, the pattern says something else. The real question is rarely whether the rating was high enough. It is whether the sealing system was designed, installed and maintained correctly. An IP rating is a type test verdict on a new product. It cannot compensate for an uneven mounting surface, it cannot plug the unused knockout for you, and it cannot stop diurnal temperature swings from expanding and contracting the air inside.
This article reduces water ingress in outdoor junction boxes and sealed electrical enclosures to five failure causes. For each one it gives the physical mechanism, the trace it leaves on site, a way to verify it, and the corresponding fix. It also sets out a four-step diagnostic routine so that the leaking path can usually be identified before anything is dismantled, avoiding the expensive habit of replacing whole enclosures while leaving the root cause untouched. The reasoning follows the principles of IEC 60529 together with ordinary sealing engineering practice, and numerical figures are given wherever they can be checked.
Contents
- Six Ways Water Can Get In
- Cause One: Insufficient or Relaxing Closing Force
- Cause Two: Gasket Ageing and Compression Set
- Cause Three: Failure at the Cable Entry
- Cause Four: Breathing, Negative Pressure and Condensation
- Cause Five: Shell Distortion and Installation Damage
- Three Case Histories
- Four-Step Diagnosis Before You Strip Anything
- Fixes Mapped to Causes
- Seven Things to Lock Down at Specification Stage
- Installation and Handover Checklist
- Maintenance Intervals and Spares Strategy
- Frequently Asked Questions (FAQ)
- Closing Notes and Further Reading
Six Ways Water Can Get In
Solving a problem starts with enumerating the possibilities. Water has exactly six routes into an outdoor sealed enclosure.
| No. | Route | Typical trigger | Evidence on site |
|---|---|---|---|
| --- | --- | --- | --- |
| 1 | Residual gap in the lid joint | Insufficient compression, wide fastener pitch, shell warp | Stains or rust lines along one particular side |
| 2 | Failure of the seal itself | Ageing cracks, compression set, twisted installation | Flattened section, cracking or displaced gasket |
| 3 | Cable entry | Mismatched gland, under-torqued, unused opening unfilled | Staining below the entry, tracking down the cable |
| 4 | Damaged shell | UV embrittlement, impact, installation stress cracking | Visible cracks, whitening, chipped edge, hole |
| 5 | Breathing-induced suction | Diurnal swing, sudden cooling in rain, negative pressure | Water inside with no trail; typical where no breather is fitted |
| 6 | Internal condensation | High humidity plus temperature difference | Even beading, concentrated on the lid and metal parts |
Routes one, two and three are structural and account for more than seventy per cent of returns. Route four is mechanical and environmental. Routes five and six are thermodynamic, and they are the ones most often misdiagnosed as leakage, although each has a completely separate line of remedy.
A useful heuristic is to look first at which direction the water came from. Flowing down from above usually means the top joint or a top entry. Wicking up from below almost always means ponding water entering through a bottom entry. Evenly distributed droplets with no running marks mean the water did not enter at all: it condensed. Getting that first reading right saves a great deal of dismantling.
Cause One: Insufficient or Relaxing Closing Force
This is the most common cause and the least appreciated.
Mechanism. Achieving a water-tight joint depends on compressing the gasket into its designed window, usually twenty to thirty per cent of free section height. Within that band, the elastic recovery of the rubber develops contact pressure high enough to exclude water. That closing force has two sources: the initial assembly load from screws or latches, and additional stress generated as the elastomer expands with temperature. When initial loading is inadequate, contact pressure falls below the level needed to resist the applied head, and water is forced through the weakest stretch of the joint.
Why it happens. Five situations recur. The supplier used a gasket that was too soft or too thin. The number of latches is too small or the screw pitch too wide: beyond about 150 to 200 millimetres the shell bows between fixing points, so compression at the midpoint is materially lower than at the screws. Installation ignored the diagonal sequence, leaving the lid skewed. The plastic creeps under sustained load, so the original torque decays. Vibration during transport or service lets nuts and latches back off.
Evidence. Leakage tends to cluster at the midpoint between fasteners and near corners, because these are the points of lowest contact pressure. On opening, the classic sign is uneven depth of impression along the gasket: deeply marked and even glossy where properly loaded, barely marked at all where water got in. That contrast is a strong diagnostic signal.
Verification. Slip a thin strip of paper into the joint at several points after closing and compare how firmly it is held; a section that pulls free with notably less resistance is under-loaded. A more rigorous method uses pressure-indicating film placed in the joint during assembly, removed afterwards to show whether the colour developed continuously and evenly.
Fixes. Confirm at acceptance that fixing pitch does not exceed 120 to 150 millimetres and is tightened near corners. Tighten in two or three passes across diagonals to the stated torque, typically 1.2 to 2.5 newton-metres for small and medium plastic enclosures. Re-check torque routinely, quarterly is a reasonable interval. Where the original design is marginal, add fixing points where the structure allows, or move to latches with a stronger closing action.
Cause Two: Gasket Ageing and Compression Set

Even perfectly loaded seals fail with time.
Mechanism. Elastomer recovery depends on the cross-linked molecular network. Under sustained compression, network junctions slip and rearrange, so the material no longer returns fully when the load is removed. That is compression set. In parallel, thermo-oxidative ageing, ozone attack, ultraviolet exposure and biological growth degrade the chains further, producing surface crazing, hardening or stickiness. Once a hardened gasket can no longer follow the shell's thermal expansion and small movements, sealing is lost.
What accelerates it. Temperature dominates: a common rule of thumb is that ageing rate roughly doubles for every ten kelvin increase. An enclosure running internally at sixty degrees may therefore see a quarter to a third of the normal seal life, which explains why dark boxes in strong summer sun fail early. Compression ratio matters too; exceeding forty per cent is generally unwise. Material choice is the third lever, and the three usual candidates compare as follows.
| Material | Service range | Advantages | Limitations | Recommendation |
|---|---|---|---|---|
| --- | --- | --- | --- | --- |
| EPDM | -40 to +120 degrees Celsius | Weather and ozone resistant, low cost | Poor oil resistance | Default choice outdoors |
| Silicone VMQ | -60 to +200 degrees Celsius | Very wide range, inert | Lower tear strength, expensive | Extreme hot or cold duty |
| NBR | -30 to +100 degrees Celsius | Good oil resistance | Weather and ozone poor | Not for long-term sun exposure |
Evidence. Press the removed gasket with a finger. A healthy one springs back immediately; a failed one holds the indentation, shows fine cracks running perpendicular to the compression direction, or in severe cases snaps when bent. Another tell-tale is that the section has been squashed into a visibly rectangular shape, having lost its original round contour.
Fixes. Choose the right compound for the conditions: EPDM or silicone outdoors, never NBR in sun-exposed positions. Manage the gasket as a consumable with a defined life, replacing preventively every five years in normal service and every two to three years where heat, ultraviolet or frequent opening are involved. Always fit the original equivalent part; substitutes of different section or hardness alter the designed compression and frequently leak worse than the old one did. Finally, order gasket spares at ten to fifteen per cent of unit quantity when placing the main order, so supply is assured years later. Our guide to ageing behaviour of seals in service covers this in more depth.
Cause Three: Failure at the Cable Entry
If causes were ranked by frequency in returned units, this one would probably beat the lid.
Mechanism. Entry points usually sit low on the side or at the bottom, so they see a higher hydrostatic head than the lid does. Gland sealing also relies on radial compression developed by tightening a nut, which means assembly quality depends entirely on the installer's hand and varies far more than a machine-closed lid joint.
Five recurring errors. First, using components with no sealing capability at all: plain rubber grommets, ordinary wall sleeves, and the small rings supplied with rocker switches. These protect against abrasion and nothing else; a rated compression gland with locknut and sealing insert is required, at a level no lower than the enclosure. Second, mismatching gland and cable diameter: inserts carry a nominal clamping range, and a cable at the thin end will never develop adequate radial compression however far the nut is turned, while an oversized cable splits the insert or damages the thread. Third, incorrect tightening torque: too little fails to seal, too much extrudes the insert, strips the thread or cracks the housing. Most manufacturers publish a recommendation, commonly two to five newton-metres for mid-size fittings. Fourth, omitting the drip loop, even with a perfect gland, since gravity keeps delivering water along the jacket until it reaches the fitting. Fifth and least forgivable, leaving unused openings open: once a knockout is removed it cannot be restored, and remaining positions need blanks of equal rating, ideally O-ring types with thread sealant.
Fixes. Alongside the four points above, two management measures matter most. Write including matching glands and blanking plugs of equal rating into the purchase order and demand type test evidence for the assembled product rather than the empty shell. And make individual inspection of every entry a mandatory step at handover, specified concretely as pulling each cable gently to confirm it neither rotates nor withdraws.
Cause Four: Breathing, Negative Pressure and Condensation
This pair misleads most often, because it looks identical to leakage yet is addressed completely differently.
Suction mechanism. A sealed enclosure contains a fixed volume of air. Sunlight during the day expands it and raises pressure, expelling some air through the weakest part of the joint. Evening cooling contracts it, dropping internal pressure below ambient. If water is standing against the enclosure at that moment, or a film lies across the joint, droplets get drawn in. Repeat this cycle daily and accumulation is much faster than intuition suggests. Thunderstorms are the worst case: a box heated past sixty degrees and then doused can drop twenty to thirty kelvin in minutes. Ideal gas behaviour puts a twenty-five kelvin drop at roughly eight per cent volume contraction, corresponding to about eight kilopascals, which is already half the head of a metre of water.
Condensation mechanism. Separately, the trapped air holds moisture. When the shell falls below the dew point of that air, water condenses on internal surfaces. The humid seasons of southern China, monsoon periods along the Yangtze, and high-altitude sites with large diurnal swings all produce this. Quantities are small but continuous, and over months they corrode terminals and depress insulation resistance. Roughly: ten litres of air at thirty-five degrees and ninety per cent relative humidity contains about 3.4 grams of water, all of which is available as droplets once the surface falls below dew point.
Telling them apart. Suction leaves a directional trail, often rising from the lowest point or running from a particular feature, and quantities vary in step with rainfall or flooding events. Condensation beads evenly over interior walls, concentrating on the coldest surfaces such as the lid or a metal mounting plate, and can appear even in fine weather. One line settles it: running water means ingress; even beading with no trail means condensation.
Fixes. Four directions. Fit a breather with a hydrophobic membrane, commonly expanded PTFE with pores of 0.1 to one micrometre, which passes air while blocking liquid water and eliminates the pressure differential at source; it is the most effective single step and costs very little. Eliminate unnecessary openings, especially on the top face. Place desiccant inside, roughly 100 to 200 grams for a ten-litre volume, replaced quarterly. And for particularly sensitive electronics consider board-level protection in the form of conformal coating or potting. Practice for persistently wet climates is set out in our humid-climate reference.

Cause Five: Shell Distortion and Installation Damage
Distortion. Injection-moulded shells warp during cooling; that is unavoidable. If tooling compensation was inadequate, warp may exceed what the gasket can absorb. Prolonged heat, heavy loads hung off the box and uneven mounting loads all add to it. Checking is simple: remove the lid, lay it on a flat bench or a pane of glass, and see whether any part rocks. The face that moves is the face that will leak.
Installation stress. Mounting an enclosure to an uneven surface and pulling it flat with four screws leaves permanent residual stress in the housing. Over following months, temperature cycling and ageing relieve that stress as visible micro-cracks, typically around bolt holes or at the roots of ribs.
Damage during work. Five patterns dominate: drilling or enlarging holes that penetrate the outer wall; driving self-tapping screws through the back face to mount rails; hidden cracks from drops during handling; brittle fracture from careless opening in freezing weather; and cutting notches in a side wall to ease cable routing. Each may look trivial and each destroys water-tight integrity.
Fixes. Check flatness on a surface plate at goods-in and reject anything doubtful. Prepare the mounting surface properly, using shims or a backing plate rather than forcing compliance with screw tension. Never penetrate an external wall outside the sealing groove; internal fittings go on factory bosses only. Set a low-temperature limit for site work, since impact strength of most engineering plastics falls markedly below zero. Further guidance on shell material choice appears in our outdoor enclosure material selection guide.
Three Case Histories
Case one, lighting branch boxes along a riverside promenade, failing in year three. Three hundred buried units, failures concentrated in rainy season. Stripping showed staining under the bottom cable entries, with the lid joint intact and plugs present. Root cause: unused bottom knockouts had been removed and left open. The contractor had simply selected one side for wiring and ignored the rest, and several of the plugs used were ordinary stowage caps rather than sealed blanks. Replacing every unused position with an O-ring blank plus thread sealant eliminated the fault for the following two seasons.
Case two, rooftop low-voltage enclosure at a data centre in the south, wet in six months. Reported as water ingress, but the interior showed no trails and no rust, only even beading which appeared even in fine weather. Diagnosis was condensation: the roof slab swings widely between day and night, and the box had been closed while wet trades were still drying, trapping a large moisture load. Remedy was a hydrophobic breather, absorbent liner on the inner walls, and a standing instruction to replace desiccant every three months.
Case three, transmitter junction boxes at a northern chemical plant with cracked shells. Micro-cracks appeared in batches around bolt holes each winter. Investigators found the enclosures had been pulled flat against an uneven steel frame at roughly five newton-metres, far above the specified value, leaving the housings permanently in tension; low temperature then removed the remaining toughness. Remedial work comprised a rigid backing plate for true flatness, reinstallation at specified torque, replacement of damaged housings and a change from general purpose ABS to low-temperature copolymer polypropylene.
What these three share is instructive: in no case was the product unusable. In each, one step of specification, installation or maintenance was wrong. That is the real message of this article.
Four-Step Diagnosis Before You Strip Anything
Do not start by replacing hardware. Four steps usually identify the cause within ten minutes.
Step one, read the environment. Note the last forty-eight hours of weather, including any storm or sharp cooling, plus mounting height, orientation, and the presence of standing water nearby. If the enclosure sits below surrounding grade, rank submersion first.
Step two, read the stains. Photograph before disturbing anything. Where does the water run from? Is there a trail from top to bottom, or a concentration in one corner? Is the water coloured, since silt implies surface flooding while clear suggests rain or condensation? This step alone is usually right more than seventy per cent of the time.
Step three, read the seal. Inspect the full perimeter for displacement, twisting, breakage or absence, and test rebound by pressing. Look particularly for half insertion, where part of the gasket has been pinched outside its groove during closing, which is very common. Check the shell for cracks and the bolt holes for whitening at the same time.
Step four, verify. Suspecting the lid, direct low-pressure water at the most likely face for five minutes, dry the outside, then open and look. Suspecting the whole unit, run the tissue-and-cord screen described earlier. Suspecting condensation, record internal and external temperature and humidity, derive the dew point from a table, and compare it with the measured surface temperature.
Those four steps will place almost any case into one of the six routes above, after which the remedy table below applies.
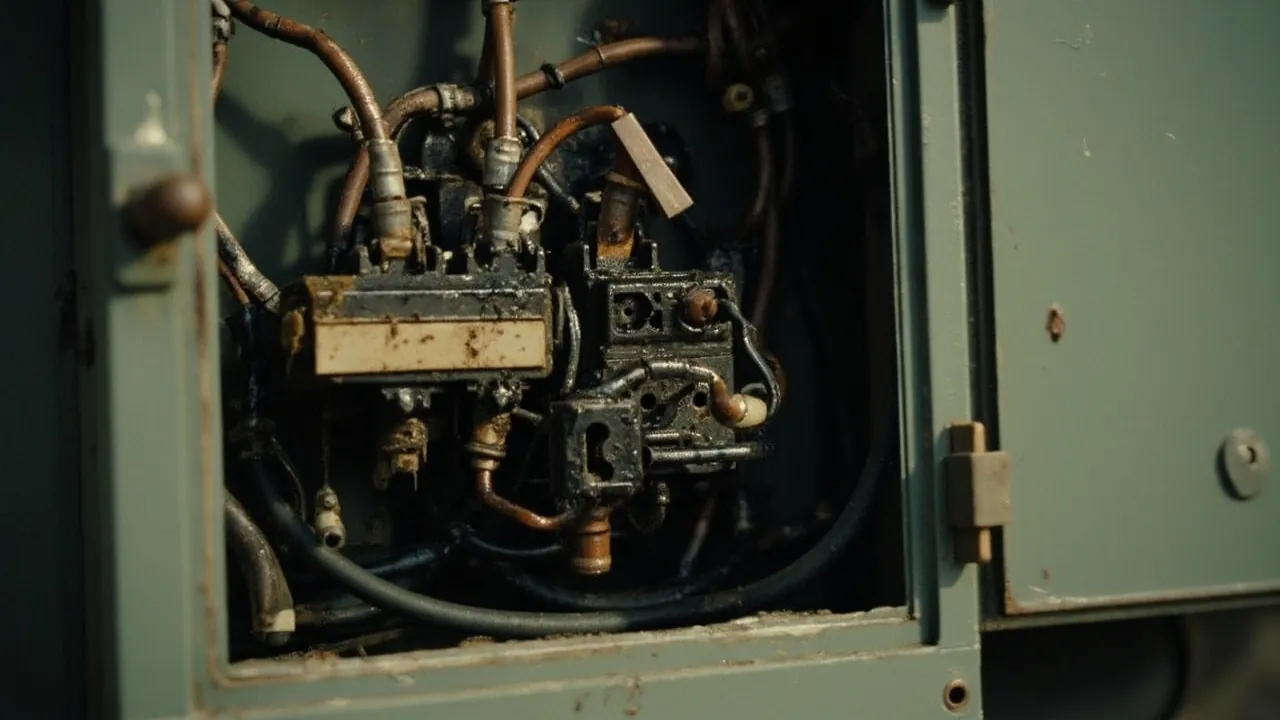
Fixes Mapped to Causes
Once the route is known, take the remedy straight from this table instead of replacing everything.
| Cause | First choice remedy | Alternative | Typical effort |
|---|---|---|---|
| --- | --- | --- | --- |
| Insufficient or relaxing load | Retighten in passes across diagonals to specified torque | Add fixing points, fit stronger latches | Minutes to a few tens of currency units |
| Fastener pitch too wide | Reduce pitch to 120 to 150 mm | Factory lid assembly of higher specification | Moderate, may need new parts |
| Aged or set gasket | Replace with original equivalent | Upgrade to silicone for hot duty | Low |
| Mismatched gland | Fit a gland matching cable diameter | Use manufacturer sealing tape as interim | Low |
| Unused opening unfilled | Fit O-ring blank with thread sealant | Replace the side panel | Very low |
| No drip loop | Re-enter from below with a U-bend | Fit a downturned conduit hood | Low, rewiring needed |
| Breathing suction | Fit a hydrophobic membrane breather | Reduce openings, vent periodically | Low |
| Condensation | Breather plus scheduled desiccant | Absorbent liner, conformal coating | Low to moderate |
| Shell warp | Replace the housing | Local stiffening with a backing plate | Moderate to high |
| Uneven mounting face | Shim or fit a backing plate, remount | Relocate the enclosure | Low to moderate |
| Cracked or perforated shell | Replace the enclosure whole | Temporary sealing of non-critical areas | High |
| Human error from frequent opening | Written procedure and training | Change to a quick-release closure | Low |
Three lessons with this table. Start with the cheapest items, because retightening, plugging and drip loops together resolve more than half of all cases. Re-verify after any remediation, at least with a low-pressure spray or thirty-minute immersion screen. And record the action in a maintenance log so the same fault can be traced later rather than rediscovered.
Seven Things to Lock Down at Specification Stage
The best repair is one you never make. Writing the following seven items into the technical requirement removes most of the risk before it exists.
One, state the worst-case local water condition with numbers. Do not write to IP67; write lowest point 1000 mm below surface, top 150 mm below surface, 30 minutes, to IEC 60529. Everything downstream depends on it.
Two, require evidence for the assembled product, not the bare shell. The report should show glands fitted and blanks installed, in quantities close to the real configuration.
Three, fix the gasket material and hardness: EPDM or silicone, Shore A 40 to 60, together with an expected replacement interval.
Four, specify the closure method and pitch, for example stainless screws into inserts, pitch not exceeding 150 millimetres, denser at corners, at a stated torque.
Five, define every opening by number, position and direction. Bottom entry only; no drilling or additional penetrations on site.
Six, agree the breathing and drainage concept: whether a membrane breather is fitted, and whether a drain hole at the lowest point is acceptable, noting that a drain hole forfeits immersion capability and that you may have one but not both.
Seven, agree spares and documentation: gaskets, glands and blanks available for at least five years, plus technical files covering flatness, material properties and test reports.
These items look tedious, but each one corresponds to a specific failure mode described above. Settling them at purchase time costs far less than hundreds of callouts later. JUNZHJIA products are made at the kexinMaterials facility in Zhongshan, Guangdong, and the team supports implementing every clause above with matching documentation and spares packages.
Installation and Handover Checklist
Print this table and tick every line before handing over each position.
| No. | Item | Acceptance criterion | Common error |
|---|---|---|---|
| --- | --- | --- | --- |
| 1 | Mounting surface flatness | No visible gap under a 0.5 m straightedge | Forcing compliance with screws |
| 2 | Mounting height | 300 mm above historical flood level | Installing at grade |
| 3 | Entry direction | Bottom entry with U-shaped drip loop | Top entry without protection |
| 4 | Gland sizing | Matches cable diameter, torqued to value | Thin cable in oversized insert |
| 5 | Unused openings | O-ring blank of same rating plus sealant | Left open or plain cap |
| 6 | Fastener tightening | Diagonal passes to stated torque | One screw taken home in one go |
| 7 | Gasket condition | Fully seated, untwisted, not pinched | Half outside the groove |
| 8 | Internal fixing | Factory bosses only, wall not pierced | Self-tapper through the back |
| 9 | Breather | Membrane down or sideways, unobstructed | Fully sealed or facing up |
| 10 | Internal cleanliness | No moisture sources, cables dressed with slack | Closing while wet work continues |
| 11 | Handover spray test | Dry inside after 5 min low-pressure spray | Skipped |
| 12 | Records | Photographs, torque values, named person | No record kept |
Completing all twelve before handover keeps the great majority of defects inside the construction phase, where they are cheap.
Maintenance Intervals and Spares Strategy
| Interval | Action | Who | What to record |
|---|---|---|---|
| --- | --- | --- | --- |
| Every opening | Reseat and inspect the gasket | Maintenance technician | Displacement, damage |
| Quarterly | Retighten screws, check latches | Maintenance technician | Torque value, any backing off |
| Quarterly | Replace desiccant if fitted | Maintenance technician | Date and quantity |
| Semi-annual | Inspect glands and blanks | Maintenance technician | Ageing, looseness |
| Semi-annual | Inspect shell for cracks and UV damage | Inspector | Position, length, replacement decision |
| Annual | Check gasket rebound | Technician | Whether preventive replacement is due |
| Annual | Clean the breather membrane face | Technician | Blocking, need to replace |
| Two to three years | Preventive gasket change at hot or high-UV points | Technician | Batch, compound, contractor |
| Five years | Project-wide gasket survey and replacement | Project manager | Register update |
On spares, order ten to fifteen per cent additional gaskets and about five per cent additional glands and blanks with the original purchase. These items are cheap individually, but if supply lapses later the alternative is often replacing complete enclosures, and manufacturers normally guarantee supply only for current production models. On projects running beyond five years this matters a great deal.
Also keep a simple fault register: date, position number, weather, stain pattern, cause found, action taken. After a year of entries almost every project discovers that its water problems concentrate into two or three causes, and targeted remediation then becomes dramatically more efficient.
Frequently Asked Questions (FAQ)
Q: An IP67 enclosure took water after six months. Is that a product defect? A: Usually not. An IP rating describes the behaviour of a new product assembled in the factory state, and it does not automatically extend into installed service. Across returned units, more than seventy per cent of causes sit in installation: unused knockouts not closed with rated blanks, mismatched or under-torqued glands, and installation on uneven surfaces which deforms or stress-cracks the housing. Work through the four-step diagnosis first and apply the matching remedy; full replacement is rarely needed. Only call it a product defect when an untouched new enclosure fails a thirty-minute screen at one metre out of the box, and then hold the supplier to it.
Q: How do I tell leakage from condensation, and does the difference matter? A: Look at the pattern. Leakage leaves a running trail or localised pooling traceable to an entry point, and quantity tracks rainfall or flooding events. Condensation beads evenly over interior walls, concentrated on the coldest surfaces such as the lid panel or a metal plate, and can appear even in prolonged fine weather because no external water is involved. A quick test is to dry the interior, add a small desiccant sachet, reseal and check next day: rapid moisture pickup with no trail indicates condensation. The remedies differ completely. Leakage requires blocking a path; condensation requires managing temperature difference and moisture content through a breather, fewer openings and scheduled desiccant.
Q: Why do failures spike in rainy periods, especially after thunderstorms? A: Three effects compound. Rain supplies abundant water and dwell time. A storm front drops enclosure temperature by twenty to thirty kelvin within minutes, and around twenty-five kelvin corresponds to roughly eight per cent volume contraction and about eight kilopascals of suction, which is half the head of a metre of water and quite sufficient to draw a film through a joint. And post-storm humidity approaches saturation, raising the dew point so condensation becomes far more likely. The three highest-value responses are a hydrophobic breather, raising the mounting position above likely water level, and prioritising inspections immediately after storms.
Q: Can I just blow the water out with compressed air and carry on? A: As an emergency measure yes, with three cautions. Isolate power and remove sensitive modules first, otherwise you simply drive moisture onto live parts. Compressed air clears standing water but not water that has wicked into porous materials, terminal crevices or beneath circuit boards, which generally needs twenty-four hours of standing or cleaning with anhydrous alcohol. And most importantly, find and close the entry route, or the next storm repeats the event. Schedule proper remediation and re-verification within the month.
Q: Is running a bead of silicone around the outside a good idea? A: No; the disadvantages exceed the short-term benefit. Neutral-cure silicone adheres poorly to polypropylene and many other engineering plastics, so after a few thermal cycles it peels away in strips and the resulting irregular voids trap water invisibly against the joint. It also bonds the lid shut, so the next inspection means destructive opening and often a cracked housing. Worst of all it conceals the genuine assembly fault, giving false confidence. Spend the money instead on proper replacement parts: correct gaskets, rated glands and O-ring blanks, installed to procedure.
Q: How often should the gasket be replaced, and how can I tell it has failed? A: Replace preventively every five years in ordinary outdoor service, shortening to two to three years where the enclosure faces continuous sun, sustained internal temperature above fifty degrees, or frequent opening. Testing is simple: remove it and press with a finger. A healthy gasket springs back at once and retains its round section. A failed one holds the indentation, shows fine cracks perpendicular to the compression direction, has flattened into a rectangular section, or snaps when lightly bent. Replace immediately if any of these appear, and insist on original-equivalent parts because changes in section or hardness alter the designed compression and usually leak sooner than the component they replaced.
Q: Will overtightening the screws make it more waterproof? A: No, and it does harm. Gaskets work within a designed compression window, normally twenty to thirty per cent of free height. Beyond forty per cent, compression set accelerates sharply and the seal loses recovery prematurely. Excessive load also distorts plastic housings and produces stress whitening or cracks around bolt holes, defects which only become visible months later. Use a torque driver set to the published value, commonly 1.2 to 2.5 newton-metres for small and medium plastic enclosures, and tighten progressively across diagonals so loading stays even. Water-tightness comes from even and appropriate compression, not maximum compression.
Q: Can I drill a drain hole at the lowest point to deal with condensation? A: Only if you accept losing immersion protection, because an open hole admits water the moment the enclosure is submerged, and you cannot have both. Decide from the dominant risk. Where ponding or submersion is possible, which covers most low outdoor positions, never drill a drain; manage condensation with a breather and desiccant instead. Only where you are certain no standing water can occur and condensation is the sole problem should you consider a three to five millimetre hole with an insect screen, and in that case restate the requirement as IPX4 or IPX5 consistently so the design intent remains coherent.
Closing Notes and Further Reading
Water inside an outdoor enclosure is rarely bad luck. It is one of six routes left unmanaged. The main threads of this article are that structural causes - insufficient load, aged gaskets, failed glands - account for the large majority of returns, that the two thermodynamic causes are the ones most often misread as leakage, and that shell damage almost always traces back to installation practice.
The corresponding action is equally clear. At specification, settle seven items: test conditions, assembled-product evidence, seal specification, closure method, opening schedule, breathing concept and spares commitment. At installation, execute the twelve-point checklist without exceptions. In service, inspect to the interval table and manage gaskets as consumables. Following those three disciplines delivers far more reliability than staring at a printed IP code ever will.
JUNZHJIA is manufactured by kexinMaterials at its Zhongshan plant in Guangdong. The waterproof junction box and sealed electrical enclosure range supports OEM and ODM customisation, and we can supply structural drawings, gasket specifications, type test reports and spares schedules project by project for volume and long-term supply programmes.
- Further reading: What the IP67 rating really means
- Further reading: Seal construction and replacement in outdoor enclosures
- Further reading: How ageing and climate drive seal life
- Further reading: Protection practice in persistently humid regions