

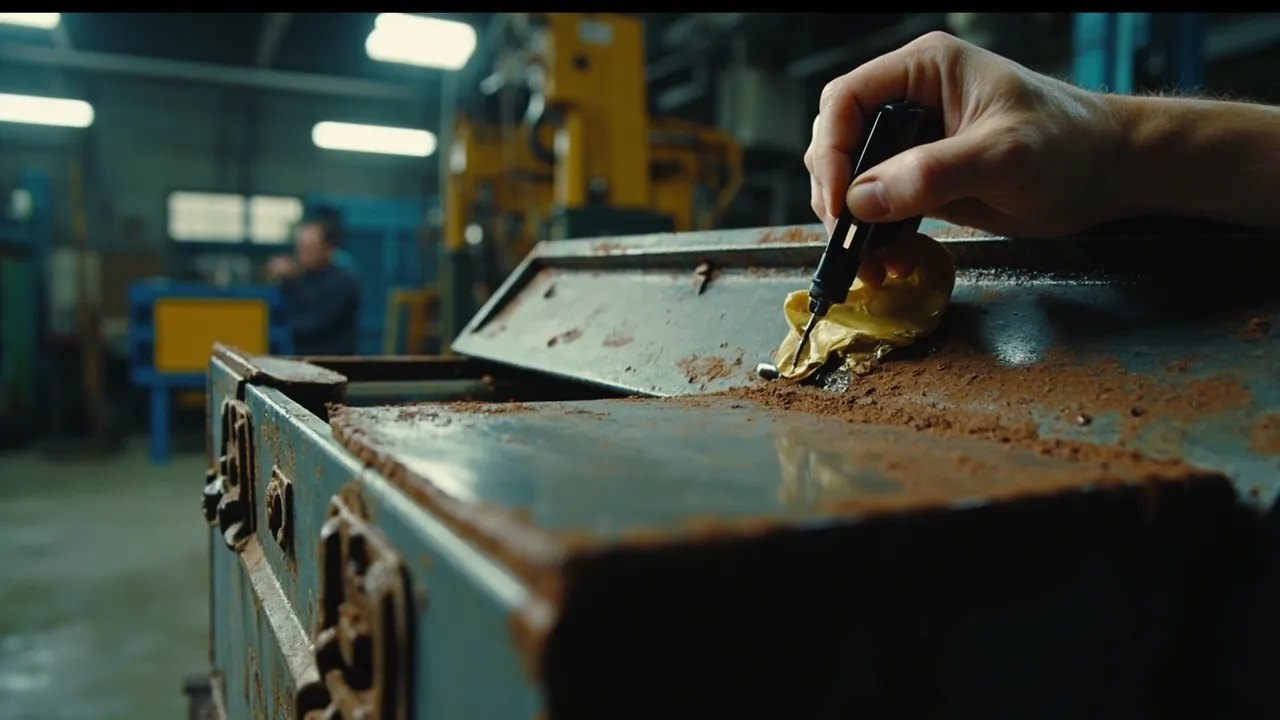
The key point first: rust on a metal toolbox is not a paint problem, it is an electrochemistry problem. It appears only when four things exist at the same time — iron, water, oxygen and time — and removing any one of them stops the reaction. That gives you exactly two lines of work. For a box that has already rusted, the job is to identify the type and depth of the corrosion first, then decide how deep to strip and how far to rebuild the coating system. For a box that has not rusted yet, the job is to build four simultaneous defences: a complete coating system, a structure that drains and dries itself, isolation at every metal-to-metal contact, and a maintenance routine that is actually followed. Most field failures we see — boxes that rust again within months of being cleaned — are not caused by a weak rust remover. They are caused by stripping the visible rust and leaving bare steel behind, which exposes the single most corrosion-prone surface in the assembly to open air.
One widespread assumption deserves to be retired at the start: the idea that a metal toolbox is always more corrosion-prone than a plastic one. That is true only for plain carbon steel with no protection. Aluminium, stainless steel, and steel that carries a complete coating and conversion treatment behave very differently, and in many outdoor scenarios they match or beat engineering plastics. What decides the outcome is whether the grade, the coating system and the working environment are matched to each other. A galvanised, powder-coated steel box that survives 480 hours of neutral salt spray without red rust at the substrate is not unusual. A stainless box built from the wrong grade and used in a wet, chloride-bearing workshop will still pit and crevice-corrode. Matching material to environment is the real subject of corrosion control.
This article is written for procurement, maintenance and equipment engineers who specify metal toolboxes in quantity, and it is also intended as a technical reference for distributors and OEM/ODM partners. It follows a deliberate sequence: understand the corrosion, then remove it, then prevent it, then specify it, then maintain it. It covers the four corrosion mechanisms you will actually meet in the field and how to tell them apart, the four removal methods and where each one belongs, how deep to strip before recoating, the coating and plating systems that do the heavy lifting, the structural details that let water leave on its own, how to read a salt spray report without being misled, a six-step maintenance routine with a frequency table, six common mistakes and what they cost, and a procurement checklist you can use at goods-in. It closes with eight FAQ entries covering the questions that come up most often — whether a whole box can be soaked in rust remover, why stainless still rusts, and how soon a repair coat can be handled.
Contents
- The key point: the three conditions that must all be true for rust to form
- Four corrosion types, and how to identify each one on site
- Removing rust: mechanical, chemical, electrolytic and laser methods
- How deep to strip before you recoat
- The first line of defence: choosing a coating system
- The second line of defence: plating and metal surface treatment
- Stainless steel and aluminium: why "rustless" metals still corrode
- Structural defence: designing so water leaves by itself
- Standards and testing: how to read a salt spray report correctly
- A six-step maintenance routine and a frequency table
- Six common mistakes and what they cost
- Procurement and goods-in: a corrosion checklist for metal toolboxes
- Frequently asked questions
- Conclusion and related reading
The key point: the three conditions that must all be true for rust to form
Corrosion is an electrochemical process, and it needs three conditions simultaneously.
First, an anodic reaction — the metal dissolves by losing electrons. For steel this means iron atoms becoming ferrous ions. This step requires the metal to have a sufficiently low electrode potential, which is exactly why carbon steel corrodes most readily while stainless steel and aluminium resist better.
Second, a cathodic reaction — oxygen is reduced. In neutral, damp conditions this is mainly the reduction of oxygen. That means oxygen and a water film are both non-negotiable participants. Dry air will barely rust steel at all, but once relative humidity passes a threshold — roughly 60 percent on a clean steel surface, an experience-based value — a continuous water film forms and corrosion starts.
Third, an ionic path — an electrolyte that conducts. A film of pure distilled water conducts poorly. Add salts, chloride-bearing dust, or acidic and alkaline contaminants and conductivity rises sharply, and so does the corrosion rate. This is the real reason toolboxes rust so much faster on the coast, in chemical plants, and along roads treated with de-icing salt. It is not that the humidity is higher; it is that the electrolyte is stronger.
From this comes the whole logic of prevention: break any one of the three conditions. Exclude water and oxygen with coatings, seals and desiccant; raise the resistance of the ionic path by keeping surfaces clean and free of salt residue; or replace the metal with something more resistant such as stainless steel, aluminium or a plated finish. Everything later in this article is an engineering expression of one of those three moves.
It also helps to accept that corrosion is a rate, not a switch. No steel toolbox comes with a guarantee that it will never rust. What you can specify is how many years will pass, in a given environment, before corrosion starts to affect function. The useful question in a specification meeting is not "will it rust" but "in my working environment, how many years before rust affects the opening action or the structural strength."
Four corrosion types, and how to identify each one on site
Identifying the type on site determines how aggressively you should treat it. There are four you will meet most often.
Type one: uniform surface rust. An even, reddish-brown, soft layer, usually on damp unprotected flat surfaces. The tell is that a wire brush or abrasive paper removes it easily and leaves a flat substrate underneath. This is the shallowest form, the easiest to fix, and it is the typical early sign of a locally damaged coating. Handled promptly, it barely affects service life.
Type two: pitting. Localised clusters of small pits, dark inside, sometimes with a rust stain at the rim. The tell is that a fingernail or probe drops noticeably when drawn across it, and a shallow crater remains after cleaning. Pitting is the one to watch, because it advances rapidly in depth while the visible surface loss stays small. Chloride is the usual driver, which makes coastlines, swimming pools, food processing and chlor-alkali workshops high-risk environments. Once a pit penetrates the wall, structural strength and sealing performance fall together.
Type three: crevice corrosion. Corrosion that appears preferentially at hinge pins, latch bases, around rivets, and between a liner and the box wall. The tell is that the rust is concentrated along a seam where two surfaces meet, usually in the least visible corner. The cause is that oxygen replenishment inside the crevice is restricted, creating an oxygen concentration cell in which the interior becomes anodic. This is the most concealed type, and finding a hinge whose pin has seized solid is a common outcome.
Type four: galvanic corrosion. Corrosion where two dissimilar metals touch, with the more negative metal — usually the steel in a steel-to-aluminium pair, or the aluminium in an aluminium-to-stainless pair — corroding preferentially. The tell is that corrosion clusters at the junction while the rest of the surface is fine. It shows up when a steel box is assembled with stainless rivets, or an aluminium box carries a steel latch. The fix is not rust removal; it is a design change — an insulating washer, compatible materials, or a single-material assembly.
| Corrosion type | Typical location | Main driver | Rate of advance | Difficulty to treat |
|---|---|---|---|---|
| --- | --- | --- | --- | --- |
| Uniform surface rust | Large flat areas, base | Prolonged damp, coating damage | Slow, reversible | Low |
| Pitting | Localised pits, scattered | Chlorides, contaminants | Fast, advances in depth | Medium to high |
| Crevice corrosion | Hinges, rivets, mating faces | Oxygen concentration cell, trapped water | Slow but concealed | High |
| Galvanic corrosion | Dissimilar metal joints | Potential difference plus electrolyte | Depends on area ratio | Needs design change |
A useful field rule of thumb: if it wipes off it is surface rust, and if it does not, look at the depth. Sheets of rust mean look at the environment, lines of rust mean look at the crevice, spots of rust mean look at chlorides, and rust at a junction means look at the material pairing.
Removing rust: mechanical, chemical, electrolytic and laser methods
When choosing a method, three constraints apply at once: the depth of corrosion, how much wall thickness you can afford to lose, and how much damage the method does to surrounding coatings and liners.
Method one: mechanical removal. This covers hand tools such as wire brushes, abrasive paper and scrapers, power tools such as angle grinders with wire wheels or discs and belt sanders, and abrasive blasting. Mechanical removal is the broadest option and the default for carbon steel boxes. Three points matter. Work in one direction rather than scrubbing back and forth, so you can judge when you have reached clean metal. Prefer a wire wheel for welds and corners, because a disc tends to scoop hollows into flat areas. And apply the primer within the specified window after blasting, because a freshly blasted active surface re-rusts quickly in damp air — often within a few hours, depending on humidity, an experience-based figure.
Method two: chemical removal, including pickling and conversion removers. The common products are phosphoric-acid based. They remove rust and, in the same step, form a phosphate conversion layer on the steel, which is a combined strip-and-passivate action. The advantage is that they reach complex shapes and crevices. The disadvantage is that residue must be completely removed, or the trapped acid keeps reacting under the coating — a hidden failure where the paint looks intact while the metal underneath corrodes. Note also that chloride-bearing acidic removers must never be used on stainless steel, because chloride is precisely what triggers pitting there.
Method three: electrolytic removal. A direct current is applied so that the workpiece, as cathode or anode, reduces the rust layer in an electrolyte bath. It suits small complex parts such as latches and hinge pins that are awkward to grind. The caveat is hydrogen embrittlement: high-strength steel can become brittle after cathodic hydrogen evolution, so load-bearing structural parts should not be treated this way. In industry, ultrasonic cleaning combined with an inhibitor is the safer route.
Method four: laser removal. A pulsed laser vaporises the rust layer directly. It is non-contact, uses no consumables and offers high precision, which suits thin-wall precision parts and localised repair. The drawback is capital cost and the awkwardness of treating large assemblies on site, so today it is mostly found in rework and small batches of high-value components.
| Method | Suitable depth | Substrate loss | Reaches crevices | Main risk |
|---|---|---|---|---|
| --- | --- | --- | --- | --- |
| Mechanical abrasion | Shallow to medium | Medium, controllable | Fair | Over-grinding and thinning |
| Chemical removal | Shallow to medium | Low | Good | Trapped acid, hidden corrosion |
| Electrolytic removal | Medium | Low | Good | Hydrogen embrittlement, waste handling |
| Laser removal | Shallow | Very low | Fair | High equipment cost |
The practical order of preference is: mechanical for surface rust, chemical for crevices and complex geometry, anything but electrolytic for precision load-bearing parts, and laser for thin-wall high-value items. Whichever you choose, the four steps that follow — neutralise, rinse, dry, and coat promptly — matter more than the choice of method. Leaving out any one of them undoes the work.
How deep to strip before you recoat
This is the step that is most often fudged on site, and it decides the outcome. Stripping is not about getting the surface as clean as physically possible; it is about reaching the preparation grade at which the coating system will adhere durably and deliver the intended service life.
In structural steelwork, coating specifications refer to preparation grades such as Sa 2.5, St 2 or St 3 for blast and hand cleaning, described in the GB/T 8923 series and their international equivalents. For thin-wall toolbox components, three practical criteria are enough.
First, no visible mill scale, rust or old coating flakes, with the metal showing its own grey or dark grey tone. Light speckling or shadowing is acceptable, but no rust patches should remain, because a residual rust layer keeps spreading beneath the coating and is a guaranteed rework item.
Second, roughness should be moderate, not polished. Coating adhesion depends on mechanical keying, so a slightly rough surface grips better. After blasting or abrasion the surface should have an even matt texture rather than a mirror finish.
Third, keep the interval between preparation and coating short. A freshly prepared surface is highly active and should be primed as soon as possible. Shorten the window further in damp weather, on the coast or for outdoor work, and apply a temporary protective layer such as a phosphate treatment or a thin rust-preventive oil if needed before the full system goes on.
One principle is regularly overlooked: for pitting, the depth of stripping must go past the bottom of the pit. If you remove only the rust around a pit while oxidation products and acidic residue stay inside it, corrosion continues under the coating and eventually produces the familiar chain of blistering, breakthrough and large-scale re-rusting. The correct approach is to grind the pit into a shallow saucer shape with rounded edges, so the coating can cover the bottom completely without leaving a sharp stress raiser. This matters especially on load-bearing areas, where a sharp corner is both a stress concentration and a corrosion initiation point.
Where corrosion has already compromised strength — for example where depth has exceeded a meaningful fraction of wall thickness, or where it sits at a hinge boss or handle mount — the correct decision is to remove the box from service rather than repair it. Safety-critical hardware cannot be brought back to life with rust remover and paint, and saying so explicitly in your specification prevents a difficult argument later.
The first line of defence: choosing a coating system
A coating works by physically separating metal from electrolyte. Its reliability rests on three properties: adhesion, barrier performance, and the ability to limit damage once breached.
Powder coating. The mainstream choice in the toolbox industry. Electrostatically applied powder is cured at temperature into a continuous, dense, solvent-free film. The strengths are thickness, typically 60 to 120 microns as a representative range, strong adhesion, and good weather and abrasion resistance, with reasonably even coverage over edges. The weakness is that once the film is breached, the breach has essentially no self-repair capability, and rust spreads laterally beneath the coating — the so-called undercutting that is invisible until it has become a large patch. Powder-coated boxes therefore benefit from rounded edges and the avoidance of sharp corners, which reduce the chance of a breach in the first place.
Electrophoretic coating, or e-coat. An electric field deposits the coating evenly across the workpiece, including internal cavities and complex geometry, making it one of the best conventional systems for corrosion protection. Automotive bodies use it widely. For toolboxes it suits applications where the interior also needs protection. The drawbacks are capital intensity, a restricted colour range, and poor economics at low volume.
Fluorocarbon and polyurethane topcoats. Used where appearance and weatherability matter more, usually as a topcoat over a primer. Fluorocarbon topcoats resist ultraviolet light and chemical attack particularly well, which suits long-term outdoor and coastal use, at a higher cost.
Wet or liquid paint. Flexible and suited to small batches and touch-up, but film thickness depends on operator skill, and solvent release needs time and ventilation. In repair work, wet paint is often the only realistic option, so field touch-up should use products compatible with the original system to avoid lifting or poor intercoat adhesion.
| Coating system | Typical film build | Corrosion characteristics | Where it fits | Limitation |
|---|---|---|---|---|
| --- | --- | --- | --- | --- |
| Powder coating | 60–120 microns | Good barrier, abrasion resistant | General indoor and outdoor boxes | No self-repair once breached |
| Cathodic e-coat | 15–30 microns primer | Excellent cavity coverage | High protection, interior included | Capital intensive, limited colours |
| Fluorocarbon or PU topcoat | Applied as top layer | Strong UV and chemical resistance | Coastal, high-UV outdoor | Higher cost |
| Wet paint | Process dependent | Flexible, field-repairable | Repair and small batches | Uniformity depends on operator |
The selection guidance is straightforward. For ordinary indoor use, powder coating is sufficient. For long-term outdoor exposure or coastal sites, use a composite system of e-coat primer plus powder or fluorocarbon topcoat. Where the interior cavity also needs protection, for example in boxes that get hosed down, prioritise a process that reaches internal surfaces. In volume projects JUNZHJIA typically recommends a coating combination based on the customer's actual environment — indoor, outdoor, coastal or chemical — and writes the film build and test requirements into the technical file rather than applying one specification to every scenario.
The second line of defence: plating and metal surface treatment
Where a coating cannot cover everything — fasteners, hinge pins, springs, latch bolts — protection has to come from plating or a conversion treatment.
Hot-dip galvanising. A thick zinc layer with good corrosion resistance that also provides sacrificial protection: even if the surface is scratched, the zinc corrodes ahead of the steel and protects the substrate. The surface is rougher and the appearance is less refined, so it is used mainly for structural parts where looks do not matter. Galvanised parts can develop white rust, the corrosion product of zinc, in damp conditions, so drainage design still matters.
Electroplated zinc and zinc-nickel. Electroplated zinc gives a thin, uniform layer suited to fasteners and small metal parts. Zinc-nickel performs noticeably better than plain zinc and is common on latches and hinge components with higher requirements.
Zinc-flake coatings, including chromate-free variants. Lamellar zinc and aluminium flakes form the film, delivering salt spray performance far above ordinary electroplating with no hydrogen embrittlement risk, which makes them well suited to high-strength fasteners. Chromate-bearing versions are subject to restrictions on hexavalent chromium, and modern specifications generally move to chromate-free zinc-aluminium coatings.
Chemical conversion films such as phosphating and passivation. These are commonly used as a pre-treatment to improve coating adhesion. For aluminium, anodising or chromate conversion improves corrosion and wear resistance. Anodised aluminium has a hard, electrically insulating oxide layer, though that layer is degraded by strong alkalis and chloride-bearing environments.
A practical note on fasteners. The parts most likely to rust first on a toolbox are not the panels but the screws, rivets, lock cores and hinge pins. Specify their surface treatment separately — for example, that box fasteners use zinc or zinc-flake finishes — rather than accepting whatever plated part the supplier happens to fit. Upgrading plain steel rivets to stainless or aluminium is a very low-cost change that lifts the weakest link of the whole assembly, and it pays off especially on the coast and in wet workshops.
Stainless steel and aluminium: why "rustless" metals still corrode
Stainless steel resists corrosion through an extremely thin, dense passive film, mainly chromium oxide. Once that film is damaged and cannot re-form, corrosion starts locally. Four things commonly break it.
Chlorides. Chloride ions penetrate the passive film, so stainless steel pits and crevice-corrodes in coastal air, swimming pools, de-icing salt and chlorine-bearing cleaners. This runs against the intuition that stainless needs no maintenance.
Grade mismatch. Within austenitic stainless steels, 304 and 316L differ markedly in chloride resistance, and 316L is less sensitive to chloride because of its molybdenum content. Choosing 304 for a salt-bearing environment is a selection error rather than a quality defect. Match the grade to the medium, not just to the word stainless.
Surface condition. Weld discolouration, machining debris and free iron contamination all become initiation sites, and scratches do the same. Post-fabrication pickling and passivation removes scale and free iron.
Crevices and standing water. Stainless steel is particularly sensitive to crevice corrosion, so design should avoid unnecessary smooth mating faces and water-trapping corners.
Aluminium behaves differently. The natural oxide film on aluminium is self-healing, so uniform corrosion rates are usually low. But in alkaline conditions and in chloride-bearing environments that film breaks down and pitting and white rust, aluminium hydroxide, appear. When aluminium touches steel, the potential difference makes the aluminium the anode in a galvanic couple, so it corrodes preferentially.
Two conclusions follow. First, when specifying a metal box, do not stop at the material name; ask for the grade and the surface treatment, and give the supplier your working environment. Second, isolate every dissimilar-metal contact, for example with an insulating washer when a steel latch is fitted to an aluminium box, or by using the same or a compatible material throughout. Related material comparisons are covered in our article on aluminium versus stainless steel toolboxes.
Structural defence: designing so water leaves by itself
Coatings and platings defend at the material level. Structural design defends at the geometric level. Many corrosion failures are not caused by the wrong material but by a structure that keeps water where it should not stay.
Detail one: the base must not hold water. An upward-facing recess, a turned-up flange or a flat base with no fall will all trap water. The correct approach is a drain hole or raised feet so that condensate and rain can leave. Drain holes should avoid corners where dust blocks them and should not face directly into ground-level dust. This point is equally important in our discussion of outdoor storage for waterproof toolboxes.
Detail two: avoid crevices and seam lines. Mating faces between two metals, the layer between a liner and the wall, and the cavity of a double-wall construction are all crevice corrosion hotspots. Reduce mating faces that cannot drain, or seal them with sealant or a gasket. Hinge pins and bores should have space for grease and a lubrication path, avoiding dry friction combined with trapped water.
Detail three: round the edges and eliminate sharp water traps. Coatings are thinnest and most easily damaged at sharp corners, which are also where water collects and stress concentrates. Rounding edges improves both corrosion resistance and impact performance.
Detail four: stop dissimilar metals from touching. As already noted, this is the root of galvanic corrosion. Apart from insulating washers, sealing the joint or designing the assembly in a single material also works.
Detail five: manage internal ventilation and drying. A fully sealed box breathes under day-night temperature swings: air expands and is expelled during the day, then damp air is drawn in as it cools at night, and repeated cycles let internal humidity build up. Counter this by assembling in a dry environment, including desiccant, or providing a controlled vent with a waterproof breathable membrane for boxes stored long term.
Detail six: the liner material matters too. A foam liner that holds moisture becomes a damp sponge pressed against the wall. Choose closed-cell, low-absorption materials, or leave a drainage and ventilation gap between liner and wall. Liner selection is covered in more detail in our article on choosing internal foam for toolboxes.
| Structural element | Common problem | Recommended practice | Benefit |
|---|---|---|---|
| --- | --- | --- | --- |
| Base drainage | Trapped water and condensate | Drain holes or raised feet | Removes uniform base rust |
| Crevice handling | Corrosion in mating seams | Reduce blind seams or seal them | Suppresses crevice corrosion |
| Edge geometry | Thin coating at sharp corners | Round the edges | Longer coating life, better impact |
| Dissimilar metals | Galvanic corrosion | Insulating washer or same material | Removes junction corrosion |
| Liner material | Moisture held against the wall | Closed-cell low-absorption foam | Lowers internal humidity |
Standards and testing: how to read a salt spray report correctly
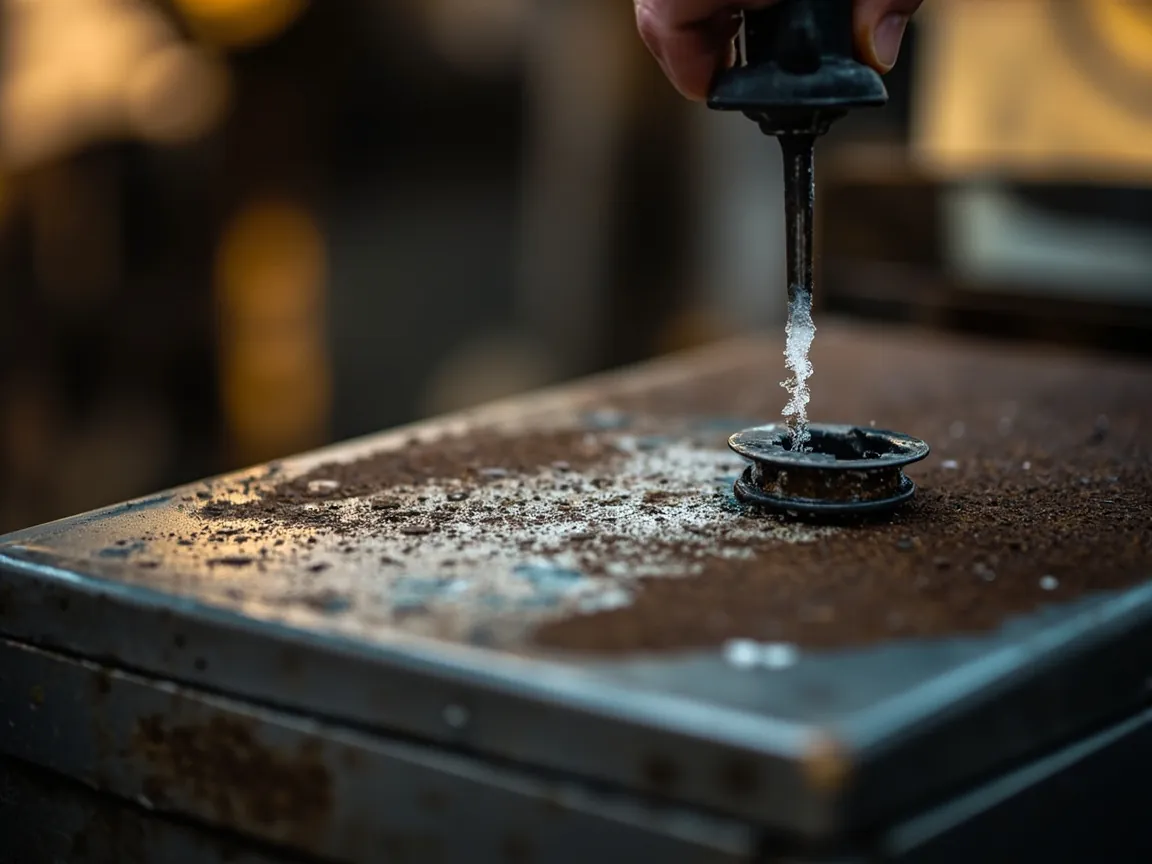
A salt spray report is the most common document used to judge corrosion performance, and it is also one of the most frequently misread.
First, confirm the method and conditions. Neutral salt spray testing follows ISO 9227 and, in common practice, GB/T 10125, typically using a five percent sodium chloride solution at 35 degrees Celsius with continuous spraying. Acetic acid and copper-accelerated variants are more aggressive and run for shorter periods. Results from different methods are not directly comparable, so check whether the test was neutral salt spray, acetic acid salt spray or copper-accelerated acetic acid salt spray.
Second, look at what happened, not just how many hours. The usual criterion is the time to red rust at the substrate, or blistering, flaking and the width of undercutting at a scribe. The same 480 hours can mean "slight discolouration only" or "severe undercutting along the scribe," and the engineering implications are entirely different. A report that says "passed 480 hours" without stating the criterion has limited value.
Third, check whether the test was scribed. Results for an intact coating and for a scribed coating differ greatly, and in real use coatings almost always get damaged. For a metal toolbox, a scribed result, where the scribe reaches the substrate, is the more relevant evidence of practical protection.
Fourth, separate decorative from protective requirements. More salt spray hours is not automatically better; it should match the environment. Pursuing 1000 hours for indoor use has no practical meaning and simply raises cost. A sound approach is to set requirements by environment band, for example separating indoor dry, indoor damp with condensation, intermittent outdoor exposure, and long-term outdoor or coastal service, each with its own duration and criterion. The table below is an experience-based reference, and actual values should follow customer standards and product positioning.
| Service environment | Suggested neutral salt spray duration | Criterion to watch | Typical material or coating |
|---|---|---|---|
| --- | --- | --- | --- |
| Indoor dry (office, retail) | 96–168 h | No red rust at substrate | Powder-coated carbon steel |
| Indoor damp (workshop, washdown) | 240–480 h | Limited undercutting at scribe | E-coat primer plus powder topcoat |
| Intermittent outdoor exposure | 480–720 h | No red rust, no blistering | Galvanised or zinc-flake plus topcoat |
| Coastal or long-term outdoor | 720–1000 h or more | Controlled undercutting at scribe | 316L stainless or composite coating |
Fifth, ask for the original sample condition. That includes measured film thickness, surface treatment process, substrate grade and photographs of the samples before testing. A salt spray report without the original condition data cannot be used for cross-supplier comparison. In OEM/ODM projects JUNZHJIA can normally support customers with film thickness, surface treatment process and test data documentation, with the exact scope agreed in the technical protocol.
A six-step maintenance routine and a frequency table
Even the best coating depends on maintenance. The routine below can be applied directly by crews, fleets and warehouses.
Step one: clean. Wipe away dust, oil and salt with a soft cloth and a neutral detergent. Neutrality is the point: strong alkalis damage the oxide film on aluminium, and chlorine-bearing cleaners trigger pitting in stainless steel. After cleaning, wipe off detergent residue with clean water.
Step two: dry. This is the step most often skipped and the one that matters most. Washing without drying deliberately creates a water film. Wipe dry with a soft cloth and open the lid to let the interior air out fully, avoiding the situation where the outside is dry while the inside stays damp.
Step three: inspect the coating. Look at three places in particular: the four base corners, the areas around hinges and latches, and the handle and wheel mounts. Scratches, blistering and pinholes should be treated immediately rather than waiting for visible rust.
Step four: touch up locally. For small damage, sand back to bare metal, feather the edges, then apply a rust-preventive primer followed by a topcoat. If the breach already shows substrate in a damp environment, apply temporary protection such as rust-preventive oil or a conversion primer before scheduling the full repair coat.
Step five: lubricate moving parts. Hinges, lock cores, wheel axles and telescopic handles should receive suitable grease at intervals. Lubrication is not only about smooth operation; it forms an oil film that separates the metal from water and oxygen. This is the same logic that makes hinges and latches the weak points, as discussed in our article on hinge and latch sealing design.
Step six: control the environment and the storage method. For long-term storage, keep boxes off damp floors by using a pallet or shelf, add desiccant indoors, and leave ventilation gaps between boxes outdoors rather than pressing them against a wall and creating a stagnant damp zone.
Set the frequency by environment. The table below is an experience-based reference.
| Service environment | Cleaning | Coating inspection | Moving-part lubrication | Deep service |
|---|---|---|---|---|
| --- | --- | --- | --- | --- |
| Indoor dry | Quarterly | Every six months | Annually | Every two years |
| Indoor damp | Monthly | Quarterly | Every six months | Annually |
| Intermittent outdoor | Every two weeks | Monthly | Quarterly | Every six months |
| Coastal or long-term outdoor | Weekly | Monthly | Monthly | Quarterly |
Writing this table into the equipment inspection schedule is worth more than any single rust removal job. Prevention is continuous and remediation is a rescue; one rescue typically costs more than a full year of good maintenance.
Six common mistakes and what they cost
Mistake one: coating the whole box in used engine oil. This is the most common folk remedy. In the short term it does exclude water, but oil seeps into coating damage and traps rust underneath, and it readily collects dust into an abrasive paste that accelerates coating wear. It also interferes with later recoating. The correct product is a purpose-made rust-preventive oil or wax, applied only to bare metal or moving parts.
Mistake two: not neutralising or rinsing after a chemical remover. Residual acid keeps reacting beneath the coating and produces concealed corrosion. The cost is a wall that rusts through from the inside six months later while the exterior looks untouched.
Mistake three: applying a primer without a topcoat, or using one coat for both jobs. Primers provide adhesion and inhibition; topcoats provide barrier and weather resistance. A coating without a topcoat chalks and loses protection quickly under ultraviolet light and rain.
Mistake four: assuming a tighter seal is better protection. Over-sealing, for example completely closing off the internal air, produces breathing and condensation under temperature swings and actually accelerates internal corrosion. Internal corrosion is often more dangerous than external corrosion because it affects sealing faces and structure.
Mistake five: touching freshly stripped metal with bare hands. Sweat carries salt and moisture and leaves initiation sites on the new surface. Avoid bare-hand contact after preparation and wear clean gloves where necessary.
Mistake six: using strong acids or chlorine-bearing cleaners on stainless steel. These destroy the passive film and cause pitting. Use a dedicated stainless cleaner, then rinse thoroughly and dry.
Procurement and goods-in: a corrosion checklist for metal toolboxes
The whole article condensed into a list you can work through at ordering and at goods-in.
| No. | Check item | Specific requirement | Verification method |
|---|---|---|---|
| --- | --- | --- | --- |
| 1 | Substrate grade | State the steel, stainless or aluminium grade | Request material certificate |
| 2 | Coating system | State primer plus topcoat, or e-coat plus powder | Request process description |
| 3 | Film build | Provide a representative value and a minimum | Sample with a film thickness gauge |
| 4 | Salt spray test | State method, duration and criterion | Request a scribed salt spray report |
| 5 | Surface treatment | Galvanising, zinc-flake or passivation process | Request process and environmental documentation |
| 6 | Structural drainage | Drain holes or raised feet at the base | Visual check plus water test |
| 7 | Dissimilar metal isolation | Insulation or same material at contacts | Strip and sample-check |
| 8 | Fastener treatment | Specify plating, stainless or aluminium parts | Verify by sampling |
| 9 | Repair materials | Supply factory touch-up paint or coating | Agree supply in the contract |
| 10 | Maintenance instructions | Provide frequency table and cleaner requirements | Check the supplied documentation |
Three contractual suggestions. First, write the service environment into the technical file so the supplier's corrosion strategy matches the actual conditions instead of a generic specification. Second, agree the supply period and availability of touch-up materials, because a toolbox's real service life often depends on whether it can be repaired continuously. Third, for volume projects, run a small trial batch first and let it pass through a full damp season in the real environment before releasing the full order. In volume supply JUNZHJIA typically works through environment assessment, sample validation and volume delivery in sequence, writing the coating system, film build and test requirements into the technical protocol, and supporting liner customisation together with OEM/ODM programmes.
Frequently asked questions
Q: The toolbox is already badly rusted. Is it worth repairing, and when should I just replace it? A: The criterion is whether the corrosion has affected load-bearing structure and sealing function, not how bad it looks. Retire the box rather than repair it in any of the following cases. First, corrosion at a hinge boss, handle mount or wheel mount where the section has clearly thinned: the strength lost there cannot be restored with paint, and continued use carries a risk of sudden failure and injury. Second, pitting that has penetrated the wall, or a pit depth approaching the wall thickness. Third, corrosion on a sealing face such as the flange or seal groove, which prevents the seal from compressing evenly, so water and dust protection is already gone no matter how much paint is applied. Fourth, visible deformation combined with corrosion. Conversely, if corrosion is confined to non-structural, non-sealing areas such as the base panel or outer wall and is shallow, repairing is worthwhile: sand to bare metal, apply a conversion pre-treatment, then rebuild the original coating system, at a fraction of the cost of a new box. A practical rule is that if after repair you would accept the box only for low-risk duty such as storing light consumables, repair it; if it still carries load-bearing, protective or sealing duty and you are unsure of the remaining strength, replace it. For organisations with many boxes, build a table linking corrosion grade to disposition so the decision is not left to individual judgement each time.
Q: Is stainless steel really rust-free? Why did my stainless box rust? A: Stainless steel is corrosion-resistant, not rust-proof, and the distinction matters. Its resistance comes from an extremely thin chromium oxide passive film. When that film is damaged and cannot re-form, corrosion starts locally as pitting, crevice corrosion or rust staining. Four causes are typical. First, chlorides: coastal salt spray, de-icing salt and chlorine-bearing cleaners all penetrate the passive film, which is the single most common reason stainless rusts. Second, grade mismatch: 304 and 316L differ significantly in chloride resistance, and 316L is less sensitive because of its molybdenum content, so specifying 304 in a salt-bearing environment is a selection problem rather than a quality defect. Third, surface contamination: machining debris, known as free iron contamination, and weld discolouration become initiation sites, so post-fabrication pickling and passivation is needed. Fourth, structure and standing water: stainless steel is especially susceptible to crevice corrosion, and mating faces and corners that retain water are high-risk areas. To deal with it, clean thoroughly with a dedicated stainless cleaner, avoiding chlorine, and dry the surface; for light staining use a non-metallic pad along the grain direction; improve drainage and ventilation; and next time give the supplier your environment together with the grade requirement. If corrosion clusters at welds or machined areas, surface treatment was inadequate; if it appears as random pits in a salt-bearing environment, the grade was probably chosen too conservatively. For a wider material comparison see our article on stainless versus plastic toolboxes for outdoor use.
Q: Can I soak the whole box in rust remover, or will it attack the coating and plastic parts? A: Full immersion is not advisable, for two reasons. First, the coating: most conversion-type removers, which are mainly phosphoric acid, soften and lift old paint along with the rust, so after soaking you are facing large-scale coating failure rather than a local repair. Second, plastics and seals: acidic media can attack some engineering plastics, surface treatments and rubber seals, and on aluminium boxes an acidic environment accelerates breakdown of the oxide film. The correct approach is disassembled, localised treatment. Remove the plastic parts, liner, seals and lock core first; treat the corroded area alone, either by brushing on a remover or by local abrasion; then neutralise and rinse fully with clean water and dry completely before recoating; finally reassemble. If corrosion is extensive and concentrated in crevices such as a hinge pin and bore, replacing the hinge assembly is a better answer than chemical soaking. One further warning: never use chloride-bearing acidic removers on stainless steel, because the chloride triggers pitting and makes the situation worse. If you are unsure of the substrate or the coating system, test a small inconspicuous area first and wait 24 hours before committing to the full area.
Q: When touching up a metal toolbox, can I just use any aerosol paint from a hardware shop? A: It works as an emergency measure but is not a long-term answer, and mixing systems is not advisable. Three points. First, primer and topcoat do different jobs: the primer provides adhesion and inhibition, often an epoxy or phosphate system, while the topcoat provides barrier and weather resistance, so covering bare metal with a single decorative coat gives neither adequate adhesion nor adequate inhibition and typically starts lifting within months. Second, systems must be compatible: layering paints with different solvent systems can cause lifting, where the upper coat dissolves the lower one, or poor intercoat adhesion that shows up as large-scale peeling. Third, colour and gloss should match, otherwise the repair is visible and may fail appearance acceptance. A sound procedure is to sand out the rust, feather the edges, degrease and clean, dry, apply a compatible rust-preventive primer, allow it to dry, then apply the topcoat. For organisations running many boxes, the simplest approach is to obtain matching touch-up materials from the original manufacturer and to agree a supply period in the contract, which guarantees compatibility and avoids hunting for a colour code every time. In OEM/ODM and volume projects JUNZHJIA can provide coating system information and matching repair guidance, with the scope agreed in the technical protocol.
Q: What should I look for in a metal toolbox for coastal or wet workshop use? A: The four levers are material, coating, structure and maintenance, and strengthening only one of them has limited effect. On material, if the environment carries salt spray, prefer 316L stainless steel or aluminium, noting that aluminium must be isolated from steel parts, and that carbon steel must have a complete coating and plating system. On coating, use a composite of e-coat primer plus powder or fluorocarbon topcoat, take the upper end of the film build range, and require scribed salt spray data, with coastal sites usually referencing 720 hours or more as an experience-based figure that should follow customer standards. On structure, insist on base drainage, rounded edges, dissimilar-metal isolation, and a closed-cell low-absorption liner. On fasteners, specify stainless or zinc-flake treatment separately so they do not become the first part to rust through. On maintenance, run a shorter cycle: weekly cleaning and monthly coating inspection and lubrication for coastal sites, with drying after every wash. Two further points are easily overlooked. Avoid leaving boxes directly on damp floors or hard against walls; use a pallet and leave a ventilation gap. And do not store wet tools or soaked rags inside a box, because moisture in a closed space is far more damaging than rain outside. If you can give the supplier the real environment, including salt, acid or alkali exposure, temperature and humidity range and whether washdown happens, the material and coating recommendation can be targeted rather than generic.
Q: Why do small parts like hinges and latches always rust first, and how should I handle them? A: Because they combine three of the least favourable conditions at once: a crevice, standing water, and a coating that is hard to apply. Specifically, a hinge pin and bore inevitably leave a gap, and oxygen replenishment inside a gap is restricted, creating an oxygen concentration cell in which the interior becomes anodic and corrodes first, which is classic crevice corrosion. Hinges and latches are also structural dead corners that are hard to dry when cleaning, so moisture lingers. And these parts often cannot receive the same film build as the panels, and some are plated or bare metal, so their protection level is inherently lower. If the hinge uses a different metal from the box, for example a steel hinge on an aluminium box, galvanic corrosion is added on top. To treat and prevent it, first lubricate on a schedule, because grease both reduces wear and forms an oil film that separates the metal from water and oxygen, the best value action available, ideally monthly to quarterly depending on environment. Second, dry hinge areas specifically after cleaning rather than checking only the visible panels. Third, specify the surface treatment of hinges and latches at procurement, whether stainless, zinc-plated, zinc-flake or matched to the box, and write a separate salt spray requirement for moving parts into the technical file. Fourth, for a seized hinge, try a penetrating lubricant, but if the pin has clearly thinned from corrosion, replace the hinge assembly rather than forcing it, because forcing can tear the mounting holes out of the box. A very low-cost improvement is to replace plain steel rivets and hinges with stainless versions, which lifts the weakest link of the whole assembly and pays off particularly in coastal and damp environments.
Q: If a box passes 480 hours of salt spray, does that mean it will last 480 days without rust? A: No, and this is a very common misunderstanding. Salt spray testing is an accelerated corrosion test. Its purpose is to compare the relative corrosion resistance of different systems in a short time, not to convert directly into a service life. There are three reasons. First, the acceleration factor is not a fixed number: it depends on the real environment's corrosivity, temperature and humidity cycling, and whether mechanical wear and ultraviolet exposure are present, so the same product can last very differently between regions and seasons. Second, salt spray does not cover all the stresses of real service: it does not simulate mechanical impact, repeated abrasion of a damaged coating, ultraviolet ageing, or wet-dry cycling, and wet-dry cycling is often more damaging than continuous wetting. Third, the test conditions and the actual exposure differ substantially: samples sit at a fixed angle in a chamber, while a real box has water traps, crevices and dissimilar-metal contacts. The correct way to use the number is as a basis for relative comparison and for pass or fail against a requirement, not as a life promise. In practice, the more useful approach is to specify the test method, neutral salt spray or copper-accelerated; specify the criterion, whether scribed and what undercut width is allowed; and require the original condition data including film build, process and substrate, all three of which are needed for a fair comparison. To genuinely assess service life, the most reliable method is a small trial batch in your own working environment, run through a complete damp season or high-corrosion cycle before releasing volume. In volume projects JUNZHJIA typically recommends the sequence of environment assessment, sample validation and volume delivery precisely to avoid reading test data as a life promise.
Q: What does routine maintenance actually involve? Is there a simple list I can put on the wall? A: Yes, and the simpler it is the more likely it is to be followed. Ten items work well. One, wipe off water and dirt after every use, especially after rain, snow or coastal work. Two, use a neutral detergent and avoid strong alkalis and chlorine-bearing cleaners. Three, dry after washing and open the lid to air the interior, so the outside is not dry while the inside stays damp. Four, every month inspect the four base corners and the areas around hinges and latches for scratches, blistering and pinholes. Five, repair damage immediately by sanding and recoating rather than waiting for rust to appear. Six, lubricate hinges, lock cores, wheels and handles, and check that they are tight. Seven, for long-term storage keep boxes off damp floors using a pallet or shelf. Eight, do not leave wet tools or wet rags inside, and use desiccant where needed. Nine, leave ventilation gaps between boxes stored outdoors rather than pressing them against a wall. Ten, follow the frequency table by environment: quarterly cleaning indoors and in dry conditions, monthly in wet workshops, every two weeks outdoors and weekly on the coast. The shared logic is that corrosion prevention is not about removal capability but about never letting the corrosion conditions all be true at the same time. Keep it dry, keep the coating intact, keep drainage clear, and keep an oil film on the moving parts. Folding these ten items into the existing equipment inspection routine alongside tool counts adds almost no labour, yet it substantially extends the life of a metal toolbox and avoids the reactive scramble of a full rust removal campaign every damp season.
Conclusion and related reading
To return to the question: how do you deal with rust on a metal toolbox? The complete answer is four steps, in order — identify, remove, rebuild, prevent. Identify: distinguish uniform surface rust, pitting, crevice corrosion and galvanic corrosion, because the type determines how deep you strip and whether the design itself must change. Remove: choose mechanical, chemical, electrolytic or laser methods according to location and substrate condition, and strip to the grade at which the coating will adhere while leaving no acidic residue inside crevices. Rebuild: restore the full primer-and-topcoat system, and never put a single coat straight onto bare metal. Prevent: build simultaneous defences across material grade, coating system, structural drainage, dissimilar-metal isolation and routine maintenance, and write the maintenance frequency into the inspection schedule.
Five practical recommendations for procurement and equipment managers. First, make the service environment the first input to selection — salt, acid or alkali exposure, temperature and humidity range, and whether washdown happens — because this decides the material and coating combination more than any single figure. Second, require the three salt spray elements of method, criterion and original condition, with a scribed result. Third, specify surface treatment separately for hinges, latches and fasteners so the weakest link is not left as plain steel. Fourth, require matching touch-up materials and maintenance instructions, bringing repair capability into the scope of supply. Fifth, run a small trial batch in the real environment before releasing volume, replacing assumption with measurement. The life of a metal toolbox is never simply bought; it is decided by choosing correctly and maintaining correctly. For a broader view of material trade-offs, see our comparison of metal and plastic toolboxes, and for the wider outdoor configuration picture, our guide to choosing toolboxes for outdoor work. JUNZHJIA can advise on material, coating and liner combinations based on the customer's working environment, and supports volume supply, distribution, OEM/ODM and global delivery.
Related reading