

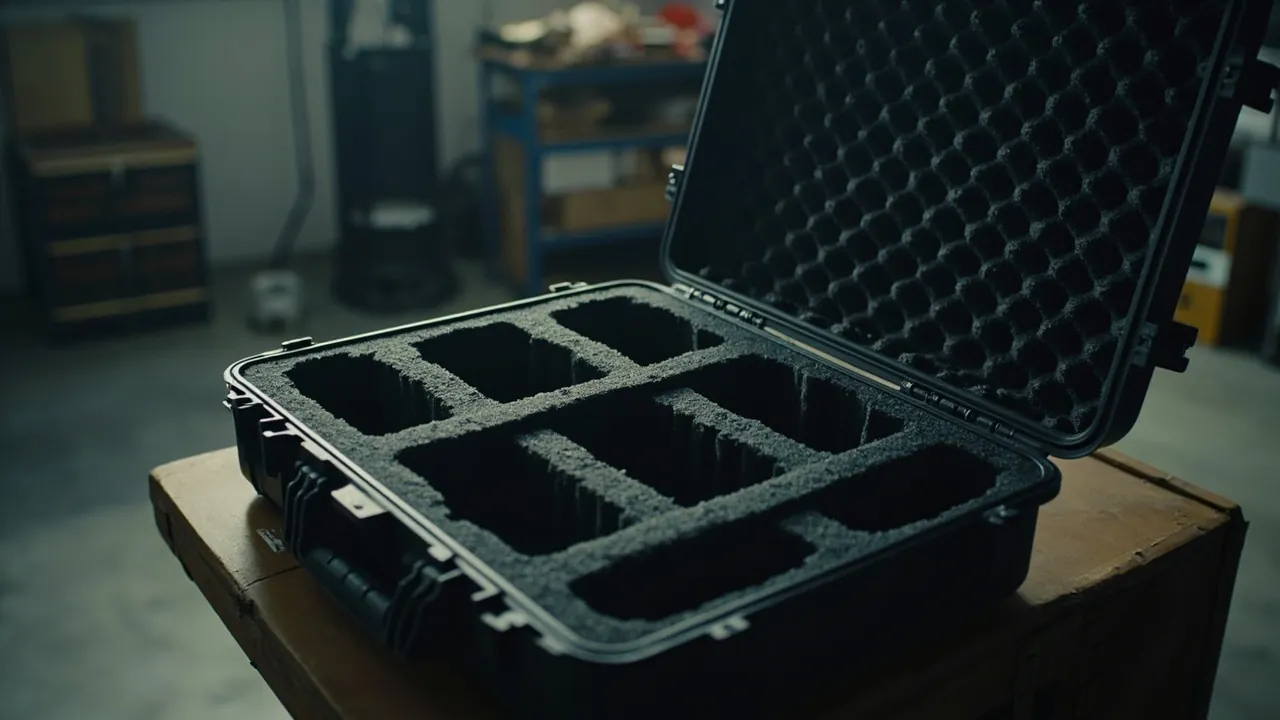
Short answer: the essence of internal layout is satisfying two goals at the same time — three-axis constraint and zoned access. Three-axis constraint means holding equipment in a fixed position along length, width and depth so that nothing shifts during handling or a drop. Zoned access means keeping frequently used items near the rim and infrequently used items deeper down, so retrieval never requires emptying the case. The two primary means of achieving this are pre-cut foam, CNC-cut to the outline of the contents for precise location, and removable dividers, which use a grid or slots to create adjustable compartments with high flexibility. Which one to choose depends on whether your contents are "one fixed item" or "many varied items". The first case is best solved by pre-cut foam, the second by removable dividers, and most real applications are best solved by a hybrid of the two.
This article is written for individuals and teams who need to manage equipment. It turns internal layout from "stuff it in and see" into an executable design process: inventory the contents, select a liner approach, design it on parameters such as density, thickness, cushion curve and clearance, and finally optimize zoning around the retrieval path. All figures are typical or empirical values; actual projects should follow supplier drawings and measured results.
Table of Contents
- The direct answer: layout means three-axis constraint plus zoned access
- Before layout: start with a contents inventory
- The two main approaches: pre-cut foam and removable dividers
- Designing pre-cut foam in six steps
- Key foam parameters: density, thickness and the cushion curve
- Design points for removable dividers
- Hybrid strategy: combining foam and dividers
- Weight distribution and centre of gravity
- Access efficiency: workflow and opening habits
- Moisture and corrosion control: liner material and VCI
- Layout examples for three typical scenarios
- Parameter and approach comparison table
- Common mistakes and a pitfall checklist
- FAQ
- Conclusion and further reading
The direct answer: layout means three-axis constraint plus zoned access
Many people approach layout by asking how big the case is and then trying to fit things into it. That order is backwards. The correct approach is to define the contents and how they will be used first, then work back to the liner design and the case size.
The two layout goals break down into four specific criteria:
- No shifting. After closing the lid, shake the case gently. If you hear contents moving inside, the constraint is insufficient. Under handling and drop conditions, free-moving items generate impact, striking the wall or each other, and this is the most common liner failure mode.
- No unsupported spans. There must be support beneath items, so that gravity is not concentrated at one point and so that items do not sink and strike the base on impact. Long items need particular attention: a long piece supported only at the ends can bend and deform on a drop.
- Retrievable. Constraint is not the same as clamping. A locating slot should leave retrieval clearance, empirically 1-3 mm, or it becomes hard to load and, once the foam swells with moisture, it grips even harder.
- Quickly locatable. Frequently used items belong near the rim in the upper layer; infrequently used items belong deeper. If retrieving a small accessory always requires removing the main equipment first, the layout has failed.
These four criteria condense into one statement: the liner's job is not to be soft, but to locate. That is why open-cell sponge is unsuitable for long-term storage and outdoor use: its open structure absorbs water and oil, degrades into crumbs and loses support, so it cannot hold position reliably.
Before layout: start with a contents inventory
The first step in layout design is not buying a liner; it is a complete inventory of the contents. A single table should structure the information.
Six items to record:
- Name and quantity, split into main equipment and accessories.
- Three-dimensional outline size in millimetres, recording the maximum envelope for irregular items.
- Weight in grams or kilograms.
- Usage frequency: high, meaning every time the case is opened; medium; or low, meaning backup or seasonal.
- Vulnerable areas: places prone to impact, compression or scratching.
- Special requirements: whether moisture, corrosion, static or light protection is needed.
After the inventory, run a simple calculation:
- Total weight: contents plus case tare, to check handling feasibility, with a practical manual-carry ceiling of around 20-25 kg.
- Total volume: the sum of item outlines, to estimate the required internal volume.
- Volume check: usable volume is roughly theoretical volume times 0.7-0.8 with 20 mm pre-cut foam, and may fall to 0.55-0.65 with 40 mm foam.
The value of this order is that it changes the question from "what size case should I buy" to "how much protected space do my contents need". The full conversion method is in 50 cal ammo box capacity.
| Inventory item | What to record | Effect on layout |
|---|---|---|
| --- | --- | --- |
| Three-dimensional size | Length × width × height, including maximum envelope | Sets locating slot size and arrangement |
| Weight | Per item and total | Sets foam thickness and handling method |
| Usage frequency | High / medium / low | Sets distance from the rim |
| Vulnerable areas | Impact-prone, compression-prone | Sets cushion layer and isolation design |
| Special requirements | Moisture, corrosion, static | Sets liner material and added materials |
The two main approaches: pre-cut foam and removable dividers
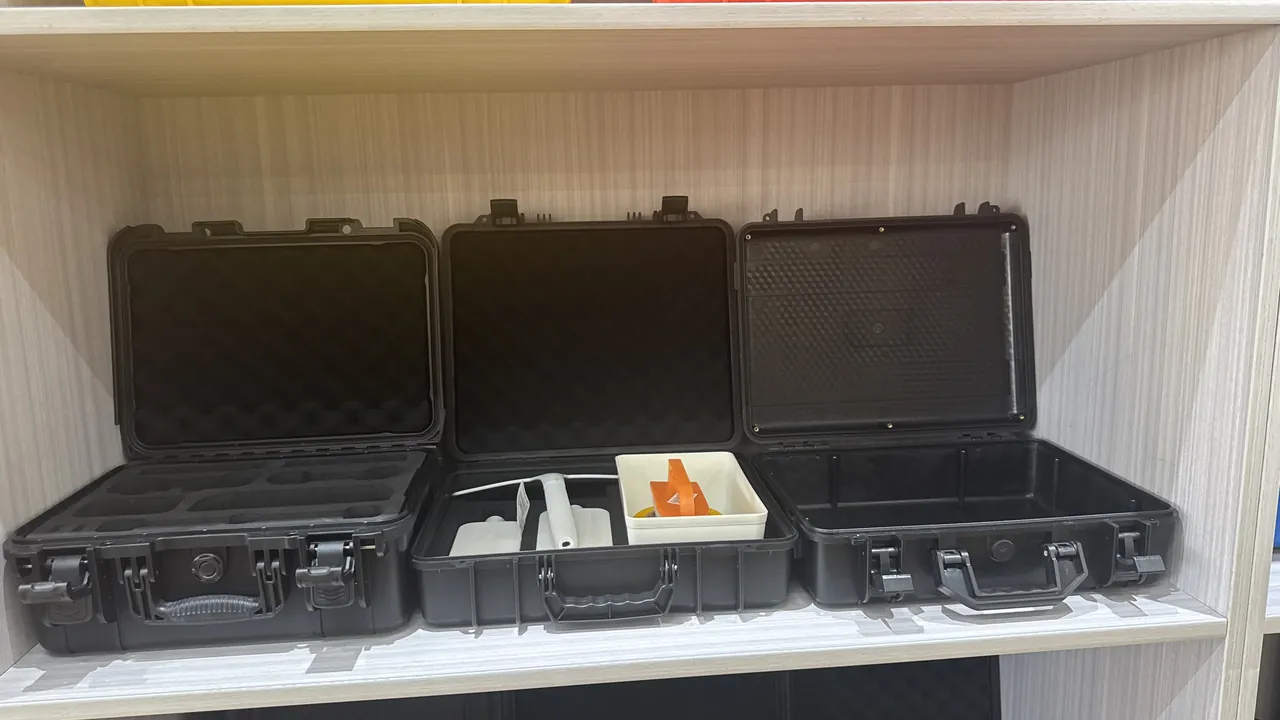
Choosing a liner approach is fundamentally a trade-off between locating precision and flexibility.
Pre-cut foam. CNC-cut to the outline of the contents to form conforming pockets. Characteristics:
- Highest locating precision: the pocket constrains the item in three axes, making movement nearly impossible.
- Controllable cushioning: laminated layers produce a gradient, protecting delicate precision items.
- Suited to fixed items and repeat delivery: once the design is fixed, every case is identical.
- Limitations: changing the contents makes the original foam obsolete, and one-off customization carries a higher cost.
Removable dividers. Grids, slots or separate panels divide the space into adjustable compartments. Characteristics:
- Highest flexibility: the number and size of compartments can be changed at any time.
- High access efficiency: a grid makes contents visible for counting and easy to retrieve one-handed.
- Suited to many small mixed items: many accessory types, irregular shapes and varying quantities.
- Limitations: less precise location for a single item than conforming foam, and irregular items can rattle within a compartment.
Grid and pull-apart foam is the middle form. It provides a regular matrix of small blocks that the user tears out as needed. It is more flexible than fully pre-cut foam and cheaper than CNC precision cutting, but the torn pockets are irregular in shape and the repeat locating accuracy declines with use. A full comparison is in case divider versus foam.
Designing pre-cut foam in six steps
The performance of pre-cut foam depends on the design, not on the cutting machine. Six steps are recommended.
Step one: choose the reference orientation. Decide whether the item sits upright or lies flat. Upright uses less floor area and more depth; lying flat uses more floor area and less depth. Factor in retrieval habits — upright items are usually easier to grip one-handed.
Step two: define the layer structure. A common three-layer build is a base layer for load bearing and cushioning, a middle layer with the locating pockets, and a top layer for compression and cushioning. The advantage is that the item is held from above and below, minimizing displacement on impact. A two-layer build is possible where thickness must be reduced, but there must still be a compression layer at the top.
Step three: design the pocket dimensions. The plan dimensions of the pocket are the item outline plus retrieval clearance, empirically 1-3 mm. Pocket depth usually equals the item height, or is slightly shallower so the top foam applies light compression. Irregular items need support platforms inside the pocket so that contact does not occur at only a few points.
Step four: verify the cushioning thickness. This follows from item weight and expected drop height. Empirically, heavier and more shock-sensitive items need thicker, lower-density foam within a sensible range, to lengthen the deceleration distance. This is the most technically demanding step in the whole design.
Step five: place end stops. Inside a long case, items are most likely to slide along the length. Limit blocks or locating pockets at both ends should hold lengthwise movement to a few millimetres.
Step six: verify. Close the lid and shake to check for any movement sound. Perform a simulated drop, by lifting and releasing gently or by the standard method, then open the lid and confirm that positions are unchanged and no new contact marks have appeared.
The design variable list appears in pre-cut foam design tips and custom foam factors.
Key foam parameters: density, thickness and the cushion curve
Three parameters determine how well the foam protects.
Density. Common ranges:
- Closed-cell EVA: 30-80 kg/m³, stable recovery, does not absorb water, best overall performance.
- Closed-cell PE foam, in the XPE/IXPE family: 25-60 kg/m³, better rigidity and compression resistance.
- Open-cell polyurethane sponge: 15-30 kg/m³, lowest cost, but absorbs water and ages, so it is not recommended for long-term storage or outdoor use.
Higher density means a harder material with more support; lower density means a longer cushioning stroke. The selection rule is to use thicker, softer foam for heavy, shock-sensitive items and firmer foam where support and location matter.
Thickness. Thickness sets the cushioning stroke. Empirically, the heavier the item and the higher the expected drop height, the greater the required cushioning thickness. Laminating layers is common practice: a low-density outer layer to absorb large deflections and a medium-to-high density inner layer to provide support.
The cushion curve. This is the core tool of professional design. A cushion curve describes the maximum acceleration transmitted to an item at different static stresses. The design logic runs as follows:
- Compute static stress from item weight and bearing area.
- Determine the required cushioning performance band from the expected drop height.
- Find the minimum acceleration point corresponding to that static stress on the cushion curve, and read off the required thickness and density combination.
This step turns "how thick should the padding be" from a judgement call into a calculation. If a supplier can provide the cushion curve for the foam used, selection becomes far more precise. If not, ask for a recommended solution based on item weight and drop height, and verify it by drop testing.
| Parameter | Common range | What it affects | Selection logic |
|---|---|---|---|
| --- | --- | --- | --- |
| Density | 25-80 kg/m³ closed-cell | Hardness, support, compression resistance | Lower for delicate items, higher where support matters |
| Thickness | 10-50 mm in layers | Cushioning stroke, volume used | Thicker for heavier and more shock-sensitive items |
| Layer structure | 2-3 layers | Displacement control, gradient cushioning | Three layers minimize displacement |
| Retrieval clearance | 1-3 mm | Ease of loading, grip force | Too tight is hard to load, too loose rattles |
| Material | EVA / PE / PU | Water uptake, ageing, rebound | Closed-cell for outdoor and long-term storage |
Design points for removable dividers
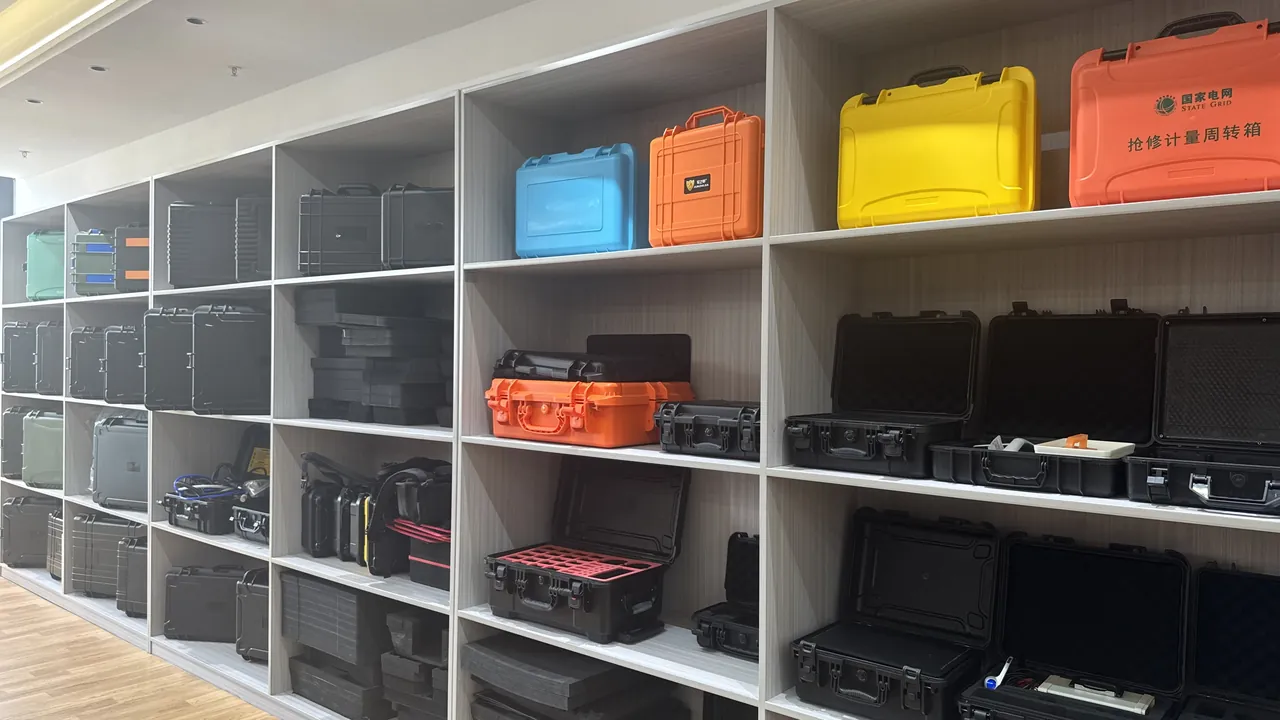
The quality of a divider solution depends on whether the compartments are adjustable and whether they stay put.
Three common divider forms:
- Egg-crate grid. Two sets of panels slot into each other to form a regular matrix. It offers many compartments, good visibility and easy access, but the sizes are fixed and fit irregular items poorly.
- Slot-in dividers. Slots moulded into the case wall accept panels that create free-form compartments. Compartment size is adjustable, but the connection strength between panel and wall needs verification, since panels can work loose in transit.
- Pull-out trays. The entire liner becomes one or more extractable trays, each independently divided. Access efficiency is very high and suits tools, but the case interior needs matching rails or supports.
Design points:
- Dividers must be secured. A panel held only by gravity shifts when the case is inverted or vibrated. Use clips, magnets, foam padding or a positive fit with wall slots.
- Divider height must match the contents. If the divider is shorter than the item, contents spill over between compartments; if too tall, it presses against the top foam when the lid closes. An empirical approach takes divider height as 60-90 percent of item height.
- Add cushioning between dividers and the wall. The junction between a panel and a rigid wall is a stress concentration; thin foam at the corners reduces vibration and prevents scratching.
- Keep one general-purpose channel. Do not fill every compartment completely. Leave a gap for temporary items or tools, which proves very useful in practice.
Hybrid strategy: combining foam and dividers
For most real applications, the best solution is a hybrid. Three common combinations:
Combination one: main foam plus side dividers. The main equipment is located in pre-cut foam, guaranteeing three-axis constraint, while the accessory area is divided by panels for flexibility. This is the most general solution and suits the typical "one main item plus several accessories" configuration.
Combination two: zoned foam plus adjustable dividers. The case is divided into a few large zones, each with its own foam block shaped for the items in that zone. Changing contents requires replacing only the foam block for that zone, reducing modification cost.
Combination three: a two-tier build. The lower tier holds the main equipment in pre-cut foam, and the upper tier is a divider tray for accessories. When the lid closes, the upper tray is pressed by the top foam, which is both secure and easy to lift out as a whole. This is the most access-efficient solution.
The governing hybrid principle is to layer by frequency and zone by stiffness:
- Layer by frequency: high-frequency items on top, low-frequency items below.
- Zone by stiffness: shock-sensitive precision items in the foam zone, impact-tolerant tools and consumables in the divider zone.
Weight distribution and centre of gravity
Layout affects not only protection but also handling safety and service life.
Keep the centre of gravity central and low. A case with a high centre of gravity tips easily when lifted and set down, and one weighted to one side loads the handles unevenly, which over time can crack a handle boss. The practice is: place the heaviest items in the centre of the base and lighter items around and above.
Balance left and right. In a dual-handle case, a large left-right weight difference means one handle carries more load over time. If balance is impossible, add support on the heavy side or switch to a wheeled case.
Check the total weight. Manual handling has a practical ceiling of around 20-25 kg including tare. Above that, consider splitting the load, using a wheeled case, or a two-person lift, having confirmed the handles can take the two-person load.
Relationship to stacking strength. The heavier the contents, the higher the base loading. Under long-term stacking the base needs ribs, otherwise it bows, which then affects stacking flatness and sealing. Structural points are in high-strength case structure.
Access efficiency: workflow and opening habits
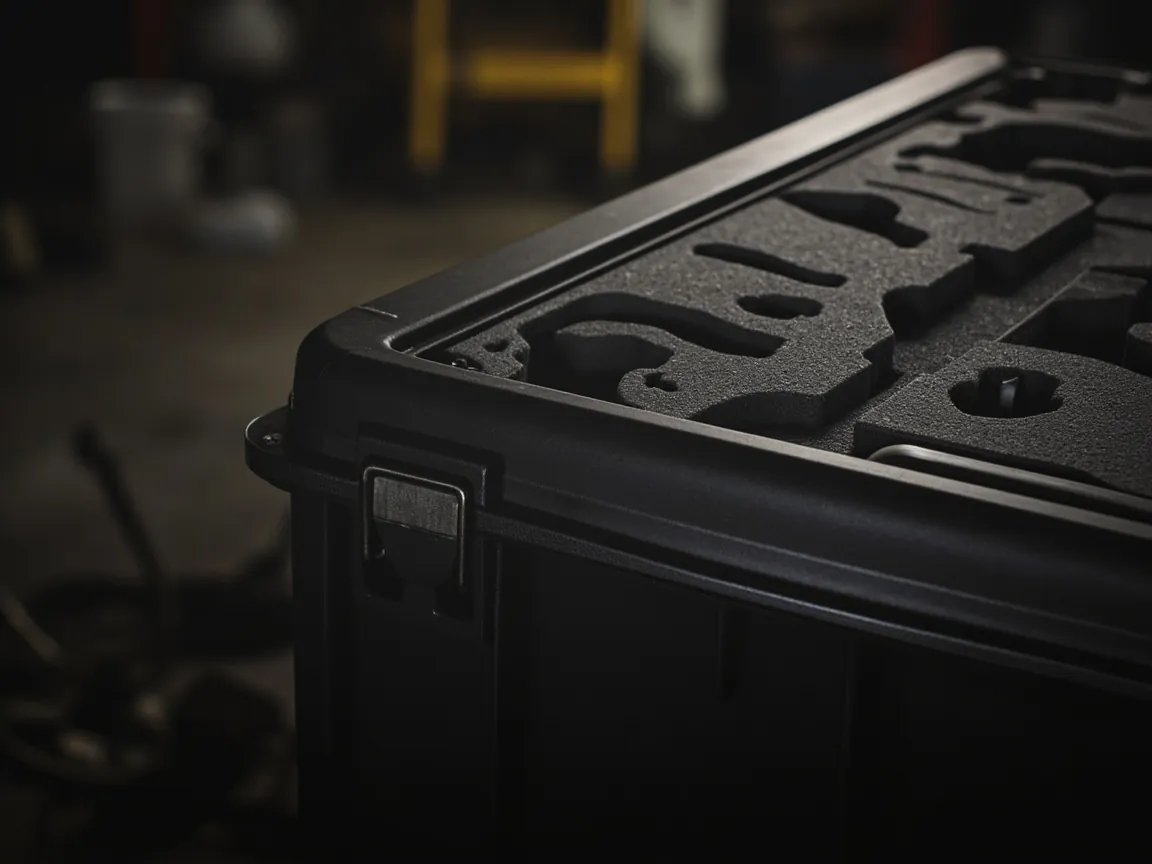
The final test of a layout is whether it feels right in use.
Usage habits determine layout. Observe three situations:
- Frequent single-item access: only one or two common items are taken each time. These belong in the top layer, nearest the edge, easiest to reach one-handed.
- Whole-layer work: several items are taken at once. Design an extractable tray so nothing has to be searched for item by item.
- Full inventory: all contents are counted periodically. Compartments should be clear and visible, ideally with label areas for quick checking.
Three workflow techniques:
- Visible on opening: when the lid opens, the position of every high-frequency item should be visible without moving anything.
- One-handed retrieval: increase the retrieval clearance slightly for high-frequency items, to 2-3 mm, to guarantee one-handed access.
- Single correct position: each item has exactly one correct place, and the place itself signals the fit through the shape of the pocket. This sharply reduces the disorder that arises from putting things back wherever.
Labelling matters too. Provide a writable label area or card slot on the outside for the content category and last inventory date, and mark zone numbers on the foam or dividers inside to correspond with the list.
Moisture and corrosion control: liner material and VCI
The liner affects moisture management as well as mechanical protection.
Material choice. For outdoor, long-term storage and humid conditions, always use closed-cell material, EVA or PE. Open-cell polyurethane sponge becomes a second internal moisture source once saturated, and because a good seal keeps that water in, it actually accelerates corrosion of metal parts.
Corrosion protection for metal parts. If the case holds steel or precision metal parts, add VCI film, paper or bags alongside the foam. Points to note:
- VCI needs a relatively closed space to maintain an effective concentration, making it strongly synergistic with a sealed case.
- Placement order: dry items, then VCI material, then desiccant, then the humidity indicator card, then close and latch.
- Do not fully wrap the VCI material in foam, or the corrosion-inhibiting atmosphere cannot diffuse through the whole case.
Humidity monitoring. Place a humidity indicator card inside, preferably with an irreversible indicator point: once the threshold is exceeded, the colour changes and does not revert, allowing a history of exposure to be traced. Related sealing and moisture-management logic appears in case seal materials and waterproof ammo box really waterproof.
Layout examples for three typical scenarios
Scenario one: one main item plus multiple accessories, where the main item is long.
- Base: a single closed-cell foam layer, 20-30 mm thick, for load bearing and cushioning.
- Middle: CNC pre-cut foam with the main item pocket centred and end stops at both ends.
- Accessory zone: panels at one end of the case create three or four compartments, ordered by frequency from outside inward.
- Top: a thin foam compression layer, 5-10 mm thick, applying light grip when the lid closes.
- Weight control: the main item centred and low, accessories distributed along both sides.
Scenario two: many tool types, irregular shapes, frequent access.
- Use a full-length pull-out tray with an egg-crate grid.
- Size each cell to the largest tool outline and pad smaller tools with foam blocks inside the cell.
- Add a full foam layer at the base as a vibration damper.
- Apply thin foam to the inside of the lid as a compression layer.
- Label the outside with the contents of each cell, ordered by frequency of use.
Scenario three: precision equipment transport, sensitive to impact, moisture and static.
- Use a three-layer foam build: a high-density bearing layer at the base, a low-density conforming layer in the middle, and a medium-density compression layer on top.
- Allow a 15-25 mm cushioning layer around the equipment, verified against the cushion curve.
- Add an anti-static liner and a moisture barrier bag, with desiccant and a humidity indicator card.
- Add limit blocks at the ends and corners to eliminate lengthwise movement.
- Specify a case with groove sealing and metal cam latches.
What the three scenarios share is that each begins by defining the contents and the way they will be used, then selects the liner combination, rather than the reverse. The selection framework is covered in tactical storage box selection guide.
Parameter and approach comparison table
| Approach | Locating precision | Flexibility | Cost | Access efficiency | Best-suited scenario |
|---|---|---|---|---|---|
| --- | --- | --- | --- | --- | --- |
| CNC pre-cut foam | Very high | Low | Medium-high | Medium | Fixed items, repeat delivery |
| Pull-apart grid foam | Medium | Medium-high | Low | Medium-high | Many small items that change |
| Egg-crate grid | Medium | Medium | Low | High | Many tools, visible counting |
| Slot-in dividers | Medium | High | Medium | High | Compartment sizes change often |
| Pull-out tray | Medium-high | Medium | Medium-high | Very high | High-frequency, whole-layer work |
| Foam plus divider hybrid | High | Medium-high | Medium-high | High | One main item plus accessories |
Common mistakes and a pitfall checklist
Mistake one: buying the case before thinking about layout. The correct order is to inventory the contents, work back to liner and volume, then select the case. Otherwise you end up with a case that fits but arranges badly, or one that is too large to be efficient or too small to hold everything.
Mistake two: padding the base without locating anything. A single foam layer at the bottom still lets items slide and collide in transit. The liner must constrain in three axes.
Mistake three: cutting pockets to zero clearance. This causes two problems: difficult loading, and foam that swells with moisture and grips the item. An empirical clearance is 1-3 mm.
Mistake four: open-cell sponge for long-term storage. It absorbs water and oil and degrades into crumbs, becoming a contamination source in dusty humid conditions and accelerating metal corrosion.
Mistake five: unsecured dividers. Panels held only by gravity shift under vibration or inversion, which defeats the compartmentalization and lets contents cross over.
Mistake six: ignoring weight and centre of gravity. Heavy items to one side or on top load the handles unevenly and make the case tip when carried, which over time can crack a handle boss.
Mistake seven: a non-replaceable liner. Contents change and foam ages. The liner should be designed to be replaceable or modular, to reduce later modification cost.
FAQ
Q: Should I choose pre-cut foam or removable dividers?
A: Judge on whether the contents are fixed or variable. If the case holds a single fixed model of equipment that will be used in the same configuration over a long period, choose pre-cut foam: it offers the highest locating precision, the pocket constrains the item in three axes, movement during handling and drops becomes nearly impossible, and laminated layers create a gradient that protects precision items. If the case holds many accessory types, irregular shapes and frequently changing quantities, choose removable dividers: they offer the highest flexibility, compartments can be adjusted at any time, and a grid makes contents easy to see and count and easy to retrieve one-handed. For most real applications the best solution is a hybrid: pre-cut foam for the main equipment and dividers for the accessory area, which satisfies both three-axis constraint for the main item and flexible access for accessories. If you are unsure, start with pull-apart grid foam, which sits between the two, costs less and allows trial and error, then move to CNC precision cutting once the configuration stabilizes.
Q: How much clearance should a locating pocket have, and what goes wrong if it is too tight or too loose?
A: An empirical clearance is 1-3 mm. Too tight causes two problems. First, loading becomes difficult, especially for items accessed often, so in practice users leave them unsecured, which defeats the purpose. Second, foam absorbs moisture and swells in humid conditions, so a fit that was originally exact becomes tighter still, sometimes gripping the item hard enough to make removal difficult. Too loose lets the item rattle in the pocket and shift on impact, which defeats locating altogether. The criterion is that the item should drop naturally into place, not shift under gentle shaking, and come out one-handed. For high-frequency items, widen slightly to 2-3 mm to guarantee one-handed access. For low-frequency, shock-sensitive precision items, use 1-1.5 mm for higher constraint precision. In addition, irregular items should have support platforms inside the pocket rather than contacting at only a few points, because point contact raises local stress and can actually make impact damage more likely.
Q: How should I choose foam density and thickness?
A: Treat them separately: density sets hardness and support, thickness sets the cushioning stroke. Common density ranges are closed-cell EVA at 30-80 kg/m³, closed-cell PE foam at 25-60 kg/m³, and open-cell polyurethane sponge at 15-30 kg/m³. The rule is to use thicker, softer foam for heavier and shock-sensitive items and firmer foam where support and location matter. On thickness, the heavier the item and the higher the expected drop height, the greater the cushioning thickness required, in order to lengthen the deceleration distance. A more rigorous method uses the cushion curve: compute static stress from item weight and bearing area, determine the cushioning band from the expected drop height, then find the minimum acceleration point corresponding to that static stress and read off the required thickness and density combination. This turns padding thickness from a judgement call into a calculation. In practice, laminated layers are common, with a low-density outer layer absorbing large deflections and a medium-to-high density inner layer providing support. If the supplier can provide the cushion curve for the foam used, selection becomes far more precise; if not, request a recommendation based on item weight and drop height and verify it by drop testing.
Q: Long items keep sliding inside the case. How do I fix that?
A: This is the most common layout problem in long-format cases, and the root cause is the absence of lengthwise limitation. Three layers of countermeasure apply. The first is end stops: limit blocks or locating pockets at both ends of the case, holding lengthwise movement to a few millimetres. End stop material should be closed-cell foam or low-hardness rubber to avoid hard contact that scratches the item. The second is segmented support along the length: if a long item is supported only at the ends with the middle unsupported, its own weight can bend it on impact. The correct approach puts support platforms in the middle so that support points are distributed evenly along the length, with an empirical guideline that spacing should not exceed one third of the item length. The third is top compression: when the lid closes, the top foam should apply light compression, working with the base pocket to hold the item from above and below, which is the most effective way to eliminate movement. With all three in place, shaking the closed case should produce no sound of contents moving. If an item is very long, close to the internal length, ensure the end stops do not press it too tightly, or moisture-swollen foam may make it impossible to remove.
Q: Does the weight distribution inside a case affect the life of the case?
A: Yes, and it is frequently overlooked. Three aspects matter. The first is handles and hinges: a centre of gravity to one side loads handles unevenly and can crack a handle boss over time, while a high centre of gravity makes the case tip when lifted and set down, raising the risk of a drop. The practice is to place the heaviest items in the centre of the base and lighter items around and above. The second is base and stacking: the heavier the contents, the higher the base loading, and under long-term stacking a base without ribs will bow, affecting stacking flatness and sealing. A practical approach assesses long-term stacking strength at 30-50 percent of short-term compressive strength, with a further reduction for creep-sensitive materials such as HDPE. The third is drop behaviour: a case with a high centre of gravity is more likely to rotate during a drop, making the contact attitude unpredictable; a corner drop is severe but its attitude is relatively predictable and therefore easier to design for. Keeping the centre of gravity low is thus not only a handling convenience but part of the protection design. Finally, check the total weight: case tare plus contents has a practical manual-carry ceiling of about 20-25 kg, above which the load should be split or a wheeled case used.
Q: Can dividers and foam be used together, and will mixing them compromise sealing?
A: Yes they can, and mixing is usually the most effective approach; done correctly it does not compromise sealing. The governing principle is to layer by frequency and zone by stiffness: high-frequency items on top and low-frequency items below; shock-sensitive precision items in the foam zone and impact-tolerant tools and consumables in the divider zone. Three common combinations are main foam with side dividers, where the main item is located and accessories are compartmentalized; zoned foam with adjustable dividers, where each large zone gets a custom foam block that alone is replaced when contents change; and a two-tier build, where the lower tier holds the main item in foam and the upper tier is a divider tray that is pressed by the top foam when the lid closes. The effect on sealing depends on two details. First, the total liner thickness must not press against the lid, or the gasket will be under-compressed after latching and sealing will actually fail; the design should ensure the sealing face closes fully with the top foam only lightly compressed, within a sensible compression ratio. Second, moisture-absorbing materials such as open-cell sponge become a second internal moisture source and should be avoided. When designing a hybrid layout, therefore, the relationship between total liner thickness plus item height plus top compression layer, on one hand, and internal case depth, on the other, must be verified, ideally with physical samples.
Q: Where should desiccant and the humidity indicator card go inside the case?
A: Position directly affects effectiveness. Desiccant should sit where air can circulate, typically fixed inside the lid or in a corner of the upper layer, and must not be fully wrapped in foam. Once enclosed, it can only absorb vapour from its immediate surroundings, leaving the rest of the case untreated. The quantity relates to free internal volume, sealing grade, storage duration and external humidity; estimate from empirical coefficients first, then verify by measurement and adjust the change interval. The humidity indicator card should be placed where it is visible immediately on opening, for example inside the lid or at the edge of the upper layer, so every opening doubles as a check. Prefer a model with an irreversible indicator point: once the threshold is exceeded, the colour changes and does not revert, allowing a history of exposure to be traced, which is valuable for deciding whether to change desiccant or inspect metal parts. Placement order matters: dry items, then VCI material where needed, then desiccant, then the humidity indicator card, then close and latch. Any lapse in the sequence, such as placing a wet item inside, defeats the whole moisture-management scheme, and this is especially critical in long-term storage.
Q: Once the layout is done, how do I verify that it is acceptable?
A: Verify in three steps, none of which requires specialist equipment. Step one is a static check: load the contents, close and latch the lid, lift the case and shake it gently left and right and front to back, listening carefully. If contents can be heard moving, the constraint is insufficient and additional foam or limit blocks are needed. Step two is a simulated drop: choose a reasonable drop height based on case weight and transport mode, following the grading logic of the ISTA series and ASTM D4169, and perform one corner drop, since the corner hits first and concentrates the impact. After opening, confirm that positions are unchanged, no new contact marks appeared and the rim is not deformed. Where possible, a drop after low-temperature preconditioning is more informative, because plastics lose toughness in the cold and crack more readily. Step three is a retrieval drill: have the actual user work through the real sequence — open the lid, take a high-frequency item, take a low-frequency item, put them back, close the lid. If anything requires removing another item first, the workflow design needs adjustment to the zones or layers. Once these three steps pass, the layout is essentially serviceable, and for batch delivery they should be written into the acceptance process.
Q: If the liner ages or the contents change, does the whole case have to be replaced?
A: No, and this is where modular design pays off. Design the liner to be replaceable or modular from the start: divide the case into zones, each with its own foam block or divider assembly, so that changing contents means replacing only the parts for the affected zone. This brings three benefits. It lowers later modification cost, since the entire liner does not need remaking. It shortens changeover time, letting one case switch quickly between two configurations. And it simplifies maintenance, since a single foam block that ages or tears can be replaced on its own. Three criteria determine whether replacement is needed: whether the foam is clearly shedding crumbs, has lost rebound or has collapsed locally; whether dividers are deformed or clips have failed; and whether locating pockets have visibly enlarged from repeated use, allowing items to move. Routine inspection every 6 to 12 months is recommended, synchronized with the seal inspection interval so that one opening covers all checks. For teams running batches, keep a sensible proportion of foam blocks and divider assemblies in stock as spares.
Conclusion and further reading
Back to the title question: the internal layout of a tactical gear box is fundamentally about delivering two goals at once — three-axis constraint and zoned access. Three-axis constraint comes from conforming pre-cut foam pockets and top-and-bottom gripping; zoned access comes from removable dividers and a layered workflow. Which to choose depends on whether the contents are one fixed item or many varied ones, and for most real applications the best answer is a hybrid: foam to locate the main equipment, dividers to compartmentalize accessories. The starting point of any layout is always the contents inventory, never the case dimensions, and the endpoint is how smoothly it works in real use, not how tidy it looks when static.
Three actionable recommendations. First, inventory before designing — record three-dimensional sizes, weights, frequencies and vulnerable areas, and work back to liner and volume rather than buying a case first. Second, design the liner on parameters rather than feel — closed-cell materials with density and thickness set by cushioning requirements, retrieval clearance of 1-3 mm, and end stops plus mid-span support for long items. Third, make the liner modular and replaceable — lowering modification cost, shortening changeover time and simplifying maintenance so that one case fits many configurations.
JUNZHJIA is manufactured by KeXin New Materials (Guangdong) Co., Ltd., covering protective cases, toolboxes, rugged storage cases and waterproof junction boxes, serving wholesale, agency, OEM/ODM and global supply. Based on customer drawings, liner solutions including pre-cut foam, pull-apart grid foam, egg-crate and slot-in dividers and pull-out trays can be provided, together with cushioning recommendations and test documentation support.
Further reading