


Short answer: the technical difficulty in replacing a gasket is not fitting it, it is fitting the right one. Fitting the right one begins with obtaining a cross-section, hardness and material that match the original design. In most cases where a case still leaks after replacement, the root cause is not technique but a substitute with the wrong dimensions or hardness. A good gasket satisfies three conditions at the same time: the cross-section matches the groove, which sets the compression; the hardness matches the structure, which sets the closing force; and the material matches the operating conditions, which sets the service life. Depart from any one of the three and the problem may not show immediately, but it will appear after cold exposure, submersion or prolonged compression. So the test of whether a substitute is usable is not its price but whether those three parameters can be obtained and verified.
This article is written for equipment maintenance staff, after-sales engineers and procurement teams. It breaks gasket replacement into a complete executable flow: first decide when replacement is mandatory, then distinguish a failed gasket from a problem elsewhere, then work through the dimensional and performance parameters to confirm at selection, the real differences between original parts and substitutes, the four ways substitutes typically fail, a standardised nine-step replacement procedure, four methods of verification afterwards, and finally spare part management and gasket storage conditions. All dimensions, hardness values, ratios and cycles quoted are typical or empirical values used to build a judgement framework. Formal work should follow the original drawings, the specification confirmed with the supplier, and the current edition of any standard cited. If you maintain a fleet of protective cases, toolboxes, military specification storage boxes or waterproof junction boxes and carry out annual servicing or after-sales repair, this procedure can be used directly as a work instruction.
Contents
- Short answer: the difficulty is not fitting it, it is fitting the right one
- When a gasket must be replaced: five rejection signals
- Diagnose first: is it the gasket, or something else
- Gasket types and construction: O-rings, profile strip, moulded parts and joints
- Six dimensions and three performance parameters to confirm at selection
- Original parts versus substitutes: a comparison table
- The four ways substitutes fail
- Preparation: tools, cleaners and lubricants
- A standardised replacement procedure in nine steps
- How to verify afterwards: four test methods
- Spare part management and traceability: model, batch and shelf life
- Storing gaskets: storage conditions and first-in-first-out
- Frequently Asked Questions
- Conclusion and Related Reading
Short answer: the difficulty is not fitting it, it is fitting the right one
Rank the difficulty first. Removing a gasket and fitting a new one is a fifteen-minute skill. What decides success is whether the right part was fitted.
The sealing principle of a protective case is this: when the lid closes, the gasket is compressed by a defined proportion, forming a continuous contact band with no break and with restoring force, which blocks the path of water and dust. Three critical quantities sit inside that principle.
- Compression - set jointly by the gasket cross-section and the groove depth. For a solid rubber gasket the empirical design range is 20 to 30 percent. Too little and the contact band is not continuous; too much and permanent set accelerates while closing force rises sharply.
- Closing force - set jointly by hardness and cross-section. Too hard and the latch will not close or the gasket is crushed; too soft and the gasket is extruded from the groove or deforms permanently.
- Resilience retention - set by material and ageing state. If compression set is too large, the gasket cannot recover after prolonged compression and sealing fails.
The risk of a substitute concentrates precisely on these three quantities. A cross-section 0.3 mm undersized can drop compression from a correct 25 percent to below 15 percent, with nothing visible to the eye, yet it will leak on immersion. Hardness moving from Shore A 50 to A 70 raises closing force substantially, makes the latch hard to close, and increases the risk of cracking at low temperature. None of these deviations appears at goods-in; they appear after use.
One line to memorise: a gasket is a dimensional part and a material part, not a generic consumable. Any substitute whose dimensions and material cannot be documented is, in effect, an unknown part.
When a gasket must be replaced: five rejection signals
Not every aged gasket needs replacing, and not every leak requires a new gasket. Set rejection criteria first, to avoid both extremes: failing to replace when you should, and replacing when you should not.
| Rejection signal | How it appears | How to judge | Action |
|---|---|---|---|
| --- | --- | --- | --- |
| Hardening and loss of resilience | Feels hard, slow or no recovery when pressed | Finger press plus comparison with a new part | Replace |
| Cracking | Fine surface cracks, especially at bends | Visual with a magnifier, plus flexing | Replace |
| Permanent set, flattened | Round section flattened, wider and lower | Measure section height with calipers | Replace |
| Joint separation or misalignment | Vulcanised joint opened, mechanical joint offset | Visual plus light stretching | Replace |
| Missing material, nicks and contamination | Local damage, swelling from oil or solvent | Visual plus touch | Replace, and investigate the contamination source |
Of the five, permanent set is the most underestimated. It is less visible than a crack, yet it is the most common cause of protective case failure: a gasket held under compression for a long time relaxes, so restoring force falls even without obvious ageing. This is why a case stored for years can have an out-of-specification gasket even if it was never used.
A counter-intuitive but important reminder: do not store protective cases with the latches clamped shut. Long-term clamping holds the gasket permanently compressed and accelerates permanent set. The correct practice is to release the latches in storage so the gasket sits free. For the full storage requirements and stacking rules, see warehouse and storage rules for protective cases.
For sealing material types and their ageing mechanisms, see what material should a protective case gasket use and how to judge protective case gasket ageing. For replacement cycles set by time or by cycle count, see how to set a silicone gasket replacement cycle. Used together with this section, those three articles answer the question of when to replace completely.
Diagnose first: is it the gasket, or something else

This step is extremely important and is often skipped. A leak does not mean the gasket has failed. Replacing the gasket without diagnosing may leave the case leaking with the real cause untouched.
| Suspected cause | How it appears | Diagnostic method | Treatment |
|---|---|---|---|
| --- | --- | --- | --- |
| Gasket aged or wrong size | Hardened, flattened or incomplete gasket | Visual plus caliper measurement of cross-section | Replace the gasket |
| Seal groove damage | Scratches, burrs, debris or deformation in the groove | Visual inspection of the groove after removing the gasket | Clean or repair the groove; replace the case if severe |
| Insufficient latch tension | Lid closing force too low, latch closes too easily | Observe closing gap, compare with a new case | Adjust or replace the latch |
| Lid warped or deformed | Local gap after closing, uneven gap | Straight edge check, feeler gauge | Structural correction or case replacement |
| Hinge loose or misaligned | Lid offset from body, closes crookedly | Inspect hinge clearance and pin | Replace or tighten the hinge |
| Assembly error | Gasket twisted, turned over or installed backwards | Visual check of gasket routing | Refit |
Diagnose from the outside in: first check the closing state, meaning whether the latch is normal and the lid seats evenly; then check the groove for debris or damage; only then examine the gasket itself. This order prevents spending 80 percent of the time on gasket removal while the real problem sits in the latch or the lid.
Groove inspection is the most critical and most overlooked step. If the groove contains moulding flash, hardened adhesive residue, grit or metal swarf, a new gasket will be lifted and a leak path will form. The groove depth and width should also be measured. If wear or deformation has taken them out of tolerance, replacing the gasket alone cannot restore sealing performance. For how the groove interacts with the latch and hinge, see how case hinges, latches and seals work together. The three form one system, and failure in any one breaks the seal.
Gasket types and construction: O-rings, profile strip, moulded parts and joints
Different constructions have entirely different replacement methods and failure modes. Identify which one you are holding.
| Construction | Typical form | Advantages | Drawbacks | Replacement note |
|---|---|---|---|---|
| --- | --- | --- | --- | --- |
| Round cross-section O-ring | Equal-diameter cord or formed ring | Versatile, stable compression behaviour | Rectangular rims need splicing, and the joint is a weak point | Watch joint alignment and even tension |
| Profile strip | D-profile, P-profile, rectangular, lipped | Fits the groove, controlled compression direction | Fitting it backwards causes failure | Confirm orientation and lip direction |
| Moulded gasket | Formed as one piece matching the rim | No joint, continuous sealing path, high dimensional accuracy | Requires tooling, higher unit cost, model specific | Replace as a whole, ensure correct location |
| Co-extruded strip | Hard base plus soft sealing lip | Easy to press in, resists displacement | Complex construction, hard to substitute | Confirm the retention feature and hardness distribution |
| Spliced strip | Vulcanised or mechanical joint | Suits large perimeters | The joint is a high-risk leak point | Prefer vulcanised joints |
In terms of sealing reliability, a moulded gasket is usually best, because it is a continuous one-piece structure with no weak point anywhere on the sealing path. Next comes strip with a good vulcanised joint. Mechanical joints and simple butt joints carry the highest risk. This is why cutting a length of generic cord and joining it yourself is a high-risk substitution - the joint is usually the first place to leak.
On rim shape: a rectangular rim or one with large corner radii requires a round-section gasket to turn four corners, where wrinkling and uneven tension are common. A moulded part has its corner geometry built in and is therefore more reliable. For large cases with complex corners, if the original design uses a moulded gasket, substituting generic cord is not advisable.
Six dimensions and three performance parameters to confirm at selection
Selection is the core task in gasket replacement. Of the nine parameters below, none should be missing when you place an order. The first six are dimensional, the last three are performance.
| Parameter | Description | How to obtain | Consequence of deviation |
|---|---|---|---|
| --- | --- | --- | --- |
| Cross-section, cord diameter or height by width | The core parameter setting compression | Caliper measurement of the old part plus original drawing | Undersized leaks, oversized closes with difficulty |
| Inner or outer perimeter | Sets assembly tension | Measured groove centreline perimeter | Too short over-stretches, too long wrinkles |
| Groove width | Space available to the gasket | Measure the groove | Insufficient width extrudes the gasket |
| Groove depth | Combines with cross-section to set compression | Measure the groove | Depth changes directly alter compression ratio |
| Cross-section tolerance | Batch consistency | Original specification or supplier declaration | Wide tolerance causes batch-to-batch variation |
| Corner radii and lip dimensions | Affects fit and sealing direction | Drawing or physical comparison | Affects sealing direction and contact band shape |
| Hardness, Shore A | Sets closing force and extrusion resistance | Original specification or supplier test | Too hard closes with difficulty and cracks; too soft extrudes |
| Compression set | Sets long-term resilience retention | Supplier test data | Too high performs well briefly then fails over time |
| Material and temperature range | Sets life and applicable conditions | Material grade plus property sheet | Wrong material accelerates ageing |
Of the six dimensional parameters, groove depth is the most often overlooked. Many substitute suppliers measure only the gasket and not the groove, so the gasket dimension is right while the groove has become shallower through wear or deformation and compression is still wrong. The correct approach is to measure the old part and the groove together and check both.
Of the three performance parameters, compression set is the most often overlooked. It determines whether the gasket recovers after prolonged compression. A gasket with acceptable hardness and dimensions but high compression set behaves normally for the first few months, then gradually loses sealing capability. This is the classic delayed failure mode of substitutes.
Recommended measuring tools: vernier calipers to 0.02 mm resolution, a Shore A durometer, a straight rule or tape, a magnifier, lint-free cloth, neutral cleaner and silicone grease. For the temperature and media selection logic of materials, see what material should a protective case gasket use.
Original parts versus substitutes: a comparison table
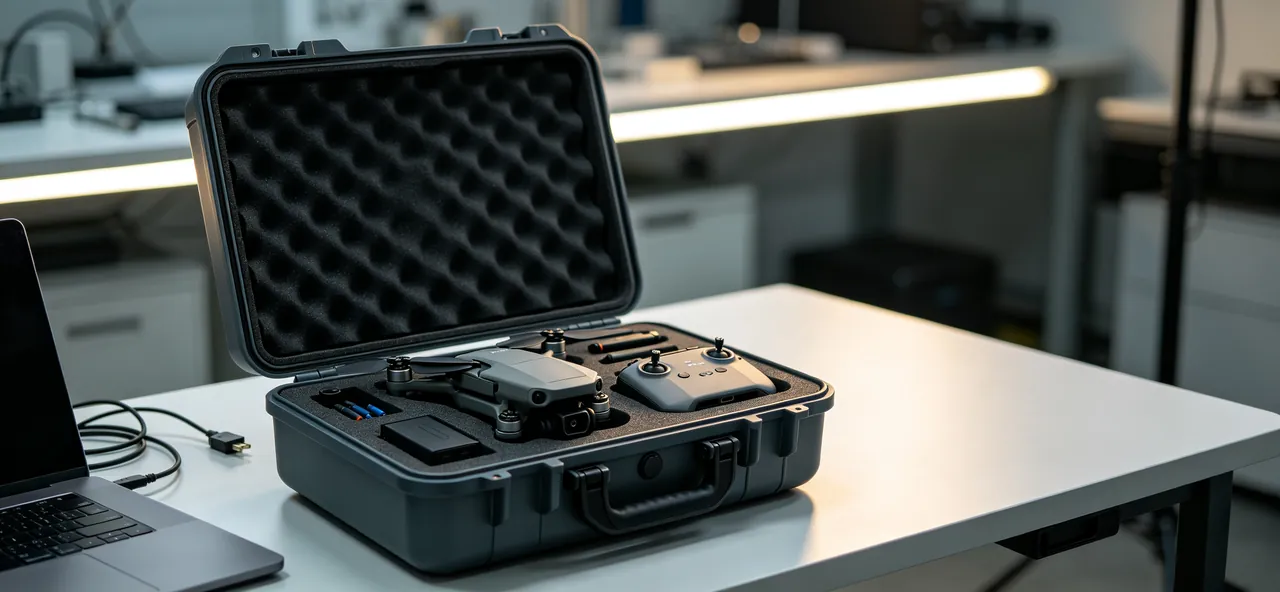
List the differences item by item so that any given substitution can be judged on its merits.
| Dimension | Original part | Substitute, general market part | Risk level |
|---|---|---|---|
| --- | --- | --- | --- |
| Dimensional accuracy | Designed to the groove, controlled tolerance | Nominal dimensions, often off when measured | High |
| Material consistency | Fixed grade, stable batch to batch | Material may not match the label | High |
| Hardness control | Set by structure with testing | Commonly too hard or too soft | High |
| Joint design | Moulded one-piece or vulcanised joint | Mechanical joint or simple butt joint | Medium to high |
| Compression set | Test data available | Usually no data | Medium to high |
| Temperature and media resistance | Matched to operating conditions | General-purpose formulation | Medium |
| Batch traceability | Batch number and production date | Usually no traceability information | Medium |
| Supply continuity | Supplied continuously by model | Depends on market stock | Medium |
| Price | Higher | Lower | - |
The most practical way to use this table is risk-tiered decision making:
- High-risk items (dimensional accuracy, material consistency, hardness control). These cannot be verified by eye or by short-term use. A deviation only surfaces after failure. If a substitute supplier cannot provide this data and test evidence, do not use it.
- Medium to high risk (joint design, compression set). If the substitute's joint process is inferior to the original, or compression set data cannot be provided, treat it as conditionally acceptable - usable in non-critical applications such as indoor dry storage, but not advisable for outdoor use, immersion, or protecting high-value equipment.
- Medium risk (temperature and media resistance, batch traceability, supply continuity). These can be partially offset by assessing the operating conditions and managing stock.
A pragmatic test: if the purpose of the replacement is to restore the original ingress protection, then the substitute must demonstrate that its dimensions, hardness and material match or are equivalent to the original design. Without that evidence, the replacement is not restoring the rating, it is changing it - and whether the changed configuration still passes a submersion verification is unknown.
A further note on compliance. An ingress protection test conclusion applies to a specific sample and a specific configuration. After replacing the gasket, strictly speaking the original test report no longer applies directly to that case unit, particularly for external delivery or regulated applications, where re-verification should be performed. For how to verify that a document corresponds to a product, see how to verify IP67 certification.
The four ways substitutes fail
A substitute rarely fails because it will not fit. It fails gradually after fitting. Four modes dominate.
One: undersized cross-section leading to insufficient compression. This is the most common and most concealed. A cross-section 0.2 to 0.5 mm undersized cannot be distinguished by eye, and the feel during assembly is not noticeably different, yet compression can fall from 25 percent to below 15 percent and no continuous closed contact band forms. It shows up as a case that keeps out water under a spray but weeps on immersion - short, low-pressure exposure holds, sustained pressure does not.
Two: excessive hardness leading to difficult closing and low-temperature cracking. A gasket that is too hard raises the force needed to close the lid, makes the latch hard to fasten, and fatigues the latch faster in service. Harder rubber also has lower toughness at low temperature and tends to crack after a cold drop. It shows up as a case that will not latch in cold weather and leaks after one cold drop.
Three: wrong material causing accelerated ageing. Substituting reclaimed or low-grade rubber for silicone or EPDM gives similar short-term performance but ages much faster under UV, ozone, heat or oil. It shows up as normal behaviour for six months, then hardening and cracking.
Four: joint failure creating a leak path. Adhesive at the joint opening, a gap in the butt face, or a mechanical joint shifting under assembly stress all create a defined break in the sealing path. It shows up as leakage in one place while everywhere else is dry - when leakage is localised like this, suspect the joint first.
| Failure mode | Surface symptom | Time to appear | Fast identification |
|---|---|---|---|
| --- | --- | --- | --- |
| Undersized cross-section | Weeps on immersion, holds under spray | Immediate to weeks | Caliper the cross-section against the original spec |
| Excessive hardness | Hard to close, cracks when cold | Weeks to months | Durometer reading, compare feel with the old part |
| Wrong material | Hardening, cracking, swelling | Months to a year | Request material and property data, run a flex test |
| Joint failure | Localised leakage | Immediate to months | Inspect the joint, run a localised immersion check |
A rule of thumb: the expensive part of a substitute is not its price, it is its delayed failure - the problem appears after the warranty period, and the user pays.
Preparation: tools, cleaners and lubricants
Preparation decides whether the job is done right first time.
| Category | Item | Purpose | Note |
|---|---|---|---|
| --- | --- | --- | --- |
| Measuring | Vernier calipers, Shore A durometer, straight rule | Measure the old part and the groove | Caliper resolution 0.02 mm recommended |
| Removal | Plastic pry bar, blunt tweezers | Extract the old gasket | Avoid sharp metal tools that score the groove |
| Cleaning | Neutral cleaner, lint-free cloth, air blower, soft brush | Remove debris and adhesive residue from the groove | Never use acetone or thinners |
| Lubricant | Silicone-based grease | Assist assembly, reduce twisting | Use sparingly; excess attracts dust |
| New gasket | Gasket matching the original specification | Replacement | Check model and batch before opening |
| PPE | Gloves | Prevent hand oils contaminating the gasket | Nitrile gloves recommended |
Three hard rules on cleaners:
- Use only neutral cleaner with water, or a dedicated rubber cleaner. Strong solvents such as acetone, thinners or strong alkalis attack the rubber surface, causing swelling or surface degradation that is invisible at first and accelerates ageing later.
- Dry thoroughly before assembly. Residual cleaner or water forms a film in the groove that prevents the gasket seating properly and can cause metal parts to corrode.
- Remove hardened adhesive residue completely. Old adhesive left in the groove forms a hard spot beneath the new gasket, lifting it and creating a leak path. Use a plastic or wooden scraper to avoid scoring the groove.
A note on lubricant: its purpose is to assist assembly and reduce twisting and friction during fitting, not to improve sealing. The quantity should be minimal - a thin film only where needed. Excess lubricant attracts dust and grit and becomes an abrasion source. Confirm compatibility with the seal material: silicone grease is usually compatible with silicone rubber and EPDM, while mineral oil based lubricants can swell some rubbers and should be avoided. Confirm compatibility against the supplier's guidance.
A note on gloves: hand oils and perspiration contaminate gasket surfaces, particularly silicone. Wear nitrile gloves and avoid prolonged direct handling of new gaskets.
A standardised replacement procedure in nine steps

Standardising the procedure raises the first-time success rate considerably at no extra cost.
| Step | Action | Control point | Common error |
|---|---|---|---|
| --- | --- | --- | --- |
| 1 | Record and photograph | Note gasket routing and joint position before removal | Removing without recording, then refitting the wrong way |
| 2 | Remove the old gasket | Pry evenly around the perimeter with a plastic tool | Scoring the groove with a sharp tool |
| 3 | Inspect the groove | Check for scratches, burrs, debris and deformation | Fitting a new part without cleaning |
| 4 | Clean and dry | Remove debris and residue with neutral cleaner, then dry fully | Using strong solvent, or assembling while wet |
| 5 | Verify the new part | Caliper the cross-section and perimeter, confirm hardness | Judging by eye that it "looks about right" |
| 6 | Trial fit and locate | Work from one point around, avoid over-stretching | Over-stretching, twisting or turning it over |
| 7 | Check around the perimeter | Confirm no twist, no lifting, joint aligned | Checking only the opening, ignoring the corners |
| 8 | Allow to relax | Let it sit before closing the lid | Closing immediately with stress locked in |
| 9 | Close and verify | Close evenly and apply the verification method | Delivering without verification |
Steps 6 and 7 are the most critical. Three problems dominate during assembly - over-stretching, twisting and fitting backwards:
- Over-stretching leaves the gasket permanently in tension, accelerating relaxation and producing a local gap after a period in service. Let the gasket seat naturally, using a little lubricant if needed, rather than forcing it.
- Twisting is the classic installation defect of round-section cord, appearing as a section turned over, creating a local bulge and dip. Twisting is hard to find by eye; run your hand progressively around the entire perimeter and feel whether the section is continuous and consistent.
- Fitting backwards happens mainly with profiled sections, for example where the flat and curved faces of a D-profile must face particular ways. A backwards gasket can look completely normal, yet the sealing lip faces the wrong way and cannot form an effective contact band under compression.
The relaxation in step 8 is often skipped. After assembly the gasket usually retains internal stress, and closing the lid immediately locks that stress into the compressed state, accelerating permanent set. A practical approach is to let the gasket sit for a period, for example 10 to 30 minutes depending on ambient temperature, before closing the lid, so the material relaxes into place.
How to verify afterwards: four test methods
Not verifying is the same as not replacing. Four methods run from simple to thorough; choose by risk level.
| Method | Procedure | Defects it finds | Suitable for | Limitation |
|---|---|---|---|---|
| --- | --- | --- | --- | --- |
| Visual and tactile check | Check routing and feel progressively around the perimeter | Twisting, lifting, joint misalignment | Every replacement | Cannot find dimensional deviation |
| Closing check | Observe gap evenness and closing force after closing | Local over-compression, uneven closing | Every replacement | Cannot confirm sealing effectiveness |
| Vacuum or pressure decay | Evacuate and observe the rate of pressure recovery | Small leak paths | Batch repair, rapid screening | Requires dedicated equipment |
| Immersion | Immerse at the agreed depth and duration, then open and inspect | Actual water ingress | Critical applications, delivery acceptance | Time consuming |
On immersion conditions: IPX7 test conditions are commonly 1 metre of water for 30 minutes, while IPX8 conditions are agreed between the parties and may be more severe. The test conditions should cite IEC 60529 or GB/T 4208 and follow the conditions agreed between the parties. For the difference between acceptance conditions of the ratings, see how to read an IP rating: acceptance conditions from IP67 to IP68.
Four verification disciplines:
- Verify under conditions close to the actual application. If the case is used at low temperature, a simple ambient-temperature immersion will not expose the brittleness of the material in the cold.
- Use opening the case as the final criterion. No water visible outside does not mean no water inside. Open the lid and check for mist, droplets or a colour change on indicator paper inside.
- Dry after verification. The case and gasket should dry fully before returning to stock, to prevent residual water causing hardware corrosion.
- Record the result. Record the replacement date, gasket batch, verification method and verdict. That record is the key evidence for judging later whether the problem was a gasket quality issue or an installation issue. For record field design, see asset numbering and QR traceability for protective cases.
On the advantage of the vacuum method: vacuum or pressure decay finds small leaks within a short time and does not require drying the case out, which makes it particularly suitable for batch repair. When servicing a hundred cases at once, use vacuum decay for rapid screening and reserve immersion for the suspect units. This two-stage screening compresses labour hours substantially without a material loss of quality.
Spare part management and traceability: model, batch and shelf life
Gasket replacement is a recurring action, so spare part management must be systematic.
First, build a gasket cross-reference by model. Every case model should map to a defined gasket specification code covering cross-section, perimeter, material, hardness and joint type. The value of this table is that when the original supplier discontinues a part or changes, an equivalent can still be found from the parameters rather than depending on one supplier's stock.
Second, batch numbers and production dates are required. Rubber parts have a storage life, and a spare without a date cannot be judged usable. Mark the arrival date at goods-in and follow first-in-first-out.
Third, set spare stock by consumption rate. Gasket consumption depends on the number of cases, the intensity of use and the replacement cycle. For the calculation of safety stock and reorder points, see how should protective case inventory be planned: setting safety stock for common specifications. Gaskets are cheap, small and short supply directly hits after-sales, so set a separate minimum stock as a proportion of complete case stock.
Fourth, separate planned repair parts from emergency parts. Planned repair parts are bought to schedule; emergency parts cover sudden failures. Keep a small quantity of high-frequency specifications as emergency stock, so that one failed gasket does not put a batch of equipment out of service.
Fifth, keep replacement records linked to the case record. Record the date, gasket batch, operator and verification verdict for every replacement. When the same batch of gaskets fails early on several cases in succession, batch traceability is the only way to define the scope of the problem quickly.
JUNZHJIA, manufactured by KeXin New Materials (Guangdong) Co., Ltd., covers protective cases, toolboxes, military specification storage boxes and waterproof junction boxes, and serves wholesale, distribution, OEM/ODM and global supply. The company can supply gaskets and other wearing parts matched by model, provide gasket cross-section dimensions with material and hardness statements, plus case drawings and accessory cross-reference tables so repair teams can verify specifications at replacement. For long-term programmes, continuous spare part supply is available, avoiding the loss of supply when a product is discontinued or revised.
Storing gaskets: storage conditions and first-in-first-out
Gaskets are a material that ages even in storage. Under poor conditions, a spare can be conforming at goods-in and out of specification by the time it is issued.
| Storage condition | Recommended requirement | Reason | Common error |
|---|---|---|---|
| --- | --- | --- | --- |
| Temperature | Cool environment, avoid heat | Heat accelerates rubber ageing and hardening | Storing in a boiler room or roof-level warehouse |
| Humidity | Dry environment, avoid high humidity | High humidity encourages mould and affects some materials | Storing in a damp basement |
| Light | Away from light, especially direct UV | UV is a leading cause of polymer ageing | Storing by a window or in clear packaging in sunlight |
| Ozone | Away from motors, welding equipment and high-voltage apparatus | Ozone causes rubber cracking | Storing in a switch room or beside workshop motors |
| Deformation | Lay flat or hang on a large-diameter support; do not fold or load | Sustained deformation creates permanent set | Folding into a small box or stacking under load |
| Contact | Avoid oil, grease, solvents and acids | Swelling and material degradation | Storing beside oil drums and cleaning agents |
| Packaging | Original packaging or sealed bag, marked with arrival date | Dust protection, contamination control, traceability | Loose bulk storage |
| Rotation | First-in-first-out | Avoid using a long-stored part | Taking whatever is on top |
On storage life: the storable period of a rubber gasket depends closely on the material type, compound and storage conditions. ISO 2230 gives general guidance on the storage of rubber products, covering temperature, humidity, light, ozone and deformation, together with the recommendation of periodic inspection. How long a specific part may be stored should follow the material supplier's advice and periodic sampling results, rather than a self-declared universal number of years. A sound management approach is to mark the arrival date and, beyond a defined storage age, run an appearance and feel check before use - looking for hardening, cracking and deformation - expanding the sample proportion if necessary.
On executing first-in-first-out: gaskets are small and cheap, so they are picked up casually and FIFO easily becomes nominal. A practical method is to store spares in the physical order of arrival batches and draw from the oldest compartment first, replenishing the newest into the newest compartment. That physical separation is more reliable than any system reminder.
A rule of thumb: a gasket usually fails not because it was used too long, but because it was stored too long. A "new part" in the warehouse may well be in worse condition than the "old part" on the case.
Frequently Asked Questions
Q: The case still leaks after replacing the gasket. What is the most likely cause?
A: Five possibilities, in order of likelihood. First, wrong dimensions: the new gasket cross-section is undersized, compression is insufficient and the contact band is not continuous. This is the most common cause and must be checked by calipering the cross-section against the original specification. Second, a groove problem: old adhesive residue, moulding flash, grit, or a groove that has become shallower through wear, all of which lift the new gasket. Third, an assembly defect: twisting, over-stretching or fitting backwards. Local twisting of round-section cord is very hard to see and requires running a hand progressively around the entire perimeter. Fourth, the problem is not the gasket: insufficient latch tension, a warped lid or a misaligned hinge all prevent even compression, and replacing the gasket will not help. Fifth, wrong material or hardness: excessive hardness prevents the gasket seating fully, or the material does not match the operating conditions. The correct troubleshooting order is closing check and groove check first, then the gasket itself, and immersion verification last.
Q: The original gasket is unavailable. Can I buy generic cord and splice it myself?
A: Technically possible, but the risk is clearly higher than using an original or equivalent part, and the application matters. Three core risks. First, dimensional consistency cannot be guaranteed: generic cord dimensions are nominal and measured deviation may fall outside the acceptable range. Second, the joint is a weak point on the sealing path: a simple butt joint or glued joint lifts easily under sustained compression and temperature cycling, creating a defined leak path. Third, material and hardness cannot be verified: generic cord labels often do not match the actual material. If a substituted approach is unavoidable, take three measures: caliper the cross-section and perimeter and compare item by item with the old part, keeping deviation within the acceptable range; prefer a vulcanised joint over a simple butt joint; and run an immersion or vacuum verification before putting the case into service. For protecting high-value equipment, for long-term outdoor use, or for external delivery, a self-spliced solution is not advisable.
Q: Should the gasket replacement cycle be set by time or by number of uses?
A: Combine both, and distinguish operating conditions. The time-based logic suits situations where ageing dominates: rubber ages naturally depending on the storage environment, and even without use, long storage hardens the gasket and creates permanent set, so time-based replacement matters more for cases stored long or used infrequently. The cycle-based logic suits situations where fatigue dominates: frequent opening and closing compresses and releases the gasket repeatedly, accelerating fatigue and permanent set, so frequently used cases suit a cycle-count threshold. In practice, take whichever comes first: set a maximum service age based on material and conditions, and a cycle-count threshold, and replace when either is reached first. Add condition-based rejection on top: if any of the five signals - hardening, cracking, permanent set, joint separation or missing material - appears, replace immediately regardless of time or count. For the full logic of ageing mechanisms and cycle setting, see how to set a silicone gasket replacement cycle.
Q: How can I quickly judge whether a gasket I bought has the right hardness?
A: The most reliable method is to measure with a Shore A durometer and compare against the original specification or the old part. Without a durometer, three substitute methods give an initial screen. First, feel comparison: place the new and old gaskets side by side and press with the thumb at the same force, comparing the speed of recovery and the depth of compression. A new part noticeably harder or softer than the old one deserves scrutiny. Second, the bend test: fold the gasket through 180 degrees and look for fine cracks or whitening at the bend. If it whitens on a single fold, the material is likely too hard or already aged. Third, the closing test: fit it and close the lid, comparing the closing force with a new case. If it is clearly harder to close, the hardness is too high or the cross-section too large. Note that these methods only screen; they cannot replace measurement. For batch purchases of substitutes, measure hardness and cross-section on a sample as a batch acceptance criterion. For batch sampling methods, see how to sample protective cases at incoming inspection.
Q: Is the original IP67 test report still valid after replacing the gasket?
A: Strictly speaking, the original report is a conclusion about a specific sample and a specific configuration. Once the gasket is replaced, the configuration has changed and the applicability of the report must be re-assessed. In practice there are three situations. First, if the replacement uses a gasket supplied by the original manufacturer with an identical specification and the assembly process is the same, the protective performance can be considered restored and re-testing is usually unnecessary, but an immersion or vacuum verification run and recorded is advisable. Second, if an equivalent substitute is used with dimensions, hardness and material verified as identical or equivalent, a verification run and record after replacement is advisable for internal quality traceability. Third, if the case is for external delivery, a regulated application or a contract that explicitly requires it, a repeat type test or verification report is necessary. The key principle is this: do not claim the case is "still IP67" without verification. For how to check that a certification document corresponds to the product, see how to verify IP67 certification.
Q: Several cases fitted from the same gasket batch fail early. How do I locate the problem?
A: This is a classic batch quality problem, and the key is to verify the gasket batch and the case batch as two separate dimensions. Step one, define the failure scope: record the case batch, gasket batch, replacement date, operator and failure symptom for every affected unit, and look for common factors. Step two, run a cross-check: if the same gasket batch fails on cases from different case batches, the problem tends towards the gasket itself; if the same case batch recovers after fitting gaskets from a different batch, the problem tends towards the case, meaning groove dimensions or latch tension. Step three, sample the suspect batch physically: measure cross-section and hardness, and run a compression set test if necessary, comparing against the original specification. Step four, pursue the supplier for the material and test records of that batch. If a gasket batch problem is confirmed, quarantine the whole batch and assess how to handle cases already fitted. This is exactly why batch traceability and replacement records must be complete - without records, the problem scope cannot be defined quickly.
Q: Should lubricant be used at all? Is petroleum jelly acceptable?
A: The correct use of lubricant is to assist assembly, not to enhance sealing, so use it as needed and in very small quantities. For a correctly fitted gasket, lubricant is often unnecessary; where the groove is tight, the gasket is long, or twisting needs to be reduced, a thin film can assist seating. On material selection, silicone-based grease is recommended, since it is usually compatible with common sealing materials such as silicone rubber and EPDM. Oil-based and mineral-based lubricants, including petroleum jelly, should be used with care, because they can swell or degrade some rubbers, EPDM in particular, and can attract dust over time to form an abrasion source. If petroleum jelly or mineral grease must be used, confirm compatibility with the seal material first and follow the supplier's advice. Pay particular attention to quantity: excess lubricant attracts grit and dust and actually accelerates gasket wear, especially in dusty outdoor environments.
Q: How do I confirm during assembly that the gasket is not twisted?
A: Twisting is the most common installation defect of round-section cord and the hardest to see. Three steps confirm it. First, the hand-slide method: run thumb and forefinger slowly around the perimeter, feeling whether the cross-section is continuous and consistent. A twisted section produces an alternating bulge and dip and the feel is clearly discontinuous. This must be done over the whole perimeter, not only at the opening and the visible parts. Second, the marking method: before assembly, mark several points around the gasket with a marker pen and, after assembly, check whether every mark still faces the same side. If a mark has turned over, that point is twisted. Third, the closing observation: without fastening the latch, lower the lid gently and look through the gap to see whether the gasket is compressed evenly. A twisted section shows uneven compression, local lifting or a gap. If twisting is found, remove and refit. Do not try to press it straight by forcing the lid closed - that locks the twist in under compression and accelerates failure. Letting the gasket relax for a period after assembly before closing also helps reduce later deformation caused by residual stress.
Conclusion and Related Reading
Back to the question in the title: how do you replace a protective case gasket? Three steps - diagnose first to confirm the problem really is the gasket, then select the right part with dimensions, hardness and material all verified, then assemble to a standard procedure and verify. The real difference between original parts and substitutes is not price but whether verifiable dimensional and performance parameters can be provided. Original parts are designed to the groove with controlled tolerances, stable batch material and traceable batch numbers. Substitutes commonly have nominal dimensions that do not match the measured value, hardness drift, inaccurate material labelling, weak joint processes and no compression set data. None of these deviations appears at goods-in; they appear afterwards, as delayed failure.
Three actions you can take immediately. First, make the nine parameters - cross-section, perimeter, groove width and depth, corner radii and lip dimensions, hardness, compression set, and material with temperature range - a mandatory checklist for gasket purchasing, and do not order when any is missing. Second, standardise replacement into nine steps, in which trial fit and location, perimeter check, and relaxation before closing are mandatory, and verify with immersion or vacuum decay while keeping a record. Third, store gaskets in physical batch order on a first-in-first-out basis and keep them away from heat, UV, ozone and oil, because a "new part" in the warehouse may not be in better condition than the "old part" on the case.
JUNZHJIA, manufactured by KeXin New Materials (Guangdong) Co., Ltd., covers protective cases, toolboxes, military specification storage boxes and waterproof junction boxes, and serves wholesale, distribution, OEM/ODM and global supply. The company can supply gaskets and other wearing parts matched by model, provide gasket cross-section dimensions with material and hardness statements, plus case drawings and accessory cross-reference tables so repair teams can verify specifications and complete the replacement verification. For long-term programmes, continuous spare part supply can be arranged, with spare specifications and replacement cycles written into the maintenance agreement.
Related Reading