

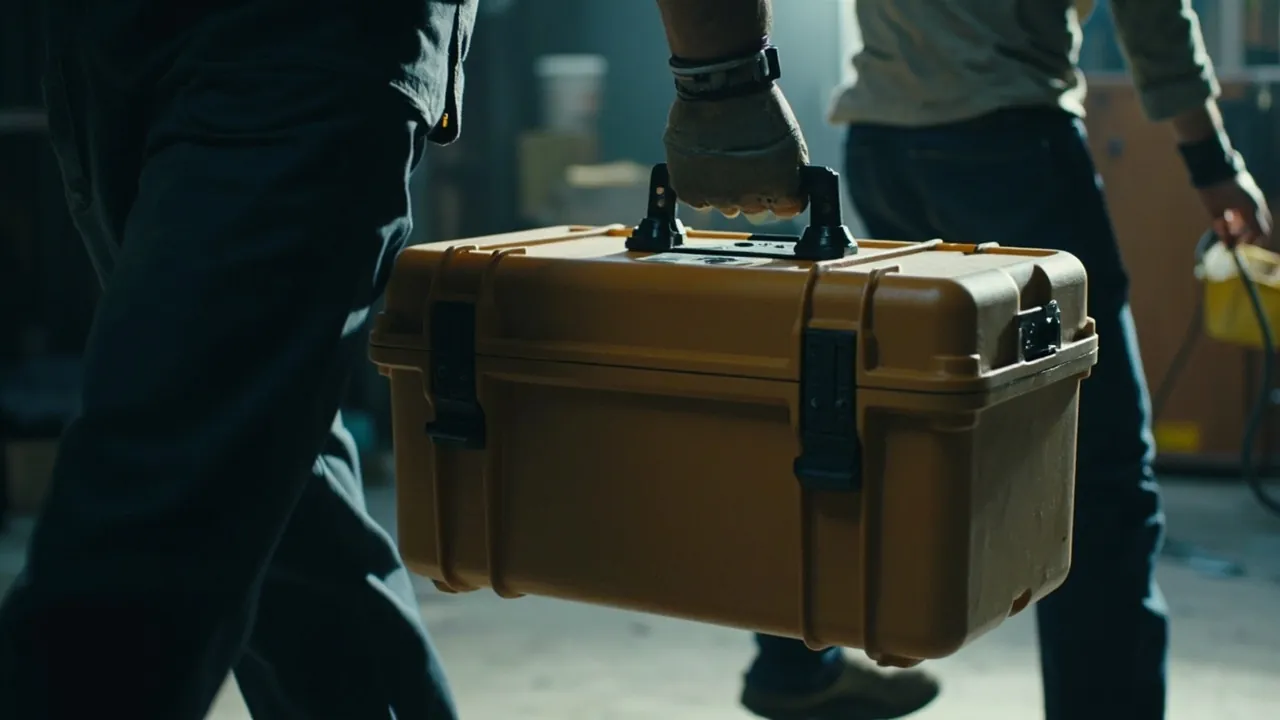
Short answer: carrying a portable toolbox comfortably is not mainly about cutting weight. It is about three things — shortening the lever arm, lowering the grip height, and keeping the centre of gravity close to your body. A 12 kg case with a central top handle, a slim profile and a carry position against the thigh can feel easier than an 8 kg case with an offset handle, a deep body that swings, and a carry position hanging out to the side. The reason is simple: when you carry something by hand your body absorbs not just weight but moment. The further the centre of gravity sits horizontally from the grip, the more the torso and shoulder must compensate to keep you upright. On top of that, the pressure distribution at the grip decides how fast your hand tires: a handle that is too narrow, too sharp-edged or too hard concentrates load onto a few lines of the palm and leaves red weals within minutes.
So the sensible way to specify a case is to treat weight, capacity and handle as one coupled system, rather than separately picking "the lightest box", "the largest capacity" and "the strongest handle". This article starts from the mechanics, then compares handle forms and materials, sets out a practical weight budget, explains how length, width and depth proportions change perceived weight, offers a decision tree between one hand, two hands and wheels, covers load management and packing order, examines how handles actually fail at the joint, explains which tests to ask for, and finishes with a requirements template for volume buying and OEM/ODM programmes.
Table of Contents
- Start with the conclusion: it is the lever arm, not the weight
- The mechanics of hand carrying: moment, grip height and forearm load
- Handle forms compared: fixed, folding, side handles and shoulder straps
- Handle materials and grip feel: PP, TPE overmoulding, metal and section shape
- A weight budget: empty case, tool load and the one-hand ceiling
- Capacity versus dimensions: how proportions decide perceived weight
- One hand, two hands or wheels: a decision tree you can run
- Managing the centre of gravity: packing order, ballast and the thigh carry
- How handles attach: integral moulding, screws, pins and failure modes
- Standards and testing: how to read lift, drop and fatigue reports
- Long distances and rough ground: straps, trolley handles and wheels
- Specification checklist and customisation: what to tell an OEM partner
- FAQ
- Closing remarks and related reading
Start with the conclusion: it is the lever arm, not the weight
Here is a counter-intuitive fact to start with: in most real situations, cutting 3 kg from a 15 kg case improves comfort less than moving the handle from an offset position to the centre, or reducing the body depth from 350 mm to 260 mm. The cost your body pays while carrying has three components:
- Vertical load — the weight itself, shared between arms, spine and legs.
- Moment load — when the centre of gravity is not directly below the grip, a moment tries to rotate the case, and your body must cancel it by leaning and contracting the muscles on the opposite side. This compensation typically costs several times more than the weight itself.
- Local pressure — the pressure distribution across the grip. The higher and more concentrated it is, the faster the hand tires and the sooner it hurts.
Components 2 and 3 are precisely the ones that design can improve, and improving them costs far less than making the case lighter with exotic materials. Concretely:
- Shorten the lever arm. Put the handle directly above the loaded centre of gravity; prefer a slim, tall body over a deep, low one, since depth converts directly into horizontal distance between the centre of gravity and your leg.
- Lower the grip height. Within structural limits, a lower handle brings the base closer to the ground and reduces swing; but do not go so low that the case strikes the ground, kerbs or steps.
- Improve pressure distribution. Widen the grip section, increase the corner radii, use a soft overmould (TPE), and eliminate sharp edges.
- Reduce swing. Carry against the thigh, walk smoothly, and avoid abrupt stops and turns, all of which cut peak load noticeably.
You can verify all of this in two minutes. Take one case, load 10 kg into it, and carry it 50 m twice: once with the weight packed on the side furthest from your body, once with it packed nearest. The second carry is clearly easier. The weight never changed; the lever arm did. That single observation is the basis for everything that follows.
The mechanics of hand carrying: moment, grip height and forearm load
It helps to put numbers on the intuition above.
The moment relationship. Moment equals force times lever arm. Let the loaded case weigh G, and let the horizontal distance from the centre of gravity to the grip be d. The hand must then supply a stabilising moment of roughly G × d on top of carrying G vertically. When d is zero — centre of gravity directly below the grip — only the vertical pull remains. At d = 150 mm, a 150 N case (roughly 15 kg) produces about 22.5 N·m, which the wrist, forearm and torso must jointly resist.
Grip height. A higher handle lifts the base further off the ground, increasing both swing amplitude and inertial effects while raising the arm and loading the shoulder. But too low is wrong as well: the case strikes the ground, steps and kerbs. A practical target is that in the carrying position the base should clear the ground by at least a few tens of millimetres, with margin for the obstacles you actually meet — thresholds, kerbs, cable runs.
Forearm and wrist load. Carrying one-handed holds the forearm flexors in isometric contraction; the longer it lasts, the faster they fatigue. A thicker grip section (within what the hand can close around) and a higher coefficient of friction both reduce the grip force required, which is exactly why an overmoulded handle is less tiring than a smooth hard one. Conversely, a section that is too thin forces a harder grip to prevent slipping, and is therefore more tiring.
Swing and dynamic amplification. Walking makes the case swing fore and aft; dynamic load can reach perhaps 1.2 to 1.5 times the static weight as a field estimate, and more on stairs or rough ground. So if the nominal weight already sits near a person's comfortable ceiling, real peaks will exceed it — which is one reason the weight budget needs margin.
| Load component | What drives it | How to improve it | Cost of improvement |
|---|---|---|---|
| --- | --- | --- | --- |
| Vertical load | Case weight plus tool weight | Fewer tools, lighter materials | High |
| Moment load | Horizontal offset of centre of gravity | Central handle, slimmer body, thigh carry | Low |
| Local pressure | Section width, radii, material | Wider section, soft overmould, no sharp edges | Low |
| Dynamic amplification | Swing, gait, terrain | Lower centre of gravity, carry close, walk smoothly | Nil |
| Endurance | Grip force required, duration | More friction, switch to strap or wheels | Low to medium |
Handle forms compared: fixed, folding, side handles and shoulder straps
The handle form decides how the case wants to be carried, and indirectly constrains capacity and stackability. Five forms are common.
1. Fixed top handle. The most common: simple, strong, cheap. Its advantages are that the grip sits over the centre of the lid and aligns with the centre of gravity easily. Its disadvantages are that it occupies top space and interferes with stacking unless it sits flush or folds away, and it snags in confined spaces. Best for small to medium cases handled frequently.
2. Folding or recessed top handle. The handle folds into a recess in the lid, leaving a flat top for stacking; standard on multi-case stacking systems. It combines carrying and stacking well, but the folding mechanism adds a moving part with wear and loosening risk, so pin material and fit clearance matter. Best where stacked transport and storage matter — see the value of stackable toolbox design.
3. Side handles. Mounted on the flanks, they suit two-handed carrying of heavy loads and sideways movement in tight spaces such as equipment aisles and pipe galleries. The drawback is a larger moment in one-handed carrying, because the centre of gravity sits away from the grip; not for long distances. Best for medium and large bodies and heavy cases moved by two people.
4. Telescopic trolley handle. Combined with wheels, this converts vertical load into ground support and is the least tiring option over distance. The costs are added weight and price, and degraded performance on soft ground, gravel and stairs. See wheeled versus conventional toolboxes.
5. Shoulder strap. Transfers load to the shoulder and torso and frees both hands. Better than wheels on uneven ground and stairs, though less convenient when you need to get into the case. The strap and its anchor points need real strength and comfort design. Best for field work, line patrols and anything involving climbing.
| Form | Effort saved | Portability | Stackability | Complexity | Typical capacity band |
|---|---|---|---|---|---|
| --- | --- | --- | --- | --- | --- |
| Fixed top handle | Medium | High | Medium | Low | Small to medium |
| Folding recessed handle | Medium | High | High | Medium | Small to medium |
| Side handles | Low to medium | Medium | High | Low | Medium to large |
| Telescopic handle plus wheels | High | Medium | Medium | High | Medium to large |
| Shoulder strap | Medium to high | High | High | Medium | Small to medium |
Selection summary: short distances with frequent access → top handle. Stacked transport → folding handle. Heavy load on smooth ground → wheels. Rough terrain or climbing → shoulder strap. Two-person moves → side handles or dedicated grab features.
Handle materials and grip feel: PP, TPE overmoulding, metal and section shape
Grip feel is the most subjective part of comfort and the most frequently neglected, but it comes down to definable engineering parameters.
PP handles, moulded integrally with the case, are the cheapest, reliably strong and weather well. The downsides are high surface hardness and a low coefficient of friction, so a fully loaded case digs into the hand and becomes painful over distance. Widening the section and increasing corner radii helps.
TPE or TPR overmoulded handles add a second shot of thermoplastic elastomer over a PP or metal skeleton. Hardness is tunable (usually quoted in Shore), friction is high, pressure spreads well, and long carries are markedly more comfortable; there is also some vibration damping. The costs are an extra process step and a higher price, and the bond strength between overmould and skeleton is a critical quality point — delamination is a common after-sales complaint. Check overmould thickness (too thin gives no cushioning), hardness (too hard does nothing, too soft wears quickly) and, above all, how the overmould is keyed to the skeleton (mechanical interlock beats simple adhesion).
Metal handles are strongest and appear on heavy and military cases. They feel cold in winter, conduct heat quickly, and dig in unless the edges are treated; they usually need a plastic or rubber sleeve. Pay particular attention to the joint to the case — if the metal is far stronger than the attachment, failure simply moves to the attachment.
Webbing or soft handles conform to the hand and take little space, but their load capacity is limited and abrasion resistance needs proving. Common on light cases or as auxiliary handles.
Section shape is an underestimated factor. A good section:
- is wide enough to spread pressure while still being graspable;
- has generous radii on the upper surface so no edge presses into the palm creases;
- has a finger-side profile with a wave or concave arc matching the fingers;
- has moderate height: too thin raises the grip force needed, too thick cannot be closed around.
| Material | Hardness and feel | Friction | Durability | Cost | Comfort verdict |
|---|---|---|---|---|---|
| --- | --- | --- | --- | --- | --- |
| PP, hard | Hard | Low | High | Low | Fair |
| PP, wide section with radii | Hard | Low | High | Low | Moderate |
| TPE overmould | Soft, tunable | High | Medium to high | Medium | Excellent |
| Metal (steel or aluminium) | Very hard | Low | Very high | Medium to high | Poor without a sleeve |
| Metal with rubber sleeve | Medium | High | High | Medium to high | Good |
| Webbing | Soft | Medium | Medium | Low | Good at light loads |
A weight budget: empty case, tool load and the one-hand ceiling
The first step in any portability exercise is to break the weight down.
Total weight = empty case (including liner and accessories) + net tool weight + consumables and spares.
The proportions vary by application, but one rule holds widely: tool weight usually dominates, while the scope for cutting empty-case weight is limited even though it strongly affects perceived effort. That is because reducing case weight usually means thinner walls and less stiffness, whereas improving moment and pressure costs almost nothing.
On the one-hand ceiling, there is no single mandatory standard for toolboxes, but ergonomics offers widely used reference methods. The NIOSH lifting equation, published by the US National Institute for Occupational Safety and Health, is a standard tool for assessing manual handling risk in the workplace. It produces a recommended weight limit under ideal conditions — load held close, moderate lift height, good coupling, low frequency — and then applies reductions as the lever arm grows, frequency rises, height becomes unfavourable or the coupling deteriorates. It was written for workplace lifting assessment, but its central lesson transfers perfectly to toolbox selection: the limit depends on how you carry, not only on what you carry.
Translated into practice:
- One-handed, short distance, level ground (tens of metres): comfortable up to roughly the ten-kilogram mark for most people. Beyond that, people start switching hands, resting the case on the thigh, or supporting the base with the other hand.
- One-handed over longer distances, or on stairs: clearly below the short-distance figure; consider a strap or wheels first.
- Two-handed: materially higher, but the case needs side handles or base grips, and pairs need to account for height differences and synchronised pace.
- Mixed workforces and long shifts: specify to the lower figure, and say so in the purchasing standard, rather than designing around the strongest person on the crew.
| How it is carried | Distance and terrain | Indicative weight band | Recommended handle form |
|---|---|---|---|
| --- | --- | --- | --- |
| One hand, short | Level, up to 50 m | Around 10 kg | Top handle, overmoulded |
| One hand, medium | Level, 50 to 200 m | Below 10 kg | Top handle plus strap option |
| One hand, long | Stairs, ramps | Clearly lighter | Strap preferred |
| Two hands | Level, short | Materially higher | Side handles plus base grips |
| Rolling | Smooth ground, long | Tens of kg | Telescopic handle, large wheels |
| Off-road | Uneven, climbing | Light first | Strap plus compact body |
These are field estimates, not regulatory limits. Real selection should account for who is doing the work, how often, and the applicable occupational health and safety rules in your jurisdiction. For volume purchases the safest method is to let actual users trial a sample case loaded with real tools over a real route before signing off.
Capacity versus dimensions: how proportions decide perceived weight
Capacity and portability are naturally in tension. But at equal capacity, different proportions feel completely different.
The core principle: at a given capacity, minimise the dimension that runs away from your body. That dimension, the body depth, determines:
- the horizontal distance from the centre of gravity to your leg when carrying one-handed, which is the lever arm;
- whether the case can be carried against the thigh at all;
- whether it passes through narrow aisles, between racks, or inside pipe galleries.
For example, take two cases of equal volume: A at 500 × 300 × 250 mm and B at 400 × 350 × 270 mm. A is slimmer, hugs the leg better and passes more easily; B is closer to a cube, marginally more efficient on a shelf, but carries with a longer lever arm.
Length governs passage and swing inertia. A body much beyond 600 mm starts catching on things in tight spaces and shows pronounced end swing while walking. If you must carry long items — spirit levels, long spanners, conduit — consider a diagonal internal layout or a separate external long pocket rather than stretching the whole case.
Height governs centre-of-gravity height and stability. Too tall raises the centre of gravity and increases swing, but increasing height moderately while trimming depth and length usually improves thigh carry at constant capacity. Height also decides how many internal layers you can run, and generous height lets you adopt a multi-tray layout, which lifts space utilisation substantially — see multi-layer internal compartment design.
Indicative proportions for a one-hand-portable medium case:
- Depth: set by whether it can be carried against the leg; typically not more than about 300 mm.
- Length: set by how the longest tool is laid out; avoid excess.
- Height: balance capacity against centre-of-gravity height; often kept in the order of the length or below.
Capacity itself has established calculation methods, covered in the toolbox capacity guide and how to choose a toolbox size, both of which argue for working backwards from the tool list rather than buying the next size up. One addition from a portability standpoint: size the case for the tools you must carry every day, not for every tool you might conceivably need. Splitting low-frequency tools out is the cheapest and most effective weight reduction available.
| Dimension | Main effect on portability | Direction |
|---|---|---|
| --- | --- | --- |
| Depth (away from body) | Largest lever arm, decides thigh carry | Make it as small as possible |
| Length (side to side) | Passage, swing inertia | Control it; stow long items diagonally or externally |
| Height (up and down) | Centre of gravity, stability, number of layers | Increase moderately to buy depth reduction |
| Radii and protrusions | Snagging, knocks | Large radii, recessed handles and latches |
One hand, two hands or wheels: a decision tree you can run
The analysis above condenses into a decision tree you can work through in order.
Step one: estimate the loaded weight. Weigh the tool list item by item, including liner, chargers and batteries. Use the real total, not the question "how much does this box hold".
Step two: classify distance and terrain.
- Short (tens of metres), level, no stairs → go to step three.
- Long, or involving stairs → prioritise a strap or wheels.
- Soft, gravel, muddy or climbing terrain → wheels degrade; prefer a strap plus a lighter body.
Step three: choose the carry mode by weight.
- Up to roughly the ten-kilogram mark → one hand and a top handle; require an overmould, a wide section and a central position.
- Above the one-hand comfort figure but still short moves → two hands; require side handles or base grips.
- Twenty kilograms and up on smooth ground → wheels with a telescopic handle.
- Moderate weight on rough ground → shoulder strap.
Step four: confirm passage constraints. Check aisle widths, door openings, vehicle boot dimensions and shelf heights. Many "right case, wrong outcome" stories are passage problems, not weight problems.
Step five: confirm stacking and storage. If stacking is needed, the handle must fold or sit flush. If it goes on racking, the base needs adequate bearing area and anti-slip features.
Step six: trial it. Load the case with real tools and have an actual user walk a complete route, including in and out of a vehicle, up and down stairs and through doorways, before signing off. This step catches nearly everything that a paper specification misses.
Managing the centre of gravity: packing order, ballast and the thigh carry
Even a well-chosen case carries badly if it is packed badly. Four practical rules:
Rule one: heavy items low, light items high. Lowering the centre of gravity cuts swing and moment fluctuation, and stops heavy tools crushing lighter ones below. In a multi-tray layout, the heaviest items — rotary hammers, spanner sets, socket sets — belong in the bottom tray.
Rule two: heavy items on the side nearest the body. For one-handed carrying, packing weight against the leg shortens the lever arm. This matters most on wide cases.
Rule three: eliminate internal movement. Tools sliding about cause sudden shifts in the centre of gravity and impact loads, which is both tiring and damaging. The fix is to fix every item in place with a contoured liner or adjustable dividers so the centre of gravity stays constant throughout the carry. The requirements this places on the liner are discussed further in selecting toolbox interior foam.
Rule four: balance left and right. For two-handed carries and rolling cases, keep the load laterally symmetric, since chronic one-sided loading distorts the case and wears wheels unevenly.
The thigh carry is the most useful field technique: let the side of the case rest lightly against the thigh and use forearm and thigh together to damp swing, bringing the centre of gravity's projection closer to the body. It costs nothing and noticeably reduces lumbar compensation. One caveat: if the outer shell has sharp edges, protruding latches or rough flash, the thigh carry becomes uncomfortable or abrasive, so external smoothness is part of portability design too.
Two habits help as well: plan the route to cut unnecessary carrying distance, and use trolleys, racking and tool carts to demote hand carrying to short transfers. In industrial maintenance toolbox configurations, that systems approach pays back far more than choosing a marginally better box.
How handles attach: integral moulding, screws, pins and failure modes
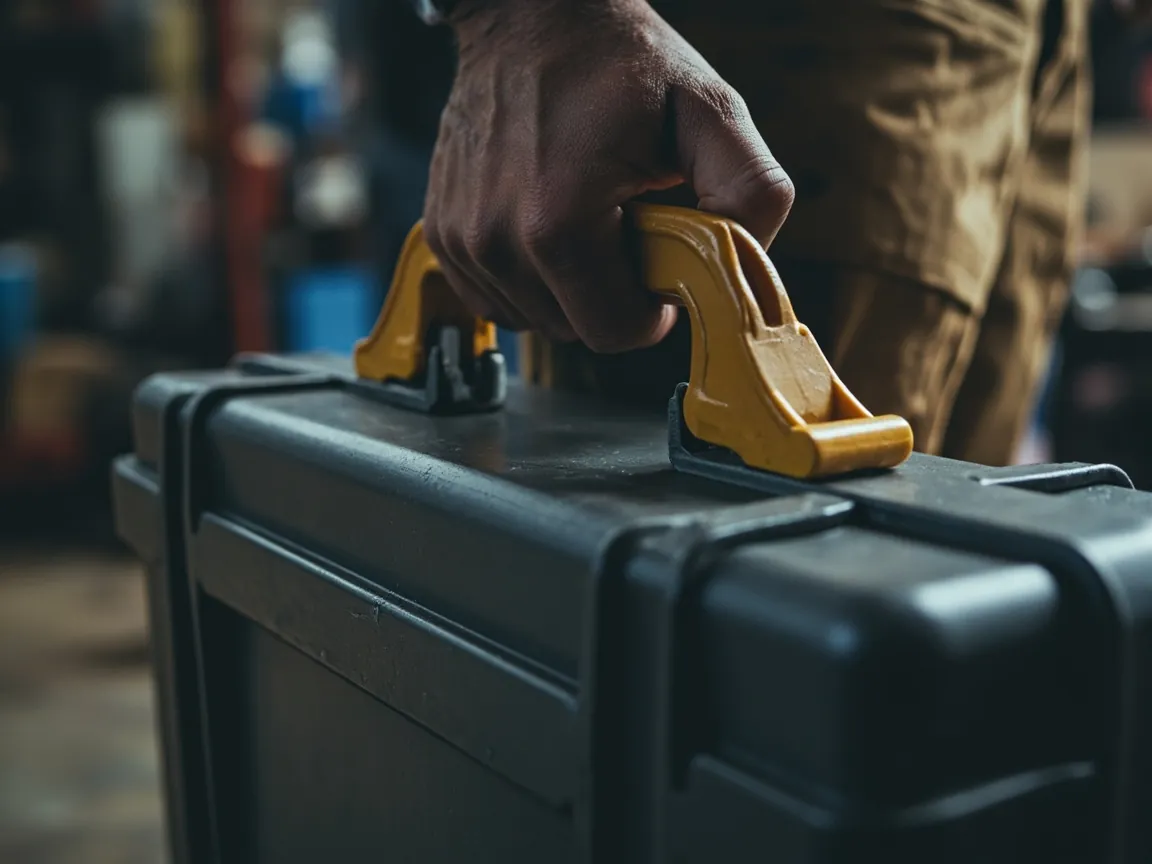
The strength of the handle itself is rarely the bottleneck. The joint between handle and case is. Four common attachment methods:
1. Moulded integrally with the case. Handle and lid produced in one shot: no assembly, no fasteners to loosen, lowest cost. Limitations are wall thickness and material choice, plus draft constraints on the shape; damage usually means replacing the whole part. Suits small and medium cases and cost-sensitive programmes.
2. Screwed or riveted. A separate handle assembly fixed to the body. This allows stronger materials — metal, glass-filled plastic — and individual replacement, but introduces fastener loosening, corrosion, and stress concentration plus a potential leak path at the fixing holes. That last point matters a great deal on a waterproof case. Requirements: anti-loosening measures (spring washers, threadlock, lock nuts), fastener material compatible with the body to avoid galvanic corrosion, and a sealing design at the holes.
3. Metal hinge pins. Used on folding handles: smooth action, good load capacity. Risks are pin wear, corrosion and stress concentration at the bore. Requirements: stainless pins, self-lubricating bushes, grease at assembly, and pin inspection on the maintenance list.
4. Snap-fit or slot-in. Fast assembly without tools and easy replacement. The risk is loosening under sustained vibration, and the clip itself has a fatigue life. Suitable for light loads or auxiliary handles; heavy-duty applications need a secondary lock.
| Failure mode | Typical cause | Countermeasure |
|---|---|---|
| --- | --- | --- |
| Fracture at the handle root | Insufficient wall, no root radius, notch-sensitive material | Larger root radius, ribs, tougher grade |
| Fasteners loosening | Vibration, no anti-loosening feature | Spring washers, threadlock, periodic re-torque |
| Cracked fixing holes | Excessive torque, thin bosses | Torque control, thicker bosses, inserts |
| Seized or worn pins | Wrong material grade, no lubrication | Stainless pins, self-lubricating bushes, regular lubrication |
| Overmould delamination | Insufficient bond area, no mechanical interlock | Add interlock features, optimise the second shot |
| Leaking fixing holes | No sealing design | O-ring or gasket, assemble from the inside |
Waterproof cases add one further constraint: handle fixing holes are potential leak paths. Their handle design therefore has to trade replaceability against sealing integrity, typically by using an integral mounting boss with a gasket and fastening from the inside, or by moulding the handle integral with the shell. This is developed further in hinges, latches and sealing structures.
Standards and testing: how to read lift, drop and fatigue reports
To turn "the handle is very strong" into a verifiable clause, refer to a handful of established test types.
Lift and carry cycling. Simulates repeatedly picking up and setting down a loaded case. The usual method is to load the case to its rated capacity and run a specified number of lift cycles through the handle, then examine handle, attachment and body for cracks, permanent deformation or loss of function. When specifying, state the applied mass (either rated capacity or a stated multiple of it), the cycle count, and the acceptance criterion (no cracking, no permanent set, still serviceable).
Drop testing. Assesses integrity after an accidental drop. Transit packaging tests commonly reference the ISTA series of procedures, graded by weight and mode; protective case products also frequently cite drop heights and retention of sealing after the drop. Specify drop height, attitude (face, edge, corner), loaded or unloaded state, and post-drop acceptance, including whether the ingress rating must still hold.
Fatigue and cycling. For moving parts such as folding handles and latches, run a specified number of open-close cycles and assess wear, loosening and retained function. Ask suppliers for cycle-life data on moving parts.
Static load testing. Apply a specified static load to the handle and hold it for a set period, then check for permanent deformation or failure. This is the simplest test to reproduce and the easiest to verify.
Making grip comfort objective. Comfort is subjective, but it can be constrained indirectly with measurable parameters: width and corner radius of the grip section, Shore hardness of the overmould, and bond strength between overmould and skeleton (peel or pull-off testing).
| Test type | Situation simulated | Key parameters | Typical acceptance |
|---|---|---|---|
| --- | --- | --- | --- |
| Lift cycling | Repeated pick up and set down | Load, cycles | No cracks, no permanent set |
| Drop | Accidental fall | Height, attitude, load | Structure intact, sealing retained |
| Open-close fatigue | Latches and folding handles | Cycle count | Functional, no loosening |
| Static load | Overload suspension | Load, hold time | No failure, no significant deformation |
| Salt spray on metal parts | Coastal service | NSS / AASS / CASS duration | Per agreed criterion |
Three general rules for reading any report: check that the specimen matches what is delivered (with or without holes, with or without overmould); confirm whether testing was loaded or empty; and make sure the acceptance criterion is written down. Those three checks filter out most reports that look impressive but prove nothing. Related test methods and documentation are also covered in high-strength protective case structures.
Long distances and rough ground: straps, trolley handles and wheels
Once the distance exceeds a few tens of metres, or the ground stops being flat, optimising the handle alone is not enough. You need a system.
Option one: shoulder strap. Moves load from hand and forearm to shoulder and back. Right for stairs, ramps, field work and situations where you need both hands to climb. Points to watch: anchor positions must stop the case banging your leg while walking; anchor strength must be verified separately, since it is the classic weak point of strap systems; the strap needs adequate width and padding; a detachable design is more flexible and does not affect stacking or storage.
Option two: wheels plus a telescopic handle. The best answer over long distances on smooth ground. Points to watch: wheel diameter is the critical variable — larger wheels cross gaps, gravel and cables far more easily, at the cost of bulk; tyre material and bearings decide performance and life on rough surfaces, with rubber-like treads quieter and grippier indoors and harder compounds more wear resistant; the trolley handle needs real stiffness and reliable locking, since flex makes the case hard to control; and where stairs are involved, efficiency drops sharply, so check for an auxiliary carry handle. See wheeled versus conventional toolboxes and industries served by trolley toolboxes.
Option three: modular split cases plus consolidated transport. If the total tool load is large, splitting it across two moderate cases is often easier and more flexible than one big one: leave one in the vehicle and carry only what the task needs. The cost is managing two liners and two inventories.
Option four: handling equipment. Trolleys, tool carts, racking, lift tables. In fixed yards and workshops this kind of investment usually pays back quickly, because it converts carrying from a human task into an equipment task.
| Scenario | Primary recommendation | Alternative | Key watch point |
|---|---|---|---|
| --- | --- | --- | --- |
| Level ground, over 200 m | Wheels plus trolley handle | Trolley | Wheel diameter versus surface |
| Stairs, multi-storey | Shoulder strap | Split the load | Anchor point strength |
| Off-road, hills, patrols | Strap plus compact body | Backpack style | Centre of gravity close to the back |
| Fixed workshop area | Tool cart or trolley | Wheels | Aisle width |
| Vehicle shuttle plus short walk-in | Top handle plus split load | Wheels | Boot dimensions |
| Stacked storage required | Folding handle plus wheeled tote | — | Flat top surface |
Specification checklist and customisation: what to tell an OEM partner
Finally, here is a requirements template you can use directly.
1. Load conditions
- Loaded total weight (kg): ______ (measured from the real tool list, including liner, batteries and chargers)
- Rated capacity required (kg): ______
- Is overload permitted: ______
2. Carry modes (select all that apply)
- One hand by the top handle / two hands by the sides / shoulder strap / rolling / two-person
- Typical carry distance (m): ______
- Terrain: level floor / stairs / ramps / gravel / mud / climbing
3. Handle requirements
- Form: fixed top / folding recessed / side / telescopic / strap anchors
- Material and overmould: PP / TPE overmould (Shore hardness: ______) / metal with sleeve
- Section: minimum width ______ mm, corner radius not less than ______ mm
- Special requirements: replaceable / flush with the top / with strap anchors / cushioned
4. Dimensions and capacity
- Maximum external dimensions (L × W × H, mm): ______
- Passage constraints (aisle width, door openings, boot dimensions): ______
- Longest tool to be accommodated: ______ mm
- Capacity required (L): ______
5. Structure and testing
- Lift cycle count and load: ______
- Drop height and attitude: ______
- Open-close fatigue cycles: ______
- Metal part material grade and salt spray requirement: ______
- Third-party report required: ______
6. Other
- Stacking, racking, marking, colour, flammability class (UL94), ingress rating (IP)
Sending that list to a supplier is far more effective than asking for "a portable, sturdy toolbox". On OEM/ODM programmes, JUNZHJIA normally begins by asking for the tool list and a description of the working route, then proposes body dimensions, interior layout and handle form to match, and provides fully loaded samples for hands-on trial at the prototype stage. For volume programmes, matched spares such as handles, overmoulded parts and pins can be supplied by model, together with the corresponding test documentation.
FAQ
Q: Is a lighter toolbox always better? A: Not necessarily, because lightness has a price. Weight reduction comes through three routes: thinner walls, lower-density material, or a smaller body. The first two reduce structural stiffness and impact resistance, which makes distortion, flange warping and latch failure likelier under drops, stacking and vehicle vibration — and those are exactly the properties that the ingress rating and service life rest on. The third sacrifices capacity. From an ergonomic standpoint, weight is only one component of load; moment and local pressure matter just as much, and improving those costs almost nothing. Putting the handle above the centre of gravity, slimming the body depth, widening the grip section and adding a soft overmould usually save more effort than shaving a kilogram off the shell. The sensible sequence is to fix the necessary capacity and load rating from the tool list, then balance stiffness, weight and cost. For frequent long moves, cutting the tool list and splitting the load is more effective than buying a thinner, flimsier case.
Q: Is a centred handle always the least effort? A: For one-handed carrying with a laterally symmetric load, a handle directly above the centre of gravity does minimise moment, and that is the ideal. Three caveats, though. First, "centre" means the centre of gravity in the loaded state, not the geometric centre of the moulding. If the contents are unevenly distributed, the two are not the same, so the more reliable move is to fix the packing — heavy items nearest the body, balanced left and right — rather than only looking at handle position. Second, multiple handles often beat one well-placed handle: a top handle for short moves, side handles for two-handed carrying, and base grips for pulling the case out of a vehicle cover three distinct actions and save more effort in practice than one correctly located handle. Third, handle position has to yield to stacking, storage and passage constraints. A folding recessed handle gives up a little grip height but returns a flat top and far better stacking, which is a net win wherever cases travel in stacks. The test is therefore "minimum moment in the dominant action", not "is the handle literally in the middle".
Q: Why does an overmoulded handle feel so much better? A: Two factors: pressure distribution and coefficient of friction. A hard plastic handle is narrow and inelastic, so under load the pressure concentrates on a few palm creases and the bases of the fingers; local pressure is high and red weals or numbness appear within minutes. A soft overmould, usually TPE or TPR, deforms elastically under load, contact area grows substantially, pressure falls, and both pain and fatigue drop. The second factor is friction: an overmoulded surface has a much higher coefficient of friction than smooth hard plastic, so less grip force is needed, and grip force is itself a sustained load on the forearm flexors — less grip force means the forearm tires later and the hand stays relaxed instead of constantly correcting slips. The overmould also damps some impact from walking. Note that the benefit depends on two parameters: too thin gives almost no cushioning, too hard approaches bare plastic, and too soft wears quickly and tears. Ask suppliers for the Shore hardness and the overmould thickness, and confirm how the overmould is keyed to the skeleton, since mechanical interlock beats plain adhesion.
Q: How much can one person carry one-handed, and is there a standard? A: There is no mandatory standard specific to toolboxes, but ergonomics offers widely used reference methods. The NIOSH lifting equation, from the US National Institute for Occupational Safety and Health, is a standard tool for assessing manual handling risk at work. It does not produce a single fixed number; it gives a recommended limit under ideal conditions — load close to the body, moderate height, good coupling, low frequency — and then reduces it as lever arm, frequency, lift height and coupling get worse. That central lesson transfers directly: the limit depends on how you carry, not only on what you carry. In practice, one-handed carrying on level ground over tens of metres is comfortable up to roughly the ten-kilogram mark for most people; beyond that, people start switching hands or resting the case on the thigh. Reduce the figure for longer distances, stairs or ramps. Two-handed carrying allows materially more, provided the case has side handles or base grips. These are field estimates rather than legal limits; real selection must account for the workforce, task frequency and applicable occupational safety rules. The safest approach is to have actual users walk a real route with a sample case loaded with real tools before committing.
Q: Is a wide, flat case or a narrow, deep one easier to carry? A: All else being equal, the slim-tall shape beats the deep-short one — provided "slim" refers to the dimension running away from your body. In one-handed carrying, that depth sets the horizontal distance from the centre of gravity to the leg, which is the lever arm: the deeper the case, the harder it is to carry against the thigh, the larger the moment and the more the lower back compensates. Hence one core rule of portable design: at constant capacity, minimise the dimension running away from the body. But width cannot grow without limit either. Length side to side hurts passage through narrow aisles, doorways and rack gaps, and increases the swing inertia of the ends while walking. So the precise statement is: reduce depth first, add height moderately to recover capacity, and keep length within what the longest tool actually needs. That is why many portable cases use a flat-tall profile rather than a deep-short one. If you genuinely need long items, lay them out diagonally inside or give them a separate external pocket rather than stretching the whole case.
Q: Tools sliding around inside is only a noise problem, surely? A: No, there are three real effects. First, shifting centre of gravity and dynamic amplification: sliding contents move the centre of gravity continuously, and your body has to keep correcting, which is far more tiring than a fixed load; the impacts also add to the static weight as peak loads, especially on stairs or rough ground. Second, damage to tools and case: metal tools striking each other chip cutting edges, damage threads and knock gauges out of tolerance, while the interior takes dents and eventually cracks. For precision instruments, repeated small shocks can be worse than one large one. Third, liner and divider life: continuous back-and-forth fretting wears the liner and loosens dividers. The fix is to immobilise every item: contoured EVA cavities, adjustable dividers clamped tight, or elastic retaining straps. The test is simple — load the case, lift it and rock it gently; there should be no sense of movement and no knocking. This also bears directly on space utilisation, discussed in multi-layer internal compartment design.
Q: Do wheeled toolboxes work well on construction sites? A: It depends entirely on the ground. On smooth hard surfaces — workshop floors, warehouses, platforms, paved roads — wheels are clearly better: the ground carries the vertical load, long moves cost least effort, and you can bring more tools in one trip. On the surfaces typical of construction sites, performance drops sharply. Soft mud lets small-diameter wheels sink. Gravel and rebar ends jam or cut the tread. Rough concrete accelerates wear and produces heavy vibration. Stairs and ladders rule wheels out almost entirely. There are also two hidden costs: the wheels and handle add weight and bulk, worsening passage through boots and tight spaces, and a flexible handle makes the case hard to control. On rough sites, a strap plus a compact body, or splitting the load, is usually the safer choice, with wheels reserved for areas with good ground. Compare wheel diameter (larger crosses obstacles better), tyre compound (rubber-like grips and runs quieter, harder compounds last longer), bearing quality, and handle stiffness and lock reliability.
Q: How can I tell whether a handle is strong enough, and what tests can I ask for? A: Work through three levels — the handle itself, the joint, and the mounting area of the shell — because the last two are where failures actually start. Ask for static load testing (apply a specified load, hold it for a set period, check for failure or permanent set); lift cycling (load to rated capacity, run a specified number of lift-and-set-down cycles through the handle, then inspect handle, joint and shell for cracks, permanent set or loss of function); drop testing (state height, attitude and load, and check afterwards whether structural integrity and the ingress rating are retained; transit work can reference the ISTA series); and open-close fatigue for folding handles and latches, with a stated cycle count and checks for wear, loosening and retained function. Metal parts can also carry a salt spray requirement to ISO 9227, stating the method (NSS, AASS or CASS) and the acceptance criterion. When reading reports, check three things: that the specimen matches the delivered configuration, that the test was loaded rather than empty, and that the acceptance criterion is written down. Best of all, write load, cycle count and acceptance criteria into the contract instead of asking for "a strong and reliable handle".
Q: When specifying a custom case, what should I confirm about the handle? A: Confirm four things — load, action, dimensions and testing — rather than simply picking a style. Load: give a measured loaded weight including liner, batteries and chargers, not a rough guess; that number drives handle material, section and joint design. Action: describe how it will actually be used — one hand over a short distance, two-handed, shoulder, rolling — plus typical distances and terrain. Different actions call for different handle forms and counts, and combinations are often right: a top handle, side handles and strap anchors together. Dimensions and passage: give the maximum external envelope, the longest tool that must fit, and aisle, doorway and boot dimensions; these constraints often rule a design out before weight does. Testing and acceptance: state lift cycle count and load, drop height and attitude, fatigue cycles, metal grade and salt spray requirement, and whether a third-party report is needed. It is also worth confirming spares availability and replacement intervals for consumables such as overmoulded parts, pins and fasteners. Written as a list and sent to suppliers, that is far more effective than describing "a nice sturdy easy-to-carry box".
Closing remarks and related reading
To answer the title: the least effort comes from treating weight, capacity and handle as one coupled system and optimising first the things that cost almost nothing. Reducing weight helps, but it is bought with stiffness, capacity and money. By contrast, putting the handle above the loaded centre of gravity, slimming the body so it carries against the thigh, widening and softening the grip, immobilising the contents with a contoured liner, and choosing correctly between one hand, two hands, a strap and wheels according to distance and terrain — all of these share the same profile: very low cost, very high return.
Three recommendations for buyers and engineers. First, weigh the tools before choosing the case: let the real loaded weight and the real route decide, not the impression that a box looks big enough. Second, specify for the dominant action rather than the peak capability — if a case is carried one-handed for thirty metres ninety per cent of the time, optimise for that, and do not sacrifice daily comfort for the ten per cent of heavy moves. Third, write requirements as verifiable clauses — load, cycle count, drop height, acceptance criteria — and demand reports that match the configuration you are actually buying. On OEM/ODM and volume programmes, JUNZHJIA typically starts from the tool list and the working route, matches body dimensions, interior layout and handle form to them, and provides fully loaded samples at prototype stage so that "easy to carry" gets demonstrated on a real route rather than asserted on a specification sheet.
Related reading