


The problem a 3D-printed part case solves is not the same as the problem a machined-part case solves. The short answer: the most common shipping failures for additive manufacturing parts are not "shattered" parts. They are local buckling of thin walls, delamination at the root of cantilever features, compression marks on finished surfaces, and dimensional drift caused by moisture absorption. The core requirement is therefore not "make the case harder" but "place restraints where stiffness exists, make the contact surfaces compliant, and hold the internal environment inside a controlled band." Acceptance should cover IEC 60529 / GB/T 4208 ingress protection ratings, ISTA and GB/T 4857 transport test methods, and, at material level, UL94 flame retardancy and antistatic targets.
Parts produced by laser powder bed fusion (LPBF) in metal, selective laser sintering (SLS) in nylon, stereolithography and digital light processing (SLA/DLP) in resin, binder jetting (BJ) and fused deposition modelling (FDM) behave very differently under transport loads. Metal LPBF parts are strongly anisotropic, and tensile strength and elongation in Z (the build direction) are typically lower than in XY. SLS nylon parts are tough but change dimension slowly as they absorb moisture. SLA resin parts hold fine detail but are brittle and poor at absorbing impact. Thin-wall features between roughly 0.8 and 2 mm buckle locally under concentrated lateral load. Moving these parts from the print shop to a finishing house, an assembly line or a customer requires case design that accounts for each of these differences. This article is written for additive manufacturing process engineers, quality engineers and logistics procurement teams. It provides structural selection guidance, insert parameters, standards references and an acceptance checklist.
Table of Contents
- 1. Where the Vulnerability of a 3D-Printed Part Comes From
- 2. The Transport Risk Map: Vibration, Shock, Temperature, Humidity and Static
- 3. Six Design Elements of a Printed-Part Transport Case
- 4. Comparing Insert Approaches: From Contour Fit to Multi-Point Support
- 5. Support Strategies for Thin Walls and Cantilever Features
- 6. Surface Protection: Scratches, Compression Marks and Residual Powder
- 7. Anisotropy and Interlayer Strength: Packing by Build Orientation
- 8. Static and Cleanliness: Contamination Sensitivity by Material
- 9. Temperature, Humidity and Dimensional Stability
- 10. Sealing Levels and Shell Ingress Protection
- 11. Single Parts and Small Batches: Reconfigurable Inserts
- 12. Volume Handling: Palletisation and Stacking Design
- 13. Standards Reference: ISTA, GB/T 4857 and ASTM D4169
- 14. Pre-Shipment Inspection and Acceptance Points
- 15. Common Misconceptions and Engineering Recommendations
- Frequently Asked Questions
- Conclusion and Further Reading
1. Where the Vulnerability of a 3D-Printed Part Comes From
Understanding failure modes is the prerequisite for designing the right packaging. Transport failures in printed parts fall into four categories.
Category one: local buckling of thin walls. Ribs, heat-dissipating fins and lattice structures with wall thickness around 1 mm do not simply break under lateral compression. They first lose stability elastically and then deform permanently. The deformation is sometimes visually subtle, yet it is enough to shift assembly holes out of position or stop a sealing face from seating. The failure threshold is usually far below that of a solid part in the same material.
Category two: interlayer delamination. In LPBF and FDM parts, the bond between layers is weaker than the bulk material. When a part in a cantilever orientation receives an impact perpendicular to the layer plane, a crack propagates along the interlayer interface. The result looks like "nothing visibly hit it, but the root has cracked." Packing orientation and the direction the part faces inside the case are therefore design variables.
Category three: surface compression marks and scratches. Mating faces after finishing, optical mounting surfaces, seal grooves, plated or anodised surfaces will develop marks and abrasion the moment they contact a hard insert, or another metal part, and are then rubbed repeatedly by vibration. These defects are frequently unrepairable.
Category four: dimensional drift from moisture absorption. Nylon (PA12, PA11, PA6) and some resin parts absorb water from their surroundings, swelling slowly and changing mechanical behaviour. If a part is not properly dried before packing, or if humidity inside the case is not controlled, dimensional inspection on arrival may fall out of tolerance even though transport shock was not the cause.
Each failure mode maps to a design response: restraint location, part orientation, contact surface material, and internal humidity. Treating the transport case as a protective structure rather than a container is the starting point of this design methodology.
2. The Transport Risk Map: Vibration, Shock, Temperature, Humidity and Static
The loads a part actually experiences in a logistics chain differ substantially from a single laboratory drop test.
Vibration. Road transport vibration energy is concentrated at low frequency. Pavement excitation, engine and suspension effects together produce continuous relative motion between the part and its supporting structure. The danger is not a single amplitude but resonance and fretting wear. If the natural frequency of the part approaches that of the packaging system, amplitude is amplified. If contact faces slide back and forth by only a fraction of a millimetre, the accumulated effect over many hours produces friction debris and surface damage.
Shock. Handling drops, parcel-line throws and impacts inside a vehicle are the main sources. The direction of impact is largely unpredictable, so packaging design should provide an effective energy absorption path in all six directions rather than only designing cushioning for the vertical axis.
Temperature and humidity. High temperature and high humidity inside a shipping container are the most underestimated factors. A closed cargo space in summer can run significantly hotter than ambient, and long sea freight sees much larger humidity swings. For resin parts, elevated temperature can drive post-curing or softening and deformation. For nylon parts, humidity directly determines dimensions. For hybrid assemblies that contain metal inserts or bonded joints, differences in thermal expansion generate internal stress.
Static and contamination. For parts with integrated electronics, sensor packages, optical surfaces or functional coatings, electrostatic discharge and particulate contamination both cause functional failure. These failures do not always appear when the case is first opened.
The table below maps risk sources to design responses.
| Risk source | Typical manifestation | Key influencing factors | Design response |
|---|---|---|---|
| --- | --- | --- | --- |
| Sustained vibration | Fretting wear, debris, loosened threads | Natural frequency of the packaging system, contact hardness | Compliant contact faces, preload, avoid hard-on-hard contact |
| Handling drops | Local dents, interlayer cracks, detached inserts | Drop height, landing orientation, cushion travel | Six-face cushioning, reinforced corners, wrapping insert |
| Temperature and humidity | Moisture swelling, softening, bond failure | Cargo space temperature, sea freight humidity, moisture content at packing | Sealing, desiccant, temperature and humidity logging |
| Electrostatic discharge | Electronic failure, coating pinholes | Surface resistance of contact material, grounding path | Static-dissipative insert, grounding terminal |
| Particulate contamination | Optical surface scratches, cleanliness non-conformance | Insert shedding, residual powder in the case | Low-shedding insert, cleaning procedure |
| Stacking load | Case deformation, lower insert collapse | Number of stacked layers, structural columns | Stacking stops, load routed through structural columns |
3. Six Design Elements of a Printed-Part Transport Case
Breaking "protection" into verifiable modules is an effective way to avoid procurement mistakes. A complete 3D-printed part transport case should deliver six capabilities.
First, a contour-matched insert. A part should not be "placed in a case," it should be "nested in a cavity." The cavity should follow the main outer contour so that restraints land on regions with adequate stiffness rather than on thin walls or cantilever tips.
Second, multi-point compliant support. For long parts, compliant support points should be provided at both ends and at the middle, avoiding a "supported at both ends, sagging in the middle" bending mode. The compliant material should have low compression set so that preload is maintained after long service.
Third, separable retention. Press plates, elastic straps or soft hold-down blocks should secure the part inside the insert so that it cannot jump during transport. Fasteners must never contact the part surface directly.
Fourth, environmental control capability. Parts that need humidity control should have replaceable desiccant and humidity indication. Where temperature control matters, space should be reserved for a data logger.
Fifth, antistatic and clean design. The insert material should be low-shedding and low-outgassing, and should be static-dissipative where required. The case should provide a grounding terminal.
Sixth, identification and traceability. Every case should carry part number, revision, batch number, packing date, orientation markings (this-way-up arrows, do-not-invert) and transport precautions.
In this application, the JUNZHJIA approach is typically to reverse-engineer the insert cavity from the customer's point cloud or physical sample, then have Kexin New Materials (Guangdong) Co., Ltd. complete the moulding. Desiccant compartments, logger slots and grounding terminals are integrated into the insert and case structure at the same time, producing a "one part, one cavity" deliverable.
4. Comparing Insert Approaches: From Contour Fit to Multi-Point Support
The insert is the heart of the case. Material and process selection set the ceiling on achievable protection.
| Insert approach | Damping | Dimensional consistency | Shedding tendency | Tooling cost | Suitable scenario |
|---|---|---|---|---|---|
| --- | --- | --- | --- | --- | --- |
| Die-cut EVA | High | High | Low | Die required | Small to medium batches with clear geometry |
| Thermoformed EVA | High | High | Low | Mould required | Volume parts needing complex 3D cavities |
| Moulded PU foam | High, density tunable | Medium | Low | Mould required | Irregular geometry, high-value single parts |
| PE foam build-up | Medium | Medium | Medium | Low | High-mix low-volume, prototype stage |
| Moulded EPP | High | High | Low | Mould required | Lightweighting, recyclability requirements |
| Adjustable divider system | Medium | Low | Low | Low | Mixed parts with a wide size range |
Four parameters deserve close attention during selection.
Hardness and density. An insert that is too hard transmits shock directly to the part. One that is too soft fails to restrain it, and the part oscillates inside the case. Practical experience suggests tuning the insert so that the part's own weight and the applied preload produce a small, recoverable compression, creating a "cradled" rather than a "jammed" condition.
Compression set. Inserts lose resilience over time and restraint force falls. It is worth writing a compression set limit into the specification and including it in service life assessment.
Contact surface treatment. For finished surfaces, a low-friction, low-shedding facing layer can be added over the contact zone so that particles trapped in foam cells do not abrade the workpiece surface.
Permeability and outgassing. Some foams release trace volatiles in a closed space, which is undesirable for optical and coated parts. Where the part is sensitive, run a closed-environment exposure test during the qualification stage.
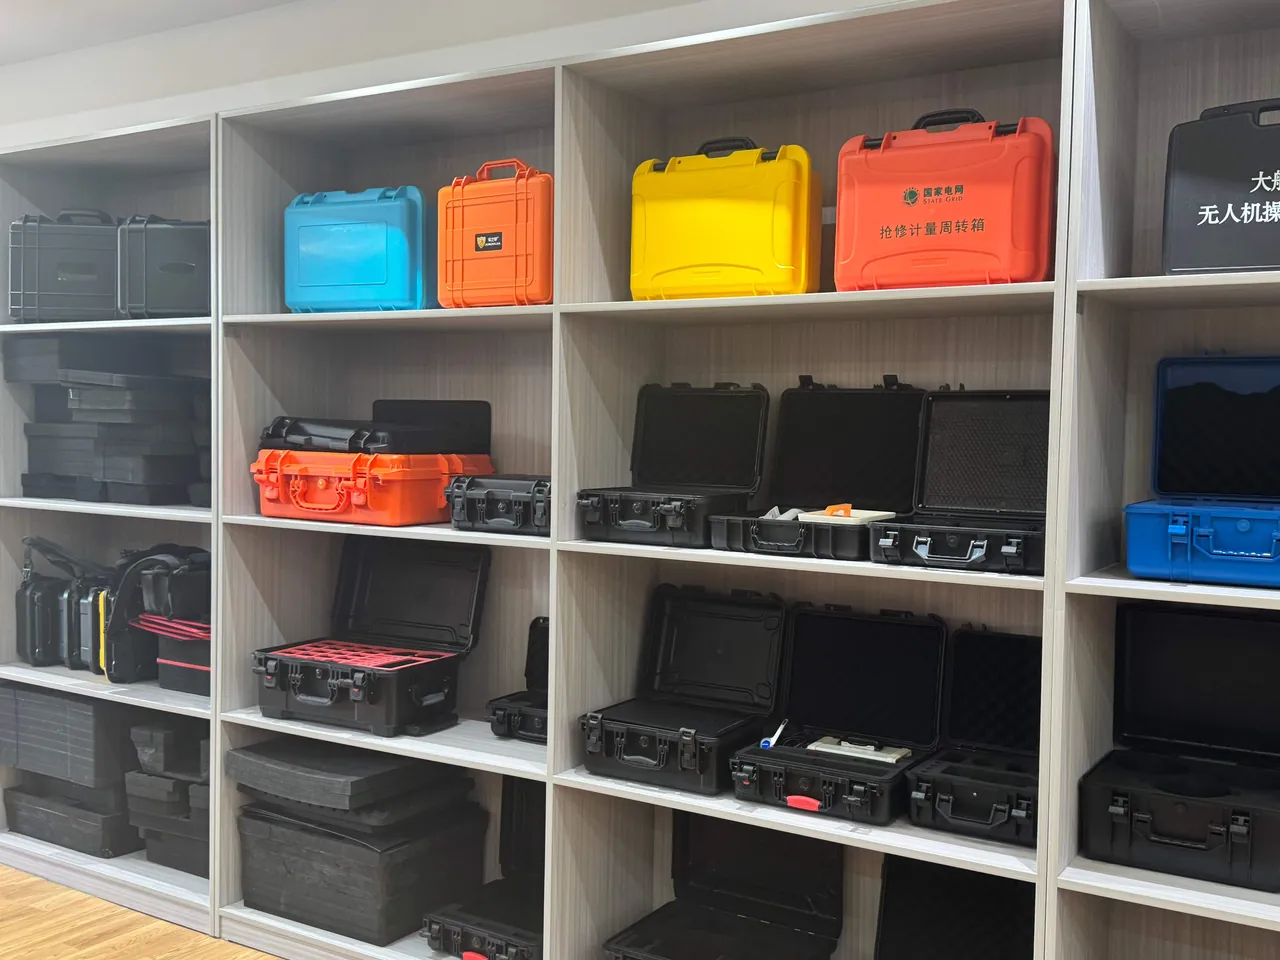
For material comparisons and moulding processes, see custom foam insert solutions and moulding processes, the EVA foam insert customisation process and case insert foam material comparison.
5. Support Strategies for Thin Walls and Cantilever Features
Thin walls and cantilevers are where transport failures concentrate, and they require dedicated strategies.
Strategy one: move support points into stiff regions. Cantilever roots, flanges, rib intersections and solid mounting bosses are the stiffer locations. Restraining there routes impact load along structural paths rather than applying it directly to thin free edges.
Strategy two: replace point contact with area contact. On thin flat walls, the insert should follow the entire region so that pressure is distributed. Point contact creates local stress far above the average, which triggers buckling directly.
Strategy three: avoid unsupported spans. A long cantilever amplifies amplitude under vibration. Where the geometry makes an unsupported span unavoidable, place a compliant block under the cantilever to cradle it without clamping it, so amplitude stays inside the elastic range.
Strategy four: zoned restraint and independent cavities. When several parts share a case, each should have its own cavity to prevent part-to-part contact. Adjustable divider systems are practical for mixed batches, but confirm that the dividers themselves do not become hard points. Related structures are described in removable divider systems for protective cases.
Strategy five: orientation is protection. For parts with weaker interlayer strength, the primary impact direction should be parallel to the layer plane rather than perpendicular to it. Packing orientation should be determined from a transport drop direction analysis rather than from what is convenient geometrically.
Strategy six: avoid over-constraint. Too many tight restraints prevent a part from expanding and contracting with temperature, which can introduce additional stress in long parts. The right design gives clear location plus one degree of freedom.
6. Surface Protection: Scratches, Compression Marks and Residual Powder
For printed parts that have been machined, polished, anodised, painted or coated, a surface defect is equivalent to a scrapped part. Surface protection must address three sources: insert friction, part-to-part contact, and residual powder inside the case.
Insert friction. Hard particles from the environment can lodge in foam cells. When the part and insert micro-slide under vibration, those particles act like abrasive and leave fine scratches. Risk reduction measures include using a closed-cell or film-faced contact surface, cleaning and inspecting the insert before packing, and avoiding opening the case in a dusty environment such as an unsegregated print shop.
Part-to-part contact. Mixing metal printed parts with resin parts, or letting metal parts touch each other, is a major cause of scratching. Beyond independent cavities, flexible separator sheets between parts help. For small parts, a tray with divided compartments is usually safer than stacking.
Residual powder inside the case. A part that has not been fully depowdered will continue to release powder into the case under vibration. That powder can contaminate other parts and can enter mating faces, threaded holes and internal channels. Depowdering and cleaning should be a pre-packing operation, not something done on arrival. For parts with internal channels, low-pressure air and dedicated tools should be used before packing, with cleaning records retained.
Contact material selection should also consider chemical compatibility. Some foams soften or dissolve after prolonged contact with cleaning agents, rust preventives or release agents. For further thinking on cushioning material selection, see cushion liner structural design.
7. Anisotropy and Interlayer Strength: Packing by Build Orientation
Mechanical performance in additive manufacturing is strongly direction-dependent. In metal LPBF parts, elongation in Z (the build direction) is typically much lower than in XY. In FDM parts, interlayer bond strength depends heavily on nozzle temperature, layer height and cooling strategy. In SLS nylon parts, anisotropy is smaller but not zero.
Two packing principles follow.
Principle one: identify the weak interface and keep it out of tension. The most damaging condition is local bending, where bending tension concentrates near the interlayer interface and the crack propagates along the layer plane. Orientation adjustment during packing can place the weak interface in compression or shear instead of tension.
Principle two: directional reinforcement for weak directions. Where a direction is unavoidably weak, increase cushioning thickness at the corresponding insert location to lower the acceleration peak reaching the part. In practice this means providing more cushion travel on that side rather than making the insert harder.
One important note: transport orientation should be decided together with the build orientation chosen at the design stage. Ideally, the part design phase evaluates whether the print orientation and the transport orientation agree. Where they conflict, transport safety normally takes priority, and the insert design compensates.
8. Static and Cleanliness: Contamination Sensitivity by Material
Not every printed part is sensitive to static and cleanliness. The test is whether the part contains electronic components, carries a functional coating or plating, or has optical or sealing mating surfaces.
Highly sensitive parts (integrated sensors, embedded circuitry, optical surfaces, conductive coatings) need static-dissipative inserts and a grounding path, and are also more sensitive to shedding and outgassing. Moderately sensitive parts (metal printed parts, ordinary structural components) are mainly concerned with scratch and powder prevention. Low-sensitivity parts (large non-mating structural components) can prioritise cost and strength.
Static protection is implemented in much the same way as in metal powder applications: the insert material is static-dissipative, the case provides a grounding point, and the insert is electrically bonded to the metal parts of the case. Structural detail is discussed in ESD shielding case design.
On cleanliness, note that ordinary foam continuously generates trace debris under vibration. Where cleanliness requirements are high, such as optical parts, medical parts and cleanroom-delivered parts, choose low-shedding materials or use a bag plus insert dual approach. If the part must be opened in a clean environment, wipe the case exterior before it enters the clean area.
9. Temperature, Humidity and Dimensional Stability
For nylon and some resin parts, humidity is an invisible tolerance variable. PA12 absorbs moisture and changes dimension at roughly the parts-per-thousand level. That is acceptable for ordinary structural parts and potentially out of tolerance for precision mating parts.
Three measures control it in practice.
- Dry before packing. Parts should reach a defined dry state before packing, with drying conditions and moisture content (or drying duration) recorded.
- Control humidity inside the case. Fit a replaceable desiccant cartridge and a humidity indicator card, holding internal relative humidity within the target band. For long-term preservation, consider a sealed plus desiccant plus inert gas purge combination.
- Log in transit. Place a single-use temperature and humidity logger inside the case so that it travels with the part; read the curve on arrival as quality evidence. This is especially valuable for cross-border sea freight and multi-season storage.
For temperature-sensitive parts (resin parts, parts with bonded joints, hybrid assemblies containing batteries or electronics), define the insulation requirement and the maximum transport temperature clearly. Where the route may see extreme temperatures, verify with reference to the temperature and humidity test methods in MIL-STD-810H. Note that MIL-STD-810H is used here only as a reference for environmental test methods and does not indicate any military certification; see MIL-STD-810H environmental testing and case compliance for clarification.
10. Sealing Levels and Shell Ingress Protection
Whether a case needs a high sealing level depends on whether the part is sensitive to moisture, dust or contamination.
IEC 60529 and GB/T 4208 define enclosure protection using two digits, where 6 in the first position means dust tight, and in the second position 5 means protected against water jets, 6 against powerful water jets, and 7 against temporary immersion. For 3D-printed part transport, common configurations are as follows.
| Application scenario | Recommended rating | Rationale |
|---|---|---|
| --- | --- | --- |
| Indoor transfer, same-day return | IP54 or no sealing requirement | Mainly dust and impact protection, frequent opening |
| Inter-plant shipment, warehouse transfer | IP65 | Dust tight and water jet resistant, good opening ergonomics |
| Sea freight, rainy-season loading, outdoor staging | IP67 | Temporary immersion protection, with pressure equalisation |
| Clean or optical parts delivery | IP65 plus bagging | Dual barrier that also controls cleanliness |
| Long-term preservation | IP67 plus desiccant plus logger | Controllable and traceable environment |
Avoid choosing higher than necessary. A higher sealing level brings greater opening effort and more demanding gasket maintenance. Where the case is opened many times a day, an over-specified rating can encourage non-standard handling. In addition, the fully airtight nature of IP67 amplifies the internal-external pressure differential, so a pressure equalisation valve should be used to prevent temperature swings from drawing the gasket inward or bulging the case. See IP67 protective case applications and selection for further discussion.
11. Single Parts and Small Batches: Reconfigurable Inserts
A defining characteristic of additive manufacturing is high mix and low volume. If every part number needs its own insert mould, tooling cost quickly exceeds the value of the packaging. Reconfigurable insert approaches address this.
Approach one: modular cavities. Build the insert as a standard grid base plus replaceable cavity modules designed per part family. Changeover requires only swapping modules while the base is reused.
Approach two: adjustable dividers. Adjust cavity size using slots and movable dividers, well suited to part families with similar geometry and gradually changing dimensions. See removable divider systems for protective cases.
Approach three: semi-moulded plus filler. Use a moulded insert for critical support locations and compressible filler blocks to take up remaining volume. Tooling cost is low, but consistency is weaker than with a fully moulded approach.
Approach four: prototype validation then staged tooling. Validate protection at the prototype stage with a low-cost foam build-up, then invest in tooling once the part design freezes and volume stabilises. This is the most risk-controlled path.
Whichever approach is used, define which part numbers the insert is qualified for and put that list on the insert drawing and the case label so that it cannot be misapplied on the shop floor.
12. Volume Handling: Palletisation and Stacking Design
As volumes rise, packaging escalates from individual cases to unit loads. Palletisation has four considerations.
First, fixing cases to the pallet. A case held only by its own weight will move under vibration. Use pallet stops, strapping or stretch film, and confirm that fixing points do not compress the lid gasket face.
Second, load path through stacks. Load should travel through the structural columns and stacking stops of the case, not through the insert or the lid. For cases holding brittle parts, the number of stacked layers should be limited by the compression set characteristics of the insert, and the maximum permitted stacking height should be stated in the specification.
Third, centre of gravity and stability. A high-centre-of-gravity pallet is much more likely to tip under emergency braking. Where a single part is heavy and concentrated, add ballast at the pallet base or use a low case with multiple stacked layers.
Fourth, returnable service life. Reusable transit cases need a defined service life and inspection interval. Latches, hinges and gaskets are all wearing parts, and replacement should be scheduled by cycle count rather than calendar. For related thinking, see protective case service life assessment.
13. Standards Reference: ISTA, GB/T 4857 and ASTM D4169
Transport protection design needs verifiable test support. Three commonly used approaches are described below.
The ISTA series. ISTA organises its procedures by distribution scenario, covering both non-simulation integrity tests and simulation performance tests. For 3D-printed part transport, a practical route is to run a non-simulation test first (drop, vibration) to expose obvious defects quickly, then select a simulation procedure matching the real logistics chain for systematic verification. See ISTA transport test procedures.
The GB/T 4857 series. Basic test methods for transport packages in China, covering vibration, impact, stacking and compression. These are well suited to establishing a baseline test matrix. See GB/T 4857 transport packaging testing and case verification.
ASTM D4169. A performance test standard based on the distribution cycle, which designs the test sequence by defining the distribution cycle and assurance level. It suits situations where a common acceptance criterion must be agreed with a customer. See ASTM D4169 distribution cycle testing.
Test design recommendations:
- Use real parts or equivalent ballasted dummies with matching dimensions, centre of gravity and stiffness, otherwise the conclusions are not usable.
- Run at least one drop and one vibration test per packing orientation, and repeat critical orientations.
- Post-test inspection should cover insert compression set, seal face condition, part dimension re-measurement, surface inspection and functional check.
- Freeze the conclusions into a packing work instruction containing the orientation drawing and retention requirements.
14. Pre-Shipment Inspection and Acceptance Points
Turning inspection into a checklist is the simplest way to guarantee batch consistency.
Pre-shipment checklist:
- Part has been depowdered, cleaned and dried as required, with records retained
- Part appearance inspected, no new scratches on finished surfaces
- Insert cavity free of damage, embedded grit and permanent collapse
- Part does not move in the insert, has no hard points, and unsupported spans are cradled
- Retention devices correctly installed, fasteners not touching the part surface
- Desiccant is fresh and in date, humidity indicator card normal
- Logger started where fitted
- Latches, hinges and gaskets in normal condition
- Identification complete: part number, revision, batch, orientation, precautions
Acceptance sampling points:
| Check item | Method | Acceptance point |
|---|---|---|
| --- | --- | --- |
| Insert cavity dimensions | Gauges plus physical trial fit | No significant gap or interference with the part |
| Restraint force | Manual shake plus sampled weighing | Part does not shift or jump |
| Contact face condition | Visual inspection | No hard-point compression marks, no embedded grit |
| Sealing | Water spray or immersion test to the declared IP rating | No leakage, indicator card unchanged |
| Grounding continuity | Multimeter measurement of bonding resistance | Resistance from insert to grounding terminal within threshold |
| Temperature and humidity log | Read the logger curve | Entire journey within the defined band |
For volume procurement, introduce an AQL sampling plan and apply tightened sampling to critical characteristics such as restraint force, sealing and grounding continuity. For the methodology, see case acceptance and AQL sampling plans.
15. Common Misconceptions and Engineering Recommendations
Misconception one: "a harder insert is a safer insert." A hard insert transmits shock straight into the part and concentrates stress at the contact points. The right approach is a stiff restraint at a stiff location plus a compliant contact surface.
Misconception two: "if the part does not move at all, we are fine." Zero movement can mean over-constraint. A long part that cannot expand or contract with temperature develops additional stress. The right state is clear location plus a small allowance for elastic movement.
Misconception three: "printed plastic or metal parts are not affected by moisture." Nylon and some resin parts are highly moisture sensitive, and the resulting change is a slow, permanent dimensional drift usually discovered only during incoming inspection.
Misconception four: "pack it in whatever orientation fits." For parts with weaker interlayer strength, orientation determines whether the weak interface is in compression or tension. That is one of the decisive variables in protection performance.
Misconception five: "one case can carry every part number." A universal cavity does create flexibility, but for thin walls and precision surfaces, universal means compromise. Partition by part family and use dedicated cavities for high-value parts.
Summary of engineering recommendations:
- Decide build orientation and transport orientation at the same design stage, and freeze the orientation drawing into the work instruction.
- Make depowdering, cleaning and drying a pre-packing operation with retained records.
- Complete ISTA or GB/T 4857 verification using real parts or equivalent ballasted dummies before tooling inserts for volume.
- For high-value thin-wall parts, combine a dedicated cavity, compliant contact faces and a traceable logger.
- Select a supplier able to reverse-engineer cavities from physical samples and integrate desiccant compartments and logger slots into the insert. Through the moulding and tooling capability of Kexin New Materials (Guangdong) Co., Ltd., JUNZHJIA can configure inserts, gaskets and cases as an integrated package based on 3D data or physical samples, and supports OEM/ODM and volume supply.
Frequently Asked Questions
Q: What damage is most common when shipping 3D-printed parts?
A: The most common problems are not total fracture but four categories of hidden damage. The first is local buckling of thin walls, where ribs or lattice structures around one millimetre thick lose stability under lateral compression and then deform permanently; the appearance may be subtle while assembly holes have already shifted. The second is interlayer delamination, particularly in metal laser powder bed fusion and fused deposition modelling parts, where the bond between layers is weaker than the bulk material and impact perpendicular to the layer plane drives cracks along the interface. The third is surface compression marks and scratches on finished faces, seal grooves and optical mounting surfaces, caused by the insert or adjacent parts rubbing repeatedly under vibration, and usually unrepairable. The fourth is dimensional drift from moisture absorption in nylon and some resin parts. The corresponding design responses are restraint location, packing orientation, contact surface material and internal humidity control, and all four are needed together.
Q: Should the insert be EVA, PU or PE foam?
A: It depends on batch size, geometric complexity and the protection level required. Die-cut or thermoformed EVA inserts offer good dimensional consistency and damping with a low shedding tendency, which suits parts with clear geometry and stable volume, though they need a die or mould up front. Moulded PU foam suits irregular geometry and high-value single parts, wrapping well with tunable density, but it demands tighter process control. PE foam build-ups are the lowest cost and most flexible option, good for prototypes and high-mix low-volume work, though compression set reduces resilience and the part can work loose. Four parameters deserve close attention: hardness and density, compression set, contact surface treatment, and permeability and outgassing. For finished surfaces, whichever material is chosen, adding a low-friction low-shedding facing layer over the contact zone prevents particles trapped in foam cells from abrading the workpiece. Whichever material is chosen, validate it with the actual part under vibration before committing to volume tooling, since geometry-specific behaviour cannot be predicted from datasheets alone.
Q: How should a thin-wall part be restrained inside the case?
A: The core principle is that support points must land in stiff regions, contact must be by area rather than by point, and unsupported spans must be cradled compliantly. In practice this means placing restraints at cantilever roots, flanges, rib intersections or solid mounting bosses so that impact load travels along structural paths rather than directly into thin free edges; using area contact on thin flat walls so local stress does not exceed the average and trigger buckling; adding a compliant block underneath any unavoidable unsupported span to cradle it without clamping, keeping amplitude inside the elastic range; and avoiding over-constraint by leaving one degree of freedom on long parts to accommodate thermal expansion. Finally, verify by vibration and drop testing rather than judging by a manual shake. Applicable methods include the relevant ISTA or GB/T 4857 procedures. Document the approved support layout with photographs and a dimensioned sketch so that operators reproduce the same packing every time rather than improvising on the shop floor.
Q: Does packing orientation really affect transport safety?
A: Yes, and it is often the most overlooked variable. Mechanical performance in additive manufacturing is strongly direction dependent. Elongation in the Z direction of metal laser powder bed fusion parts is typically much lower than in XY, and interlayer bond strength in fused deposition modelling parts depends heavily on process parameters. When a part receives an impact perpendicular to the layer plane in a given orientation, a crack propagates along the interlayer interface, producing the classic "looks undamaged but the root has cracked" result. When deciding packing orientation, identify where the weak interface sits and adjust orientation so that this interface is in compression or shear rather than tension. Where a weak direction cannot be avoided, increase cushion thickness at that location to lower the acceleration peak reaching the part. A better practice is to evaluate build orientation and transport orientation together at the part design stage; where they conflict, transport safety takes priority and the insert design compensates.
Q: Why does humidity need to be controlled for nylon printed parts?
A: Because polyamide materials absorb moisture from their surroundings, swelling and changing mechanical properties slowly, and the change is gradual and easy to overlook. For ordinary structural parts, a change at the parts-per-thousand level is usually acceptable. For precision mating parts, insert assemblies or connection faces with tolerance requirements, that magnitude can push the part out of tolerance, and the problem only appears at incoming inspection, making root cause attribution difficult. Three engineering measures apply. First, bring the part to a defined dry state before packing and record the drying conditions. Second, fit a replaceable desiccant cartridge and humidity indicator card to hold internal relative humidity within the target band. Third, for high-value parts, place a single-use temperature and humidity logger in the case so that it travels with the part and its curve can be read on arrival as quality evidence. Note that relative humidity is highly temperature sensitive, so reading only a humidity indicator card can be misleading; record temperature and humidity together, or record dew point directly.
Q: Does a transport case need to be rated IP67?
A: It depends on how sensitive the part is to environmental factors and on the transport route. Under IEC 60529 and GB/T 4208, IP65 is dust tight plus water jet resistant and IP67 is dust tight plus temporary immersion protection, so the difference is in the water digit. Same-day indoor transfer mainly needs dust and impact protection and involves frequent opening, so IP54 is sufficient. Inter-plant shipment and warehouse transfer are well served by IP65, which balances protection and opening convenience. Sea freight, rainy-season loading and outdoor staging favour IP67. For clean or optical parts, IP65 plus inner bagging is common, providing a dual barrier that controls cleanliness while reducing opening effort. Note that higher sealing levels amplify the internal-external pressure differential, so IP67 should be paired with a pressure equalisation valve to prevent temperature swings from drawing the gasket inward or bulging the case. Gaskets are also wearing parts and belong in a scheduled inspection and replacement plan.
Q: How can insert cost be controlled for high-mix low-volume production?
A: Use a staged strategy rather than tooling every part number. At the prototype stage, validate protection with a PE foam build-up or a semi-moulded insert, which is the lowest cost and easiest to modify. At the second stage, group parts into families based on similar geometry and gradually varying dimensions, then use modular cavities with a reusable standard base and replaceable cavity modules, or an adjustable divider system whose slots change the cavity size. At the third stage, once the part design freezes and volume stabilises, invest in thermoforming or injection moulding to amortise unit cost. A further option is a semi-moulded insert plus compressible filler blocks, where the moulded insert handles only critical support locations and filler blocks take up the remaining volume. Whichever approach is chosen, define which part numbers the insert is qualified for and put that list on the insert drawing and case label so that it cannot be misapplied and reduce protection.
Q: How should transport testing be carried out, and to which standards?
A: Proceed in the order of exposing problems first and then verifying systematically. Step one is a non-simulation test to expose obvious defects quickly, covering drops in different orientations and fixed-frequency or swept-sine vibration. Step two is a simulation procedure matched to the real logistics chain for systematic verification. The internationally used ISTA series organises procedures by distribution scenario, GB/T 4857 provides basic test methods for vibration, impact, stacking and compression in China, and ASTM D4169, based on the distribution cycle, suits situations where a common acceptance criterion must be agreed with a customer. Three design points matter. Use real parts or equivalent ballasted dummies with matching dimensions, centre of gravity and stiffness. Run at least one drop and one vibration test per packing orientation, repeating critical orientations. Post-test inspection must cover insert compression set, seal face condition, part dimension re-measurement, surface inspection and functional check. Freeze the conclusions into a packing work instruction with the orientation drawing and retention requirements to close the loop.
Q: How often should a reusable transit case be replaced?
A: There is no single calendar interval. A practical approach is management by cycle count plus scheduled inspection, with a time limit as a backstop. The life-limiting components are usually not the case body but the latches, hinges and gaskets, the moving and elastic parts. Latch pressure decay prevents the lid from seating, hinge wear causes misalignment, and gasket ageing reduces the protection level. A common baseline is a dedicated inspection each quarter or after a defined number of cycles, covering latch closing pressure, hinge clearance and abnormal noise, gasket cracking and permanent set, and any case deformation that would affect the sealing face. Where usage intensity is high, mark cycle counts on the case and send it for inspection once the set count is reached. Retain inspection records as the basis for replacement decisions and quality traceability. For high-value parts, keep a small stock of certified replacement cases so that a failed case never forces a shipment to leave in a downgraded one.
Conclusion and Further Reading
The challenge in protecting 3D-printed parts in transit is not making the case thicker; it is understanding what the part fears. Thin walls fear concentrated lateral load. Cantilevers fear bending and amplified amplitude. Finished surfaces fear friction and embedded grit. Nylon and some resin parts fear moisture. Parts with integrated electronics fear static. Translating each failure mode into insert cavity geometry, support point location, contact surface material, packing orientation and internal environmental parameters is what turns a transport case into a protective structure.
Four disciplines matter in implementation. Decide build orientation and transport orientation together at the design stage. Make depowdering, cleaning and drying pre-packing operations with retained records. Complete vibration and drop verification using real parts or equivalent ballasted dummies before tooling inserts for volume. For high-value thin-wall parts, provide dedicated cavities and traceable temperature and humidity logging. When selecting a supplier, focus on their ability to reverse-engineer cavities from 3D data or physical samples, and on whether they can integrate desiccant compartments, logger slots and grounding terminals into the insert and case structure. Through the moulding and tooling capability of Kexin New Materials (Guangdong) Co., Ltd., JUNZHJIA provides custom inserts, matched seals, OEM/ODM and volume supply across its protective case, tool case and equipment case product lines, so that protection requirements become hardware specifications that pass acceptance the first time.
Further Reading