

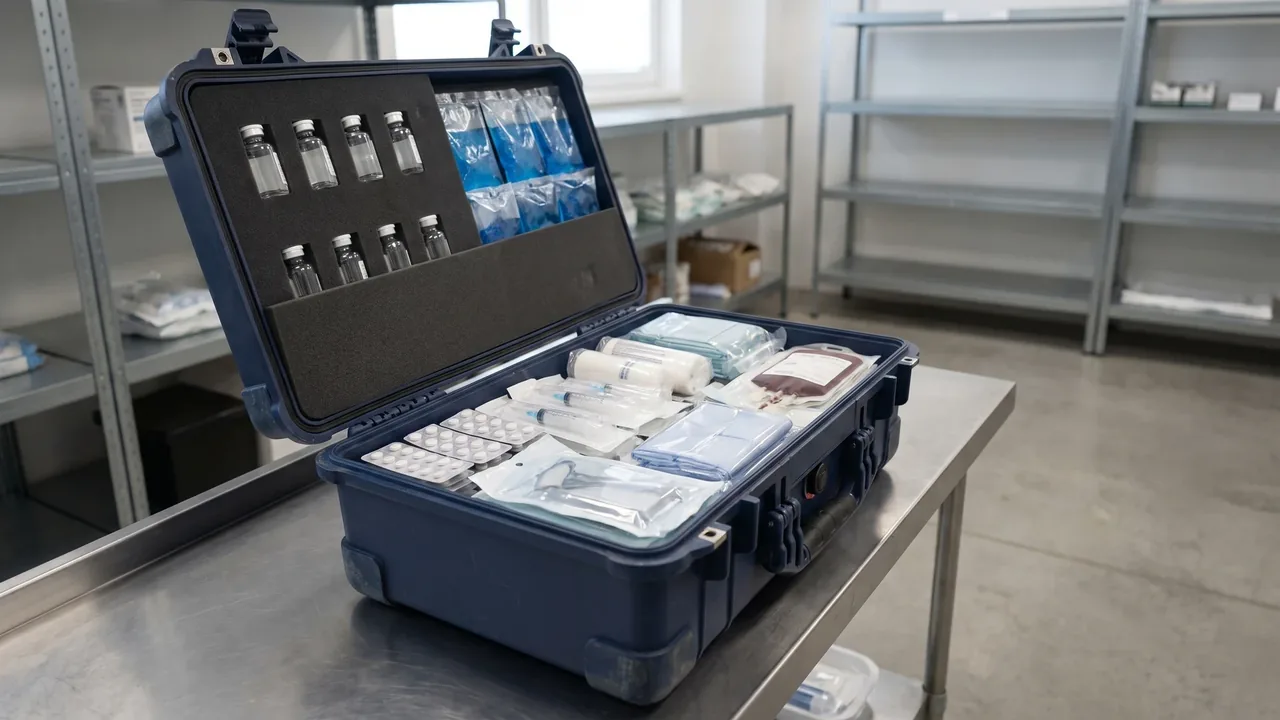
In third-party testing laboratories, pharmaceutical quality control departments, and environmental monitoring facilities, the journey of a sample from the collection point to the analytical bench is the first gate that decides whether a result can be trusted. Whether a sample transport case can stay sealed, leak-proof, shock-isolated, and traceable across the entire submission chain directly determines whether the test report carries legal weight and cross-lab comparability. This article focuses strictly on the container itself - its shell, sealing, liner, thermal control, latches, labeling, and certification - and explains how to select and maintain a qualified laboratory sample transport case for the submission chain, giving procurement and lab managers a clear checklist for specification and acceptance. We cover material trade-offs, the meaning of IP67, the dual-layer leak concept, shock isolation, cold chain options, tamper evidence, labeling, stacking, standards, customization, and maintenance so the reader can specify a case with confidence.
1. What a Sample Transport Case Is Built to Do
A laboratory sample transport case is a protective container designed to store and transport sealed sample tubes, vials, and swabs for laboratory submission. Its fundamental purpose is to preserve sample integrity, identity, and packaging seal during transfer. In third-party labs it carries field-collected water, soil extracts, and food swabs back to the central facility; in pharmaceutical QC it handles raw material retains, in-process submissions, and stability samples; in environmental monitoring it consolidates watershed, atmospheric deposition, and noise monitoring carriers.
Unlike a general toolbox, the value of a sample case is not how much clutter it holds but how reliably it seals, prevents leaks, isolates vibration, controls temperature when needed, labels clearly, and stays traceable. A qualified case should keep samples in their original state through bumpy road transport, frequent handling, humidity swings, and even brief rain exposure without cross-contamination. From the design stage, the shell, gasket, liner, latch, and label system must be treated as one integrated subsystem rather than separate parts.
Within the submission chain the case passes through four phases: site hold, short carry, logistics transfer, and lab intake. Each phase stresses the case differently: the site values light weight and portability, transfer values stacking strength and tamper evidence, and intake values quick opening and label checking. Understanding these differences is the premise for later selection and customization. For related use cases see the broader discussion in the sample case guide and the medical sample transport case.
The case is not a passive box but an active link in quality assurance. When the container fails, the failure is silent: a slow leak wets the manifest, a broken tube mixes two samples, or an opened lid casts doubt on the whole batch. Treating the case as equipment rather than packaging shifts the conversation from price to reliability, which is the theme of everything below. A clear specification written before purchase pays back at every audit.
2. Shell Material: Engineering Plastic versus Alloy
The shell material sets the baseline for strength, weight, weathering, and cost. Mainstream laboratory sample case shells include modified polypropylene (PP), acrylonitrile butadiene styrene (ABS), polycarbonate (PC), and aluminum alloy. Modified PP offers good low-temperature toughness and chemical resistance, so it rarely becomes brittle in cold chain use and is a common choice for refrigerated sample cases; ABS is rigid and easy to print on, fitting ambient submission; PC resists impact but costs more; aluminum gives higher stiffness and optional EMI shielding yet raises weight and price.
When choosing, evaluate the physical nature of the sample and the extreme temperatures of transport. If samples must move at two to eight degrees Celsius, pick low-temperature modified PP with an insulating foam layer; if samples emit strong solvent vapor, both shell and gasket need solvent-grade compatibility to avoid swelling or seal failure over time. For shielding or antistatic needs, coat the inner wall with a conductive layer or use an antistatic modified compound.
Material alone does not equal protection level. Even a strong alloy shell leaks if the gasket cross-section and compression are wrong; conversely, a well-designed PP shell with a quality gasket can deliver stable leak-proof performance in most submission scenes. Material choice must be argued together with sealing structure and liner plan, never in isolation. The trade-off between plastic and metal is explored further in the aluminium versus plastic case guide.
A practical way to decide is to list the three worst conditions the case will meet: lowest temperature, strongest chemical, and hardest drop. Match the shell to the worst of each, then confirm the gasket and liner are rated for the same conditions. Over-specifying the shell while under-specifying the gasket is the most common and costly mistake, because the seal is what actually keeps liquid in. Budget accordingly and ask the maker for the material data sheet.
3. Sealing Structure and the IP67 Rating
Sealing is the core of leak prevention. The industry measures foreign-object and water protection with the IP code defined by IEC 60529 and the Chinese national standard GB/T 4208, where IP67 means the enclosure survives temporary immersion at one meter depth for thirty minutes without water ingress under normal pressure. For the submission chain, reaching IP67 means the case resists rain wash, ground splash, and short overturn immersion, forming the basic threshold of leak-proof design.
Achieving IP67 is not about simply thickening the gasket but balancing cross-section shape, compression amount, and closure uniformity. Common gasket forms are continuous foamed silicone or EPDM rings that deform under lid pressure to form a watertight interface. The design must keep the gasket evenly compressed when closed, avoiding local under-pressure that creates a leak path; reinforce the flanges at the four corners where stress concentrates to prevent permanent deformation after long use.
At acceptance, verify sealing by pressure-decay or water-immersion methods, recording hold time and pressure drop as typical values rather than judging by appearance. For critical submissions, run a quick airtight spot check before each batch leaves, confirming the gasket is not shifted, cut, or pinched by debris. Treat sealing as a quantifiable, verifiable subsystem so leak prevention becomes repeatable process instead of a slogan. More on seal materials can be found in the case seal materials guide.
It helps to separate two questions: does the case seal when new, and does it keep sealing after a year of use? Only the second question matters for a reusable asset. Ask the supplier for compression-set data of the gasket and for a repeated open-close test, because a gasket that relaxes after a few hundred cycles will quietly drop below IP67. The rating on the brochure describes a fresh sample, not your case after twelve months in the field.
4. Leak-Proof Liner and Secondary Absorption
Even with a perfect shell, a single tube broken in transit can contaminate the whole case. Therefore the laboratory sample transport case uses a dual approach: a primary sealed container plus a secondary absorption liner. The sample is first sealed in a capped tube or vial as primary containment, then placed inside a secondary liner made of absorbent material; if the primary breaks, the leaked liquid is locked by the absorbent layer instead of spreading to other areas or samples.
The secondary absorbent liner is usually dust-free cotton, polymer absorbent pad, or gel-adsorption layer. Its capacity should reserve margin above the maximum possible leak, typically at least 1.2 times the total sample volume as a typical value. The liner bottom should be a removable tray for whole-unit replacement after contamination rather than piece-by-piece wiping. For corrosive or solvent samples, the absorbent must also be media-compatible to avoid dissolving and releasing.
In layout, the secondary liner works with but separate from the positioning foam: the foam fixes position and absorbs vibration, the absorbent layer catches leaks. They can be layered or the pad can sit at the bottom of each cavity. Either way, replacement must be easy and residue-free, and the case interior should mark maximum load and absorbent change interval so field staff see status at a glance. This dual concept also appears in the laboratory sample transport cases overview.
A subtle but important point is that the absorbent layer is insurance, not a license to ship weak primary closures. If the primary vial is loosely capped, no liner can guarantee a clean outcome, because the leak may evaporate or wick into the foam before anyone notices. The procedure should require a visual cap check at packing, then rely on the liner only for the unexpected break. The two layers are complementary defenses, each doing a job the other cannot.
5. Shock Isolation: Foam Liner and Positioning
Vibration and drops are the main external causes of sample damage. The laboratory sample transport case isolates samples from the shell with foam, dispersing impact energy. Common liner materials are polyethylene foam (EPE), cross-linked polyethylene (XPE), polyurethane (PU), and ethylene vinyl acetate (EVA), each with different hardness, rebound, and temperature tolerance selected by sample fragility.
Positioning uses two ideas: pre-CNC-milled fixed cavities cut exactly to tube diameter and arrangement for secure, fast handling; or Pick-and-Pluck grid foam torn on site to shape, flexible but less precise. For stable batch submission, fixed cavities help standardize and prevent errors; for multi-type small batches, tear foam is cheaper. In both, cavity depth should keep the sample center of gravity below the liner surface to avoid hitting the lid.
Shock design also needs reinforced ribs at corners and base. Ribs guide deformation under impact and spread concentrated load across the shell, lowering local crack risk. At acceptance, reference the drop and random-vibration procedures in MIL-STD-810H to set internal tests, recording sample survival rate as a typical value rather than only checking shell appearance. Liner shaping detail is covered in the custom foam lining case guide.
Think of the liner as a tuned spring, not just padding. Too soft and the sample floats and still rattles; too hard and the impact passes straight to the glass. The right hardness depends on sample mass and the expected drop height, which is why a one-size foam rarely fits every lab. Where samples vary, a modular liner with swappable inserts lets one shell serve several submission types while keeping each cavity properly supported, which also simplifies spare-part planning.
6. Thermal Control and Cold Chain
When samples are temperature-sensitive - microbes, enzymes, or pharma retains needing two to eight degrees - the laboratory sample transport case needs cold chain ability. Thermal plans split into passive and active. Passive relies on foam insulation (PU or XPS) plus phase-change cold packs to hold a range; simple, no power, good for short to medium trips. Active builds in thermoelectric or compressor cooling for precise control but adds size, weight, and power needs.
Passive cold chain performance depends on insulation thickness, airtightness, and cold-pack layout. Typically, with ambient environment, reasonable load, and proper pre-cooling, a twenty to forty millimeter homogeneous insulation layer with enough phase-change packs holds the range for several to more than ten hours; the exact duration must be measured, not taken from claims. Cold packs should surround the samples evenly, not pile on one side, to avoid local freezing.
Either way, the case should host a temperature recorder interface or inner logger bay so the chain keeps a temperature curve as evidence. Opening frequency, ambient temperature, and load rate all change hold time, so the procedure should cap single open time and max transit time, marking the zone and max duration on the case. This discipline is also central to the cold chain case guide and the vaccine cold chain case.
Pre-cooling is the step most often skipped. A case packed with warm samples and cold packs will spend the first hours pulling temperature down, wasting capacity and risking excursion. Condition the packs and the empty case to the target zone before loading, and load quickly with the lid closed between insertions. A simple written pre-cool checklist at the packing bench removes most cold chain failures and costs nothing beyond a few minutes of discipline.
7. Latches and Tamper-Evident Seals
Sample chain reliability depends not only on physical seal but also on proof that the case was never opened mid-route. The laboratory sample transport case uses latches and tamper-evident seals for closure assurance. Common latches are press buckles, butterfly catches, toggle locks, and lock-hasp designs; the hasp type can add a wire seal or anti-fake zip tie that leaves irreversible marks when cut, giving tamper-evident capability.
Tamper-evident seals should use unique numbering and tensile material, with the number checked against the handover record at intake. For high-value or legally weighted samples, a one-time RFID seal can bind its number into the chain system and alarm on opening. The latch itself needs enough cycle life: a buckle should keep closure force after thousands of open-close cycles, avoiding spring-open from metal fatigue.
Structurally, lock points should sit near the gasket flange so closing and sealing compress together, preventing the trap of locked but not pressed tight. Multi-point locks balance lid force and reduce single-side warp leakage. Note that a tamper seal only proves not physically opened and cannot replace gasket leak prevention; the three must stack. The ip67 protective case explains how latch and seal interact.
When specifying latches, ask for the cycle-life test result, not just a rating. A latch rated for ten thousand cycles but tested at room temperature may fatigue faster in a hot vehicle or a cold store, because the spring steel and the polymer bushings age with temperature. For cases that cross climate zones, request the latch validation across the expected temperature band, and keep a small stock of spare latches so a worn catch is swapped rather than tolerated until it fails on a critical shipment.
8. Labeling and Chain-of-Custody Management
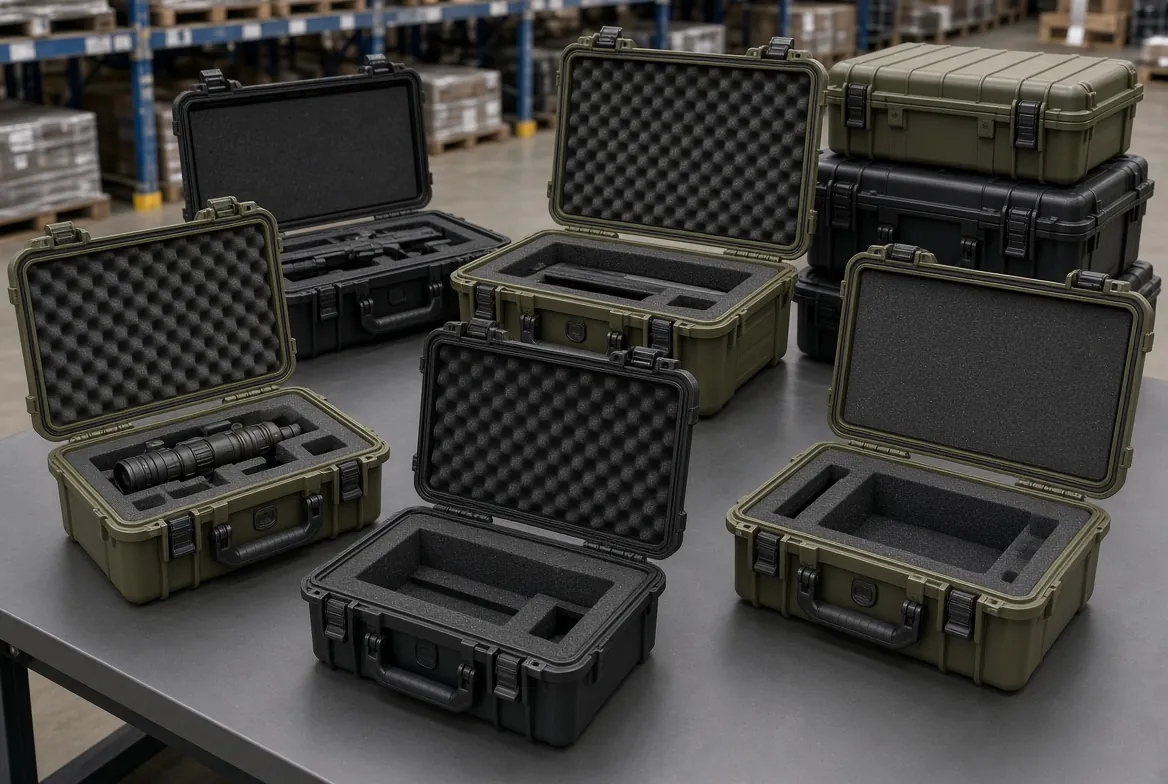
Traceability is the lifeline of the submission chain. The laboratory sample transport case should provide clear labeling zones on the outer wall and liner for submission forms, sample numbers, temperature prompts, and classification labels where applicable. Label material must resist friction and moisture to avoid blurring; for outdoor or cold chain use, choose waterproof adhesive or laser-etched nameplates.
QR codes move chain management from paper to digital. Generate a code from the case number and loading list, stick it on the case, and the intake side scans to pull the manifest, responsible person, collection time, and temperature zone, cutting manual transcription errors. Some labs also bind the seal number to the QR code for case-seal-sample triple link. Remember the QR carries management info only and must not replace physical protection; label loss should not affect sealing or leak prevention.
For internal records, keep a waterproof card or electronic tag with transport start-end time, ambient temperature and humidity, and open count. For long-archive samples, the case number enters the lab information system for a one-case-one-file rule. Unified labeling lets different batches and departments be separated quickly at intake, lowering confusion risk. Similar discipline is shown in the medical sample transport case.
A labeling mistake is cheap to make and expensive to find. The fix is to standardize the label layout across the whole lab so every case carries the same fields in the same place; a scanner or even a glance then finds what it expects. Reserve a dedicated weatherproof pocket for the paper manifest, and print a duplicate QR on the lid and the base so a torn outer label still resolves to the right case. Redundancy here is far cheaper than a misidentified batch.
9. Stacking, Nesting, and Transit Fixing
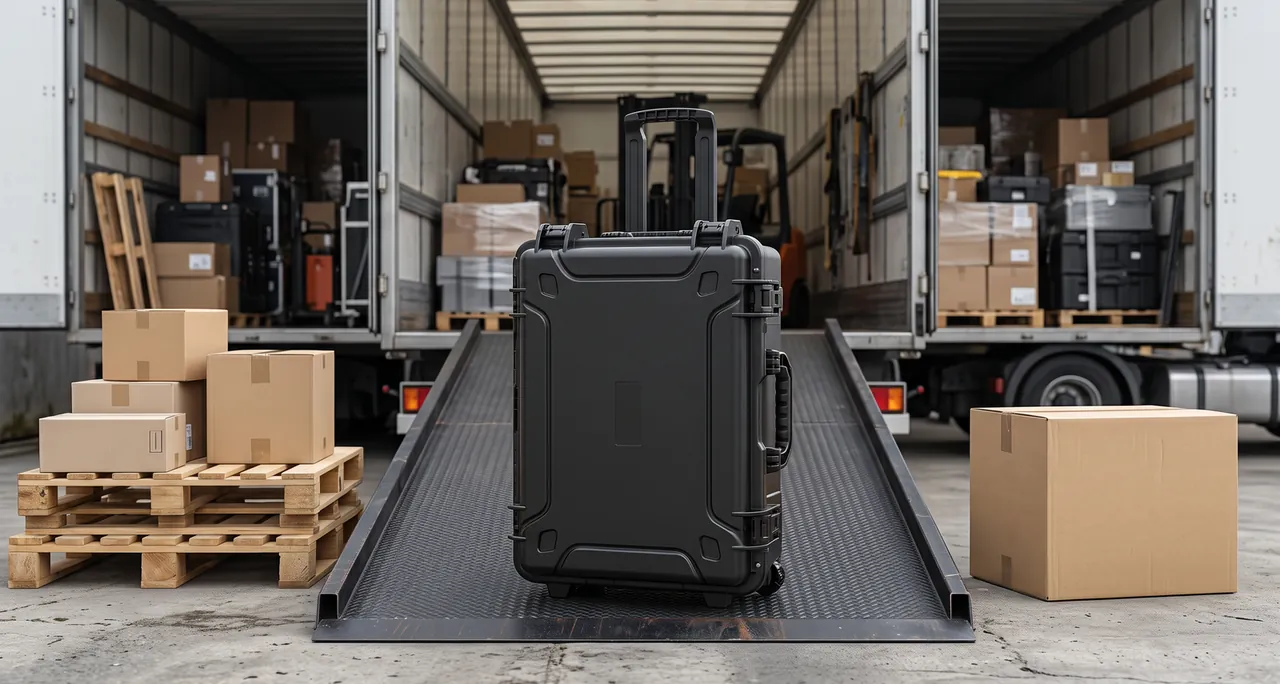
Submission rarely travels alone; cases move in batches. The laboratory sample transport case needs matching stack structures on lid and base - reinforced ribs, corner bosses, or a full bead - so upper and lower cases lock and share load evenly, avoiding slip and collapse. Stack height is limited by both shell compression strength and content fragility; as a typical value, do not exceed the rated stack layers stated by the maker.
When fixing inside a vehicle or logistics box, use straps, limit blocks, or anti-slip pads to stop case movement; with cold packs the center of gravity rises and hard braking can overturn it. Fill gaps between cases with buffer spacers to prevent knocking and add rigidity. For air or express transfer, reserve buffer in outer packaging and mark this way up and fragile sample consistent with inner labels.
Distinguish stacking from sealing: a case stackable ten high is not automatically IP67 leak-proof. Procurement should separately request stack-load and seal test typical values and spot-check on arrival instead of trusting advertised numbers. Reasonable nesting and fixing keep the whole batch orderly and intact over long hauls. The protective case stacking guide gives layout rules.
A useful habit is to mark the maximum stack height directly on the case side, because the person loading the van rarely has the data sheet open. Pair that with a floor anchor point or a cargo net in the vehicle, and the cases stay put through cornering and potholes. The cost of a tumble is not just a broken shell but a compromised sample whose result may still be reported if the damage goes unnoticed, so physical fixing is part of quality control.
10. Certification: IEC 60529, GB/T 4208, MIL-STD-810H, and ISTA
The compliance floor of a laboratory sample transport case comes from a set of citable standards. Shell sealing is graded by IEC 60529 and the national standard GB/T 4208 under the IP code; environmental and mechanical durability can follow the temperature, drop, and vibration procedures of MIL-STD-810H; overall transport reliability can use the ISTA series such as 1A, 2A, and 3A vibration and drop sequences; shell flame behavior can reference UL94; electrical safety adds further certifications by scenario.
Clarify that standards give method and grade frameworks, not automatic compliance for a specific case. A responsible supplier provides test reports or typical data executed per standard, stating conditions, sample size, and conclusion. Reviewers should ask for the measured or typical value of the corresponding grade, not just the code on a brochure. For export or cross-border submission, also note CE, RoHS, and REACH declarations so material and coating meet destination rules.
In internal acceptance, build a standard mapping table linking each key parameter - IP grade, working temperature zone, stack load, absorbent capacity, seal type - to the relevant clause, forming a reviewable file. Thus every container in the chain is documented for audit and for fast root-cause when anomalies appear, whether from case, operation, or transport. The ista test guide details the procedure choice.
Do not collect certificates as trophies; collect them as evidence tied to the actual model you buy. A generic factory certificate for a different size or material proves nothing about your unit. The acceptance file should name the exact case model, batch, and test date, and the purchasing record should reference that file, so an auditor can walk from the report back to the physical container without a gap.
11. Customization and OEM/ODM: Matching Liner and Seal to Sample
Standard sample cases cannot cover every sample shape, so customization matters. A protective case maker such as JUNZHIJIA can supply foam liners cut to the exact sample tube specification, forming cavities, dividers, and absorbent layers in one piece so each sample sits in its place; it also supports OEM/ODM to produce in volume by the client's case size, latch type, and label rule, and delivers test documents and material certificates for archiving and audit.
The value of customization is matching: the gasket cross-section matches the flange, the liner cavity matches the tube diameter, the seal number matches the chain system. End-to-end matching sharply lowers field assembly error and transit breakage. For labs sharing one case across departments, a swappable liner module on the same shell adapts to different sample types and raises single-case utilization.
Before starting customization, the buyer should give the sample list, max load per case, target temperature zone, and transport mode, so the maker outputs a structure plan and typical test advice. A factory with tooling and molding capability like JUNZHIJIA can verify liner fit, seal pressure drop, and drop integrity at the prototyping stage and write results into the delivery file. Treat customization as an engineering process from plan to evidence, not mere cosmetic change, to produce a truly reliable submission container. For mold and cost context see the custom case mold cost analysis.
The prototyping step is where risk is retired cheaply. A machined or 3D-printed mock liner lets the lab dry-run packing, confirm tube clearance, and reject a poor cavity before steel is cut. Insist that the prototype is tested the same way the production unit will be tested, because a pretty mock that fails the drop tells you more than a brochure that claims success. Document the prototype results and carry them into the production acceptance criteria so the delivered cases are comparable to what you approved.

12. Maintenance, Cleaning, and Life Management
The laboratory sample transport case is a reusable asset whose protection decays with use and must be maintained by plan. Daily care includes checking after each intake whether the gasket is shifted, cut, or pinched; confirming latches close smoothly and seal numbers are intact; cleaning the absorbent liner and replacing it when contaminated or saturated; wiping the shell with neutral cleaner to avoid strong solvents attacking material and print.
The gasket is the aging part. Under long compression and temperature cycles it takes permanent set; set a replacement interval by usage frequency, for example a quarterly point-check for high-frequency use and half-year for low-frequency as typical values. Replace with the same cross-section and hardness; wrong specs shift compression and leak. If the shell cracks or lock points loosen, retire or repair rather than run it sick.
Life management also builds one-case-one-file: record purchase date, test typical values, repair and replacement, and retirement. When seal spot-checks fail repeatedly, the liner cannot reset, or structural strength drops clearly, judge it retired. Good maintenance extends life and lowers total cost, but more importantly keeps leak-proof and traceable abilities valid over long use, guarding the credibility of the submission chain.
Maintenance is cheapest when it is boring and routine. A five-minute check after every intake, a logged gasket replacement on schedule, and a clear retire rule remove the drama of a failed shipment discovered too late. Pair the log with the labeling system from section eight so the case identity, its test history, and its current status are one record that any operator can read at a glance and any auditor can trust.
FAQ
Q: How is a laboratory sample transport case different from a normal toolbox in leak prevention? A: The two are designed for completely different goals. A normal toolbox focuses on storage and carry, usually with no quantified seal or leak requirement, while a laboratory sample case treats sealing, leak prevention, shock isolation, and traceability as core metrics. The differences show in four places. First, the case lid carries a continuous ring gasket engineered for IP67 compression, whereas a toolbox uses gap-style clasps. Second, the sample case has a secondary absorbent liner that catches leaked liquid if the primary container breaks, which a toolbox lacks. Third, the case liner is milled to the tube diameter so samples sit fixed and vibration is absorbed, while toolbox padding is rough. Fourth, the case has tamper-evident seals and a label zone to support chain of custody, which a toolbox does not emphasize. For testing submissions, a normal toolbox should never replace a dedicated sample case, or leak and mix risks rise sharply. The distinction is also noted in the lab sample transport case comparison, where the same shell principle is discussed for a related use.
Q: How can I verify that a sample case truly meets IP67? A: Do not trust the printed label; verify with evidence and arrival checks. Under IEC 60529 and GB/T 4208, IP67 means the enclosure survives one meter immersion for thirty minutes without ingress. Practical verification uses pressure-decay: charge the closed case with a little gas, hold pressure, and record drop versus time; a drop within the typical threshold means sealed. Or use water immersion, submerge in the standard attitude and watch for escaping bubbles. On arrival, spot-check by ratio, focusing on corner flanges, gasket seams, and latch areas for under-pressure. Also request the supplier's test report or typical values stating sample size and conditions. Only by managing sealing as a quantifiable subsystem can you avoid the gap between claimed IP67 and actual leak. See the ip67 protective case for test method detail and for the cycle-life question that matters after a year of reuse. Keep the report with the case file so future audits can confirm the grade was actually measured rather than assumed.
Q: How should the secondary absorbent liner capacity be set? A: The secondary absorbent liner capacity should cover the worst-case leak, not just the average load. A typical rule takes 1.2 times the total liquid volume of all samples as the minimum margin; for example ten vials of ten milliliters each total one hundred milliliters, so the absorbent layer should be at least one hundred twenty milliliters. If the sample is corrosive or solvent, confirm the absorbent is compatible so it is not dissolved and released. Layout-wise the absorbent should be a removable tray replaced whole after contamination rather than wiped piece by piece, with max load and change interval marked inside. Remember the absorbent is a backstop, not a substitute for the primary container seal; it stays idle until a break occurs, so both must pass. The concept is shared with the laboratory sample transport cases design, which also treats the liner as a separate serviceable part. Log the installed capacity on the case so users know at a glance when the liner is due for change.
Q: How long can a passive cold chain sample case hold temperature? A: A passive cold chain case has no fixed duration; it must be measured by route. Main variables are insulation thickness and homogeneity, cold-pack count and layout, ambient temperature, load rate, and opening frequency. Typically, with ambient environment, reasonable load, and proper pre-cooling, a twenty to forty millimeter homogeneous foam layer with enough phase-change packs holds the two to eight degree zone for several to more than ten hours; the exact number needs in-house calibration. Cold packs should surround samples evenly, not pile on one side, to avoid local freezing. Single open time and total transit time should be written into the procedure and strictly limited. The case should host a temperature recorder bay so the whole chain keeps a curve as evidence, a point also stressed by ISTA and cold chain audit. The cold chain case guide expands on calibration steps and pre-cool discipline. Measure on your own route once, then trust the resulting number rather than a generic vendor claim.
Q: Can a tamper-evident seal replace the gasket for leak prevention? A: No. A tamper-evident seal and a gasket are complementary, not substitutable. The seal - a numbered wire seal, anti-fake zip tie, or one-time RFID seal - proves the case was not physically opened in transit, giving tamper-evident closure evidence; it has no watertight or airtight ability, and an intact seal does not mean no internal leak. Real leak prevention relies on the continuous gasket and even compression after closing, falling under the IP grade of IEC 60529. The correct stack is three layers: primary container seal, case gasket against external leak, and tamper seal against mid-route opening, none optional. At acceptance check all three: seal number matches record, gasket undamaged, absorbent present and not saturated, so the chain is both unopened and unleaked. This is mirrored in the medical sample transport case guidance for sensitive loads. Order the three checks as one written checklist so none is skipped under time pressure at the loading bench.
Q: How should the labeling system be planned for chain-of-custody? A: Labeling should cover outside and inside and move toward digital. Outside, put the submission form, sample number, temperature prompt, and needed classification labels on a weatherproof zone using waterproof adhesive or etched nameplate so they do not blur in transit. Inside, fix a waterproof record card on the liner or lid with start-end time, temperature and humidity, and open count. QR codes lift efficiency: generate from case number and manifest, scan at intake to pull the list and responsible person, cutting transcription errors; for high-value samples bind the seal number to the QR for open alarm. All numbers enter the lab system under one-case-one-file. Unified labels let different batches and departments be separated fast at intake, lowering confusion at the source, which is the base of traceability. The sample case note repeats this discipline across case types. Standardize the label field before shipments begin, not after the first misidentified batch forces a recall.
Q: What information must the buyer give a maker for customization? A: Successful customization needs complete input. The buyer should give at least four sets. First, the sample list and max load per case, including tube diameter, length, count, and arrangement, to design cavities and absorbent. Second, the target temperature zone and transport mode, deciding shell material, insulation thickness, and whether a cold bay is needed. Third, latch and seal type requirements, such as whether a lock-hasp for seals is needed or an RFID seal is required. Fourth, label and compliance rules like QR fields, waterproof label material, and CE or RoHS statements. A factory with tooling and molding like JUNZHIJIA verifies liner fit, seal pressure drop, and drop integrity at prototyping and delivers test files. Treat customization as an engineering process from plan to evidence, not mere cosmetic change, to produce a reliable submission container. Cost background is in the custom case mold cost analysis for budget planning. Share the prototype report with finance so the spend is tied to verified performance, not to a brochure promise.
Q: How do I know when the gasket is too old and must be replaced? A: The gasket is the most aging part; judge replacement by sight, touch, and spot-check. Visually, replace immediately if there is a visible cut, crack, permanent flat set, or open seam. By touch, a healthy gasket presses with even elastic rebound; if it turns hard, sheds, or loses rebound, aging is signaled. Usage frequency is a key reference: high-frequency cases point-check quarterly, low-frequency half-yearly, as typical cycles. Replacement must use the same cross-section and hardness or compression shifts and leaks; after fitting, run a quick airtight spot-check for no leak. Shell cracks or loose lock points should be fixed together, because a sick case even with a new gasket cannot recover reliable protection and should be retired or repaired. The case seal materials guide covers material choice and the compression-set metric that predicts service life. Track each gasket by its install date so replacements are scheduled on a plan, not triggered by a failure.