

Most protective case customization projects do not require a new mold. A fresh injection tool is only mandatory when your requirement changes the geometry of the plastic body itself: overall dimensions, internal cavity split, wall thickness structure, or the mounting positions for latches and hinges. If you are only changing foam inserts, printing a logo, specifying a color, adding a nameplate, or swapping hardware, you can reuse the manufacturer's existing open tooling. In that case the cost sits almost entirely in secondary materials and labor, and typically lands within a few thousand dollars. The decisive question is whether your requirement touches the case body or only the case accessories.
The real difficulty for buyers is not the yes-or-no question. It is the cascade of numbers that follows. What does an injection mold actually cost? Can the tooling fee be amortized into unit price? How large must a batch be before tooling makes sense? Is there a middle path for small orders? Many projects stall exactly here, because the buyer cannot judge whether a quotation is reasonable or whether a soft tool or a steel tool is the right fit. The result is either walking away over price or choosing a mismatched tool type that doubles the cost of later revisions. This guide lays out the cost structure, a batch threshold model, tooling-free alternatives, and the trial run acceptance rhythm, then closes with a parameter checklist you can paste directly into an inquiry.
Table of Contents
- 1. Where the Line Falls: What Requires a Mold and What Does Not
- 2. Comparing Five Forming Routes for Protective Cases
- 3. Breaking Down Injection Mold Cost Components
- 4. Choosing Mold Type: Soft Tooling, Aluminum, and Steel
- 5. Batch Threshold and Mold Cost Amortization Model
- 6. Customization Without a Mold: Inserts, Panels, and Hardware
- 7. Technical Preparation Checklist Before Cutting Steel
- 8. The Trial Run Sequence: What to Inspect at T0, T1, and T2
- 9. Mold Ownership, Transfer Clauses, and Negotiation Points
- 10. Common Misconceptions and Pitfall Checklist
- 11. How JUNZHJIA Supports OEM and ODM Programs
- Frequently Asked Questions
- Conclusion and Further Reading
1. Where the Line Falls: What Requires a Mold and What Does Not
Splitting requirements into two categories eliminates a large amount of wasted communication.
Requires a new mold (touches plastic body geometry): changes to overall length, width, or height; a reworked parting surface or rib layout inside the cavity; wall thickness moved from a standard range into a load-bearing structure; changes to the position or form of latches, hinges, pressure relief valves, or cable ports; modification of the seal groove cross-section between body and lid; and features that must be molded integrally such as handles, wheel mounts, or stacking locators. All of these alter the cavity contour, and an existing tool cannot absorb them.
Does not require a mold (reuses open tooling): custom cutting and lamination of EVA or PU inserts; pre-cut foam, layered foam, and divider combinations; screen printing, pad printing, UV printing, laser marking, and in-mold labeling; color masterbatch matching to a specified Pantone reference; nameplates, barcodes, and laser-etched serial numbers; and adding pressure equalization valves, locks, shoulder straps, or wheel assemblies when the open tool already reserves the mounting points.
A useful rule of thumb: if the change can be achieved through post-processing, it is not a tool change. Inserts are post-processed. Printing is post-processed. Color matching swaps material before molding but never touches the mold. Only when a cavity must take a different shape do you genuinely enter tooling territory.
There is a genuine gray zone. Suppose a project wants the outer wall thickened by 1.5 mm to improve drop performance. It looks like a thickness tweak, but wall thickness changes pull cooling channels and gate locations with them. In most cases this requires modifying cavity inserts or even remaking them, which is a classic case of a small-looking change that is really a tool change. Requirements of this kind should be settled with a mold flow study before anyone commits.
2. Comparing Five Forming Routes for Protective Cases
Structure dictates process, process dictates tool form, and tool form dictates the order of magnitude of cost.
| Forming route | Typical products | Tool format | Tooling investment | Unit cost behavior | Order quantity pattern |
|---|---|---|---|---|---|
| --- | --- | --- | --- | --- | --- |
| Injection molding | Small and mid-size hard cases, waterproof junction boxes | Steel or aluminum mold with cavity, core, slides | Medium to high | Lowest at high volume | Usually thousands of pieces |
| Blow molding | Large hollow cases, large toolboxes | Aluminum or steel mold with blow pin and clamping | Medium | Moderate | Hundreds to thousands |
| Rotational molding | Very large cases, irregular containers | Thin welded steel sheet mold, no high pressure | Low to medium | On the higher side | Tens to hundreds |
| Thermoforming | Trays, inner cradles, thin liners | Aluminum or plaster mold with vacuum holes | Low | Low | Hundreds |
| Sheet metal plus sealing | Military steel ammunition cans, tool carts | Stamping dies, bending fixtures, welding jigs | Low to medium per part | Moderate | Flexible |
The selection logic is direct: injection molding owns precision and volume efficiency, rotational molding owns very large parts and low minimums, and sheet metal owns heavy loads and a military specification look. If your target is under 500 pieces at a large size, forcing injection molding is not economical, and rotational molding or sheet metal with sealing is usually the better answer. Conversely, if the target is 100,000 mid-size cases a year, the unit cost advantage of injection molding rapidly dilutes the tooling investment.
One caution: protective cases are often assumed to require injection molding by default. In practice the same outer form can be rotomolded for a small pilot batch and injection molded for volume production, with both routes coexisting. The precondition is that the design phase considers a shared outer envelope, so that inserts and packaging remain interchangeable across both lines. For material-level differences, see how to choose protective case plastic materials and PP versus ABS versus PC case materials.
3. Breaking Down Injection Mold Cost Components
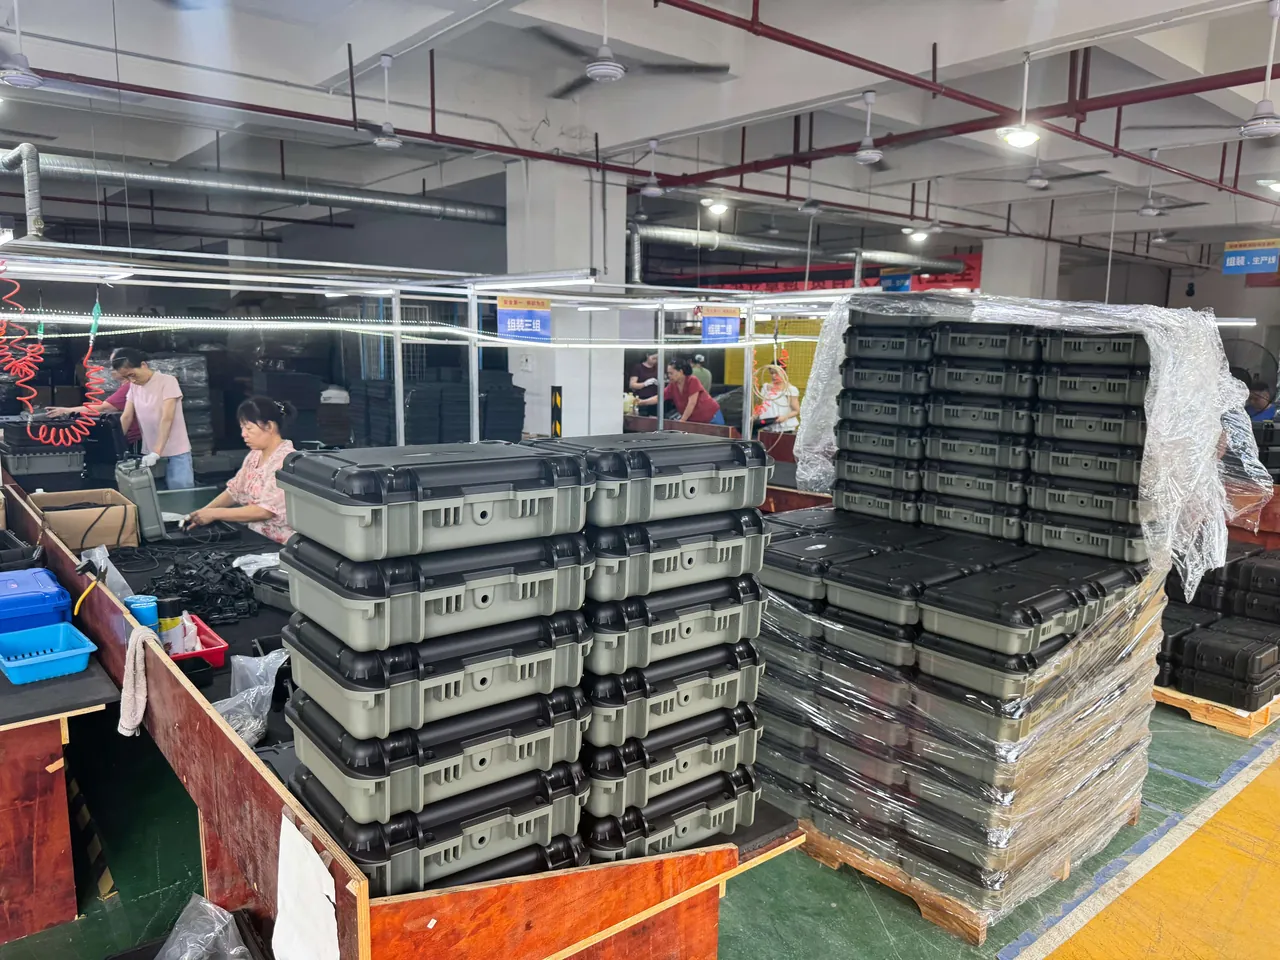
A protective case mold quotation is normally a sum of line items rather than a single figure. Understanding the breakdown is what lets you judge which line is negotiable and which should be left alone.
| Cost item | Content | Typical share | Room to compress |
|---|---|---|---|
| --- | --- | --- | --- |
| Structure design and mold flow analysis | 3D parting, cooling layout, gate plan, warpage and weld line assessment | 5 to 10 percent | Small; best left intact |
| Mold base and steel | Standard mold base plus cavity and core steel such as P20, 718, or S136 class | 25 to 35 percent | Moderate; select by volume |
| CNC machining and EDM | Roughing, finishing, deep cavity discharge, texture work | 25 to 35 percent | Moderate; tied to tolerance |
| Slides, lifters, and core pulls | Side action, unscrewing, complex parting | 5 to 15 percent | Moderate; simplifiable by design |
| Hot runner and temperature control | Hot runner system, heater elements, controller | 5 to 15 percent | Optional; volume dependent |
| Trial runs and process setup | T0, T1, T2 trials, sample inspection, parameter lock-in | 5 to 10 percent | Small |
| Surface treatment and texture | Etching, bead blasting, mirror polishing | 3 to 8 percent | Moderate |
Steel selection is the largest adjustable variable. A pre-hardened grade such as P20 class suits small pilot runs, with an empirical service life in the range of one hundred thousand cycles. Medium to long term production can move to 718 or S136 class, where life extends well beyond several hundred thousand cycles. If the product may be revised later, an insert-style cavity is more economical than a solid cavity, because a revision only replaces the insert and never touches the mold base.
Whether a hot runner is worth it comes down to two numbers: annual volume and scrap rate. A hot runner reduces runner scrap and shortens cycle time but adds tooling cost and maintenance complexity. Empirically, for mid-size case projects under fifty thousand units per year, a cold runner is the safer choice. Only at very high volume with expensive resin, such as PC class material, does a hot runner become the recommended option.
4. Choosing Mold Type: Soft Tooling, Aluminum, and Steel
Soft versus steel is not a contest about precision. It is a contest about life cycle. Choosing the wrong type most commonly ends with a mold failing mid-production and forcing a second investment.
| Mold type | Cavity material | Empirical life | Investment tendency | Recommended use |
|---|---|---|---|---|
| --- | --- | --- | --- | --- |
| Soft tool | Resin or zinc alloy | Hundreds to thousands of cycles | Low | Appearance validation, structure validation, trade show units |
| Aluminum tool | Aluminum alloy, 7075 class | Thousands to tens of thousands of cycles | Low to medium | Small to mid pilot runs, rapid iteration, shape confirmation |
| Pre-hardened steel tool | P20 class pre-hardened steel | On the order of one hundred thousand cycles | Medium | Stable medium volume production |
| Hardened steel tool | 718, S136, NAK80 class | Beyond several hundred thousand cycles | Medium to high | Long production runs, high appearance requirements |
| Beryllium copper insert | Beryllium copper alloy | Depends on cooling demand | Medium, localized | Deep cavities, thick walls, zones needing fast cooling |
A practical combination strategy: freeze structure and appearance first with an aluminum or soft tool, then invest in steel once everything is confirmed. This two-stage approach appears to spend money on an extra mold, but it moves revision risk forward into a low-cost phase. For complex structures or a buyer building its first protective case line, that money is usually recovered.
Conversely, if the structure is already mature, the drawings come from a proven platform, and the supplier has volume experience with a sibling case family, going straight to a pre-hardened steel tool is the faster route. The deciding factor is the degree of design freeze, not the size of the budget.
5. Batch Threshold and Mold Cost Amortization Model
Tooling cost is fundamentally a fixed cost, and it must be diluted by volume. The core formula is a single line:
Amortized tooling cost per unit = Total tooling investment / Total lifecycle production volume
From this follows an empirical threshold: when the amortized tooling cost per unit exceeds 20 to 30 percent of the unit material and processing cost, the batch is usually too small, and you should prefer a tooling-free route or a lower mold grade.
The table below is an illustrative model. The figures are empirical reference values used to explain the structure, not a quotation for any specific project.
| Scenario | Tooling investment (relative) | Lifecycle volume | Amortized per unit | Resulting preference |
|---|---|---|---|---|
| --- | --- | --- | --- | --- |
| A: 500 unit pilot | 100 | 500 | 0.200 | Amortization too high; avoid tooling or use a soft tool |
| B: 3,000 unit small batch | 100 | 3,000 | 0.033 | Acceptable; aluminum tool suggested |
| C: 20,000 unit mid batch | 100 | 20,000 | 0.005 | Reasonable; pre-hardened steel tool works |
| D: 100,000 unit volume | 100 | 100,000 | 0.001 | Clear advantage; steel tool plus hot runner |
Note that lifecycle volume is not the same as first order quantity. Many projects start with only one thousand units but expect fifty thousand cumulatively across three years, and in that case lifecycle measurement is the correct basis. If the product is a one-off project or the market outlook is uncertain, measure against the first order instead and prefer a lower mold grade.
Another frequently overlooked variable is revision probability. If structural iteration is expected within a year, an insert-style steel tool with replaceable inserts beats a solid cavity on total cost, even though the initial investment per tool is higher.
6. Customization Without a Mold: Inserts, Panels, and Hardware
For most B2B buyers who simply want a measure of customization, the routes below are already sufficient and trigger no tooling cost at all.
Insert customization is the most common entry point. EVA and PU foam can be CNC cut into virtually any contour, with adjustable depth, compartment layout, chamfers, and lamination layers. Relevant parameters and process details appear in factors that shape custom foam inserts and how pre-cut foam is produced. If you prefer tool-free manual shaping, pick and pluck foam is the low-barrier option. Where rigid support and zoned management are needed, consider a combination of dividers and foam.
Panel and branding customization covers screen printing, pad printing, UV printing, laser marking, in-mold labeling, metal nameplates, and woven labels. These processes act only on the surface of an already molded case and never involve the tool.
Hardware and function customization includes latch selection, hinge format, pressure equalization valves, shoulder straps and wheel assemblies, external mounting plates, and locking or tamper-resistant structures. When the open tool already reserves standardized mounting points, swapping hardware costs essentially nothing in tooling. For selection logic, see latch selection essentials and matching hinges, latches, and seals.
Color customization is achieved by changing the masterbatch, and as long as the material system and surface texture stay the same, the mold stays untouched. The caveat is that dark and highly saturated colors affect sink marks and color deviation, as detailed in protective case color customization considerations.
7. Technical Preparation Checklist Before Cutting Steel
Once tooling is approved, the fewer gaps in the following documents, the less rework later.
- 3D data: supply a complete solid model in STEP or IGES. Do not send only three views or an STL mesh.
- Critical dimensions and tolerances: define the outer contour, internal clearances, mounting holes, and seal face positions with tolerances.
- Wall thickness definition: keep the main wall in a uniform range and avoid abrupt thick-to-thin transitions that cause sink marks and warpage. Thick zones should be redesigned as ribs.
- Draft angles: specify draft on both outer and inner surfaces. Empirically, at least 1 degree per side on external surfaces, and more in deep cavities.
- Parting line intent: state which surfaces must remain on the same side and where a parting line witness mark is acceptable.
- Seal structure requirements: groove cross-section, compression target, and seal material hardness, all of which decide whether the target ingress protection level is achievable.
- Ports and openings: specifications and locations for cable ports, valves, locks, and mounting bosses.
- Material and surface requirements: resin grade, flame retardance such as a UL94 class, texture pattern, and color reference.
Wall thickness and rib layout directly affect compression and drop performance. See design essentials for high strength case structures and the logic of reinforcement rib layout.
8. The Trial Run Sequence: What to Inspect at T0, T1, and T2
A trial run is not simply molding a few samples for a look. It is a stage gate with defined exit criteria.
T0 first trial: verify that the mold opens and closes correctly, that ejection and core pull motions are smooth, and check for short shots, flash, and balanced filling. Dimensional drift is acceptable at this stage; the focus is whether the mold can run at all.
T1 parameter optimization trial: tune injection pressure, speed, packing, mold temperature, and cooling time while watching for sink marks, weld lines, warpage, and dimensional stability. The goal at this stage is to lock in a stable process window, not to find one setting that happens to pass.
T2 freeze trial: run a continuous batch using the locked parameters, then perform full dimensional inspection, appearance confirmation, and assembly validation including seals and hardware. Where applicable, run watertight, airtight, and drop spot checks. On passing, issue the sample approval record and release the mold to production.
Empirically, stable passage from T0 to T2 takes about three rounds, and more for complex structures with multiple slides and core pulls. When requesting a quote, state explicitly how many trial rounds are included and how overruns are billed, to avoid surprise charges later.
Always archive trial samples together with the first article inspection report and the process parameter sheet. This is the only evidence that matters in a later dispute. If the product carries an ingress protection claim, validate in parallel against IP67 rating requirements.
9. Mold Ownership, Transfer Clauses, and Negotiation Points
Who pays for tooling and who owns it is a far more common source of trouble than price. Three models dominate.
- Buyer pays and owns: the most common structure for long production runs. The contract must record the tool number, condition, storage location, and the conditions for transfer.
- Buyer pays, supplier owns: often paired with a supplier subsidy. The buyer effectively purchases usage rights only, and transfer must be negotiated separately.
- Supplier funds and amortizes into unit price: zero upfront cost for the buyer, but a higher unit price and supplier lock-in. Suitable for small pilot volumes.
During negotiation, settle the following: acceptance criteria for the finished tool and the number of trial rounds; service life commitments and maintenance responsibility; the documentation package delivered at transfer, including drawings, process parameters, electrodes, and inserts; the idle period after which a tool is considered abandoned; and the notification obligation when materials change or are discontinued. Putting ownership and transfer terms in the first contract is far easier than adding them later.
On price, compressing design and trial run fees usually costs more than it saves, and downgrading steel directly shortens life. The reasonable negotiating space lies in simplifying the structure to remove slides and core pulls, deciding which options such as hot runners to drop, and bundling the tooling fee with the first order volume.
10. Common Misconceptions and Pitfall Checklist
- "Changing color requires a new mold." It does not. A masterbatch change is a material change and never touches the tool.
- "The more expensive the mold, the better." Mold grade should match lifecycle volume. Overinvestment is waste.
- "The tooling fee must be recovered in the first order." If the first order is small, agree on an amortization period instead of insisting on full recovery up front.
- "Open tooling is always worse than a private mold." Open tooling means shorter lead time, lower cost, and a proven process window. For most small and mid projects it is the better answer.
- "Thicker walls are stronger." Thick walls sink, warp, add weight, and raise cost. The correct move is to add ribs.
- "Mold flow analysis is unnecessary." For complex cases, the cost of a mold flow study is usually far below the cost of a later tool modification.
- "A passing trial sample means stable production." Passing samples are necessary but not sufficient. Look at the dimensional capability index across continuous production.
- "Modifying the mold directly is fastest for a revision." If the original design used inserts, a revision only replaces inserts. A solid cavity may mean scrapping the whole tool.
11. How JUNZHJIA Supports OEM and ODM Programs
JUNZHJIA, manufactured by KeXin New Materials (Guangdong) Co., Ltd. at its Zhongshan facility, supports customization projects across protective cases, toolboxes, military weapon cases, and waterproof junction boxes in three typical modes.
The first is open tool customization. The buyer stays on an existing case platform while the factory handles insert design and cutting, surface printing, color matching, and hardware configuration. Lead times are short and there is no tooling investment, which suits pilot sales and small batches. The second is structural improvement. Localized structural optimization on an existing platform is delivered by modifying inserts rather than remaking the whole tool. The third is full custom tooling. From 3D data assessment, mold flow analysis, and tool design and manufacturing through to trial run approval, the whole chain is covered, with material certificates, flame retardance test reports, and ingress protection validation documents available on request.
Mold cost, batch threshold, and lead time depend on case size, structural complexity, steel grade, and surface requirements, and must be assessed against actual drawings. At the inquiry stage, provide the target annual volume and lifecycle forecast, the desired ownership model, ingress protection and flame retardance requirements, surface and color needs, and whether inserts are required. The more complete the information, the closer the quotation sits to final cost, and the fewer the later additions.
Frequently Asked Questions
Q: Does a custom protective case always require a new mold?
A: No. The test is whether the requirement changes the geometry of the plastic body. Replacing foam inserts, printing a logo, specifying a color, adding a nameplate, or swapping hardware all fall into post-processing or material change, so the manufacturer's open tooling can be reused with no mold cost. A new tool is only mandatory when you change the outer dimensions, internal parting, wall thickness structure, latch and hinge positions, or seal groove cross-section, since those define the cavity contour. Watch for the gray zone: thickening an outer wall by a small amount looks minor, but wall thickness changes pull cooling channels and gate locations with them, and often still require insert modification or a remake. Requirements of that type should be settled with a mold flow study first.
Q: How much does a protective case injection mold cost?
A: Price depends on size, structural complexity, steel grade, surface texture, and hot runner configuration, so the range is wide and no single figure is meaningful. The practical approach is to evaluate the cost components one by one: structure design and mold flow analysis typically run 5 to 10 percent, mold base and steel 25 to 35 percent, CNC and EDM work 25 to 35 percent, slides and core pulls 5 to 15 percent, hot runner and temperature control 5 to 15 percent, trial runs and setup 5 to 10 percent, and surface treatment 3 to 8 percent. Steel grade is the largest adjustable variable, with pre-hardened grades suited to a hundred thousand cycle range and hardened grades supporting several hundred thousand cycles or more. Ask the supplier for an itemized quotation rather than a lump sum, so you can tell what is negotiable and what should not be squeezed.
Q: How large a batch makes tooling worthwhile?
A: Use amortized tooling cost per unit, calculated as total tooling investment divided by total lifecycle volume. The empirical threshold is that when amortized tooling cost per unit exceeds 20 to 30 percent of unit material and processing cost, the batch is usually too small and you should prefer a tooling-free route or a lower mold grade. The structure works like this: a 500 unit pilot produces clearly excessive amortization, so avoid tooling or use a soft tool; a 3,000 unit batch can accept an aluminum tool; a 20,000 unit batch suits pre-hardened steel; and at 100,000 units a steel tool with a hot runner shows a clear advantage. Remember that lifecycle volume is not first order quantity. If you expect fifty thousand units over three years, measure against the cumulative figure.
Q: How do I choose between soft tooling, aluminum, and steel?
A: The difference is product life, not precision. Soft tools use resin or zinc alloy cavities with an empirical life of hundreds to thousands of cycles, suited to appearance and structure validation and trade show units at the lowest investment. Aluminum tools with aluminum alloy cavities last thousands to tens of thousands of cycles and fit small to mid pilot runs and rapid iteration. Pre-hardened steel tools last on the order of one hundred thousand cycles and suit stable medium volume production, while hardened steel tools exceed several hundred thousand cycles and fit long production runs with high appearance requirements. A practical strategy is two-stage: freeze structure and appearance with a soft or aluminum tool, then invest in steel once confirmed, moving revision risk into a low-cost phase. If the structure is already mature, going straight to pre-hardened steel is also reasonable.
Q: Are there customization options for small orders that avoid tooling?
A: Yes, and the routes are quite rich. Insert customization is the most common entry point, since EVA and PU foam can be CNC cut into virtually any contour with adjustable depth, compartment layout, chamfers, and lamination layers, and pick and pluck foam or divider combinations are also available. Surface customization covers screen printing, pad printing, UV printing, laser marking, in-mold labeling, and metal nameplates, acting only on the molded surface. Function customization includes latches, hinges, pressure equalization valves, shoulder straps, wheels, and external mounting plates; when the open tool already reserves standard mounting points, the tooling cost of swapping hardware is effectively zero. Color customization through masterbatch changes also leaves the mold untouched. Combined, these options support most small-batch pilot and branding needs.
Q: What documents should I provide before tooling starts?
A: Eight categories are recommended. First, a complete solid model in STEP or IGES format rather than three views or an STL mesh. Second, critical dimensions and tolerances covering the outer contour, internal clearances, mounting holes, and seal face positions. Third, a wall thickness definition, keeping the main wall as uniform as possible and converting thick zones to ribs. Fourth, draft angles, empirically at least 1 degree per side on external surfaces and more in deep cavities. Fifth, parting line intent, stating which surfaces must stay on the same side and where a witness mark is acceptable. Sixth, seal structure requirements including groove cross-section, compression target, and seal material hardness, which together decide whether the target ingress protection level is reachable. Seventh, port and opening specifications. Eighth, resin grade, flame retardance class, texture pattern, and color reference.
Q: How many trial rounds are typical, and what is checked in each?
A: Empirically, stable passage from first trial to release takes about three rounds, and more for complex structures with multiple slides and core pulls. At T0, the focus is whether the mold opens and closes properly, whether ejection and core pull are smooth, whether short shots or flash appear, and whether filling is balanced; dimensional drift is acceptable here. At T1, injection pressure, speed, packing, mold temperature, and cooling time are tuned while watching sink marks, weld lines, warpage, and dimensional stability, with the goal of locking a stable process window. At T2, a continuous batch runs on the locked parameters for full dimensional inspection, appearance confirmation, and assembly validation, plus watertight, airtight, and drop spot checks where applicable, after which the sample approval record is issued. State in the inquiry how many rounds are included and how overruns are billed.
Q: Can the tooling fee be amortized into the unit price?
A: Yes, but three common models must be distinguished. In the first, the buyer pays for the tool and owns it, which suits long production runs and yields the lowest unit price. In the second, the buyer pays but the supplier owns the tool, so the buyer effectively holds usage rights only and transfer requires separate negotiation. In the third, the supplier funds the tool and amortizes it into unit price, giving the buyer zero upfront cost at the price of higher units and supplier lock-in, which suits small pilot volumes. Which model fits depends on your order outlook and supply chain strategy. In every case, record the tool number, condition, storage location, acceptance criteria, life commitment, maintenance responsibility, documentation package at transfer, and discontinuation notice obligation in the first contract. When a factory relocates or a supplier changes, the clarity of those clauses decides the migration cost.
Conclusion and Further Reading
Whether a custom protective case requires a new mold is fundamentally a boundary question. Change the geometry of the case body and tooling is mandatory. Change only the inserts, surfaces, and hardware around the body and tooling is unnecessary. Once that line is drawn, everything remaining is a calculable engineering problem. Mold cost is composed of design, steel, machining, mechanisms, hot runner, trial runs, and surface treatment. The batch threshold follows from the ratio of amortized tooling cost to unit material and processing cost. Mold grade follows from lifecycle volume rather than budget comfort. At the inquiry stage, provide target annual volume and cumulative forecast, the desired ownership model, ingress protection and flame retardance requirements, surface and color needs, and insert configuration, and settle the number of trial rounds, their billing, and the tool ownership and transfer clauses. The more complete that information, the closer the quotation sits to real cost and the more controllable the revision risk. JUNZHJIA supports open tool customization, structural improvement, and full custom tooling, with the final approach determined by drawing assessment.
Further Reading