


The conditions faced by marina equipment cases are more complex than those of most coastal warehouses. The equipment is installed between floating pontoons and quay walls, with seawater often only a meter below the working surface, a spray zone that persists throughout the year, ultraviolet exposure that is never shaded, and electrical components inside the case that are extremely sensitive to humidity. The core conclusion is that marina equipment should adopt a combined solution of a seawater salt spray resistant enclosure, a foam insert that separates electrical parts from structural parts by cavity, clean isolation of stainless passivated surfaces, and readable internal humidity control. Mooring structural parts, rubber fenders and shore power electrical parts must be handled as three distinct requirement families rather than being forced into one generic package, because using a single universal pack for every component is the single most common cause of rework on this type of project.
Marina components also differ from shipyard parts in one important respect: they are usually unpacked and installed on the dock itself, with no temperature controlled warehouse available for staging. Once the pin bore of a mooring arm, the internal elements of a shore power box, or a cable plug are wetted or contaminated at the moment of unpacking, the site has neither a drying facility nor a cleaning facility, so the part can only be installed with the hidden defect still present. Worse, seawater rinsing is routine dock work, so the case and its contents are frequently swept by water mist while waiting for installation, salt precipitates in the gaps and keeps absorbing moisture, and these invisible starting conditions often only surface in the first rainy season. This article gives packaging parameters, insert cavity methods, insulation and humidity control targets, and test items and acceptance practices that can be written directly into a procurement specification, for use by marina civil contractors, shore power equipment manufacturers and mooring equipment suppliers.
Table of Contents
- Marina component operating environment and case selection boundaries
- Mooring bollards and mooring arm bend and impact protection packaging
- Pontoon connectors, pins and fastener kit management
- Rubber fenders and bumper anti aging packaging
- Shore power box enclosure, circuit breakers and metering moisture and vibration protection
- Shore power cable, socket and plug insulation protection
- Stainless passivated surface protection and free iron contamination control
- Case material and hardware selection under seawater salt spray
- Electrical insulator moisture control: drying, heating and indication
- Insert cavity zoning and mixed loading compatibility
- Sealing, pressure equalization and humidity control in salt precipitation environments
- Test basis, labeling and unpacking acceptance
- Dockside storage and pre installation inspection
- Frequently Asked Questions FAQ
- Conclusion and further reading
Marina component operating environment and case selection boundaries
Begin by drawing the boundary. Long, heavy structural items such as floating pontoon box girder segments, concrete sinkers and whole mooring piles are transported on dedicated cradles with multi point lashing and should not be forced into cases. The six families that genuinely suit a dedicated protective case are: bollards, mooring rings and shackle type connectors at the top of mooring piles; rods, hinge seats and pins of the mooring arm; pontoon connectors, connecting pins, bolts and embedded parts; rubber fenders, bumper strips and the metal end plates of inflatable fenders; shore power box enclosures, circuit breakers, contactors, energy meters and wiring assemblies; and shore power cables, industrial plugs and sockets, and cable reel accessories. The common feature of these six families is high unit value, surface condition or electrical performance that determines function, and the need to be shipped as a complete kit keyed to the installation node.
The environmental parameters set the starting point of the protection grade. Chloride deposition rates at coastal marinas often sit in the range of 10 to 50 mg/(m2·d) (experience range, varying with distance from the sea and wind direction), relative humidity in the pontoon zone stays above 80 percent for long periods, and the spray zone also sees liquid water acting together with salt mist. This implies two things. First, the corrosion rate of metal parts is far higher than inland, and a galvanized layer can fail in a single rainy season within the spray zone. Second, the inside of the case can be contaminated by external salt mist before disassembly, so the sequence of cleaning and drying must be written into the work procedure. The sealing grade of the case should be specified according to IEC 60529 or GB/T 4208, and an electrical cavity stored in the open usually needs to reach IP65 or above. The specific selection logic can be referenced from the waterproof case and IP rating selection guide and the IP67 protective case structural points article.
The case selection principles can also be compressed into three rules. First, electrical and structural parts must be in separate cavities, because rust debris and metal dust from structural parts are the direct cause of electrical insulation failure. Second, stainless parts must be managed as clean parts, physically isolated from carbon steel parts, with all contact pieces made of non metallic or stainless material. Third, the moisture protection grade is set by the storage period, because marina projects often leave weeks between arrival and installation and, with schedule delays, may stretch across a whole rainy season, so the moisture scheme must be configured for the worst case rather than for the planned schedule.
| Component family | Main damage mode | Key protection requirement |
|---|---|---|
| --- | --- | --- |
| Bollards and mooring rings | Bore wall denting, coating scratches | Plug the bore, soft pad on contact face, single layer storage |
| Mooring arm rods and hinge seats | Permanent deflection, pin bore deformation | Evenly spaced V supports, fixed by posture, no single point suspension |
| Pontoon connectors and pins | Mixed grades, surface rust, thread damage | Kit by node in separate cells, thread caps, quantity marking |
| Rubber fenders and bumpers | Ozone cracking, UV chalking, permanent set | Flat lay not hung, away from light and ozone, end plate packed alone |
| Shore power box and electrical assembly | Condensation, loose terminals, arc chamber dust | Independent cavity, desiccant plus humidity card, switch off and locked |
| Shore power cable and plug socket | Jacket swelling, pin deformation, insulation drop | Compliant coil radius, capped joints, same cavity away from solvent and grease |
Mooring bollards and mooring arm bend and impact protection packaging
The mooring arm is a long rod with hinge points, and its failure modes concentrate almost entirely at two locations: the straightness of the rod body and the fit accuracy of the articulated pin bore. Once a rod deflects beyond its elastic limit under transport, it keeps a permanent bend, which on site shows up as abnormal swing resistance of the mooring arm and uneven pin loading. When the pin bore is dented, the bore wall develops burrs or becomes oval, the hinge point then develops play and wears faster. Both damages are hidden: the factory inspection passes, yet the problem is found only at site assembly.
The key of support design is to control the span rather than to increase the number of lashing points. The engineering rule of thumb is to place supports at even spacing, the spacing not exceeding one eighth to one tenth of the full rod length, with soft polyurethane support blocks shaped as V locators that both limit rolling and spread the contact stress. Support points should avoid the threaded section and the pin bore machined section so that no concentrated load forms on precision areas. For two point lifting, placing the lift points at about 0.2 of the full length from each end brings the self weight bending moment close to minimum, which is the standard practice for long member lifting. Never use wire rope or chain to directly bind the rod body and threaded section, and never place lift points on the pin, grease nipple or sensor bracket.
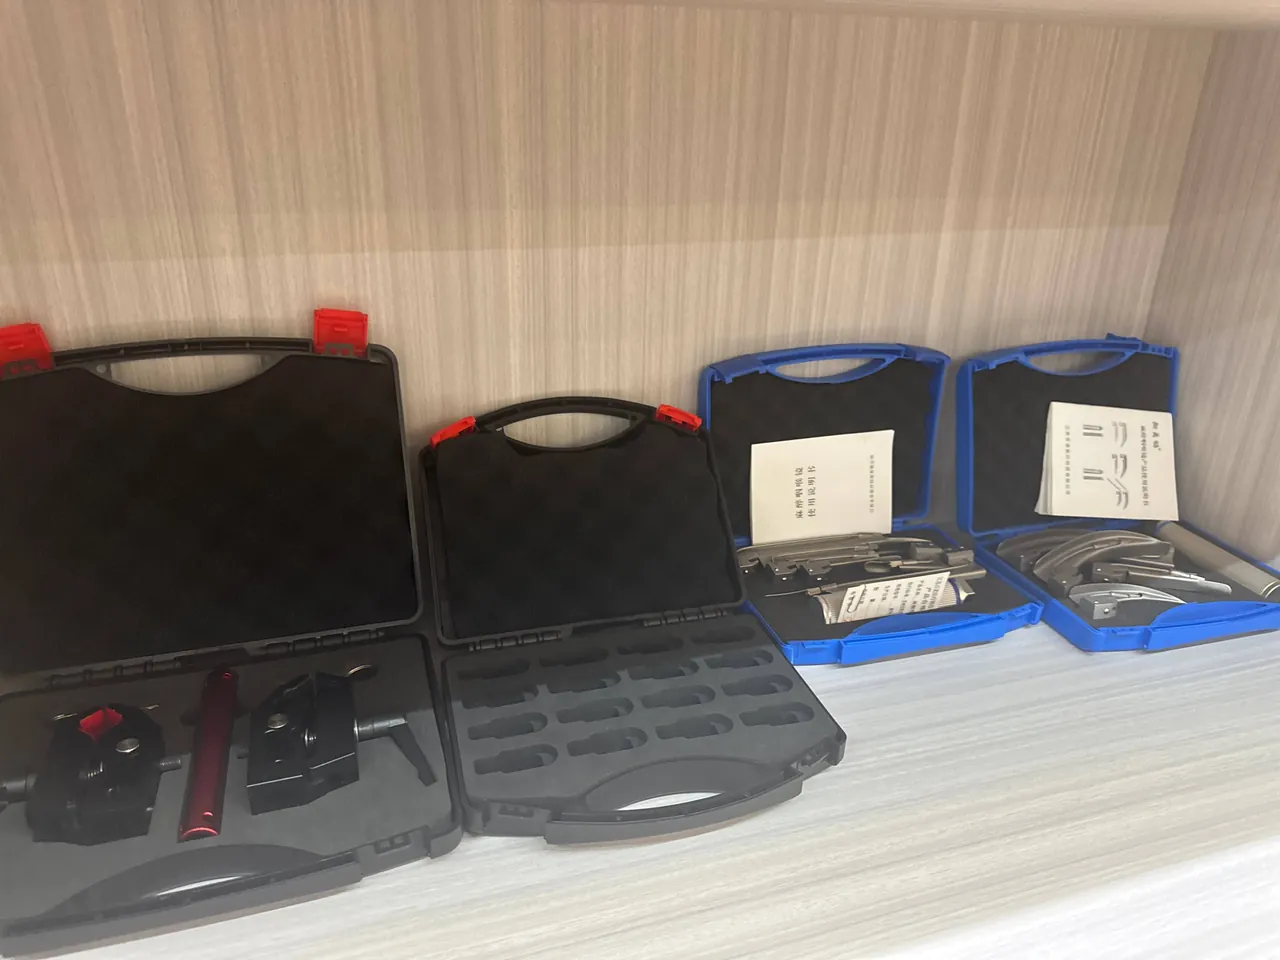
Bollards, mooring rings and shackle type parts are small in volume but precise on the contact face. The ring body and pin bore of a mooring ring are load bearing surfaces, and any dent forms a stress concentration under mooring load. The base mounting face and bolt holes of a bollard are assembly datums, and once the bore chamfer is damaged, the base will seat poorly after site tightening. The packaging for these parts is: plug the pin bore with a plastic stopper or wrap film, fit a soft guard on the bore mouth, apply a peelable protective film on the mounting face, place in a single layer on soft padding and keep them separated, never letting a large part press a small part. For kit shipment, the bollard, mooring ring, shackle, pin and fasteners of the same mooring node should go in the same divided tray and be marked with the node number, so the site takes them by number and avoids mis assembly.
| Part type | Typical size or weight | Support and fixing | Notes |
|---|---|---|---|
| --- | --- | --- | --- |
| Mooring arm rod | 2 to 8 m, 80 to 600 kg | Evenly spaced V soft support, spacing not over 1/10 length | Avoid threaded and pin bore sections, no single point suspension |
| Mooring arm hinge seat | 60 to 400 kg | Fixed by mounting posture, pin bore plugged | Contact face filmed, single layer store |
| Bollard and mooring ring | 15 to 300 kg | Single layer soft pad, bore mouth guarded | Not in same cavity as heavy mass parts |
| Pontoon connector and pin | 1 to 80 kg | Kit by node in cells, thread capped | Quantity mark, with install sequence drawing |
| Rubber fender and bumper | length 0.5 to 3 m | Flat lay not hung, interlayer separator | Away from light and ozone, end plate packed alone |
Pontoon connectors, pins and fastener kit management
The problem with pontoon connectors is not how precise a single piece is, but that the quantity is large, the specifications are close, and mixing is extremely easy. A medium sized yacht marina pontoon can have hundreds of connection nodes, and two batches of pins differing by only 2 mm in diameter are almost indistinguishable by appearance, so once mixed in one box, the site can only tell them apart by measuring each piece with a caliper. More serious is material mixing: a stainless pin fitted into an aluminum pontoon lug plate forms an obvious galvanic couple in the seawater splash environment, and the aluminum side corrodes far faster, yet this corrosion only appears months after installation.
There are three management methods. First, divide by installation node rather than by specification: one cell per node, holding all pins, bolts, washers and insulators required for that node, with the node number marked outside the cell and an install sequence drawing attached. Second, divide pins by diameter range with quantity marking, using a low moisture absorbing closed cell material at the bottom of the cell so pins do not roll inside and strike each other's threads. Third, an insulating sleeve or insulating washer must be fitted between aluminum structures and stainless fasteners, and the quantity of these small parts must match the fastener count and be counted separately, because if one is missing on site someone will substitute an ordinary washer. The machining method of the divided insert and the mold cost structure can be referenced from the custom protective case mold cost analysis article.
Lubrication and anti corrosion treatment must respect compatibility. Pin and thread areas usually need anti rust grease, but the chosen grease must not contain components that migrate into rubber parts and cause swelling, nor use a formula that forms corrosive products on aluminum surfaces. After coating, an outer wrapper should isolate it so the grease does not spread inside the case and contaminate electrical and rubber parts in other cavities. If the project requires site installation without cleaning, the grease can be applied at the factory with a protective sleeve, and removing the sleeve is listed as a pre installation check item.
Rubber fenders and bumper anti aging packaging
Rubber fenders are the marina components most dependent on elasticity, and elasticity is precisely the performance most easily ignored in packaging. The fender has four failure paths: ozone produces cracks perpendicular to the stress direction on a stretched surface; ultraviolet chalks the surface and progresses inward; continuous compression or hanging produces unrecoverable permanent set; and an inflatable fender can be punctured by sharp objects or over pressured by internal pressure versus outside temperature difference. All four paths can occur simultaneously in the pontoon environment where strong UV, high ozone and high temperature overlap.
The principle for solid fenders is flat lay, away from light, no stacking pressure. Cylindrical and D section fenders should lie flat on soft padding, never hung on hooks, and never have heavy objects stacked above. For multi layer storage, a rigid separator between layers lets the separator carry the load rather than the fender body. The packaging material should block both UV and ozone; dark polyethylene film or aluminum plastic composite film both work. Do not use film that may release chlorine or plasticizer in the same cavity as stainless parts or electrical parts. Storage temperature should be controlled between 10 and 25 degrees Celsius by experience, and kept away from welding areas, electric motors, switchboards and diesel generator sets as ozone sources. Pontoon marinas often place generators and switchboards right next to the fender yard, which is the easiest point to overlook.
Inflatable fenders are treated as pressure vessels: before transport, adjust internal pressure per the manufacturer's requirement to avoid over pressure in high temperature, fit an outer protective cover to prevent puncture and abrasion during handling, and attach pressure documents and a repair parts list. Metal end plates and flanges are coated or plated parts and should be packed separately from the rubber body, with a protective film on the end plate contact face and fasteners kitted by node in cells. Fenders and mooring ropes should not be stored in the same cavity, because the rope surface carries salt and sand that repeatedly grinds the fender surface under vibration.
Shore power box enclosure, circuit breakers and metering moisture and vibration protection
The shore power box is an electrical device shipped as a whole, and it already has an IP44 to IP66 protection grade, so the focus of transport protection is not external waterproofing but the mechanical and humidity protection of internal components. Three risks are most common. First, condensation: the box wall sweats under day night temperature difference and droplets fall on the circuit breaker and busbar. Second, loose terminals: transport vibration reduces the preload of wiring terminals and component mounting screws. Third, contamination: once metal dust or salt bearing particles enter the arc chamber and contact gap, the breaking performance drops.
There are four concrete practices. First, the whole box should be positioned on six faces inside the protective case, fixed with closed cell foam or a molded insert, never supported only by corner blocks, because under vibration the box will shift slightly inside the cavity and strike the cavity wall. Second, the box interior should be dried once before shipment, with a proper amount of desiccant and a humidity indicator card placed inside, the door closed properly and the lock fitted with a protective sleeve; switches and circuit breakers are set to the off position with mechanical lock or warning label to avoid accidental closing under vibration. Third, all removable wiring terminals and busbar connection screws are re tightened once per the torque table and marked with a reference line, so arrival can judge looseness by the line. Fourth, precision parts such as energy meters, residual current devices and communication modules, if removable, are best packed individually in anti static shielding bags and fixed in an independent small cavity; the static and humidity protection idea can be referenced from the ESD shielding case solutions article.
| Shore power part | Protection focus | Reference practice |
|---|---|---|
| --- | --- | --- |
| Shore power box body and door lock | Six face positioning, lock denting | Molded insert fix, lock sleeve, door seam protective tape |
| Circuit breaker and contactor | Loose terminal, arc chamber dust | Torque retighten and mark line, switch off locked, low dust cavity |
| Energy meter and communication module | Static, humidity, vibration | Anti static bag pack, independent small cavity, soft positioning |
| Cable and industrial plug socket | Pin deformation, jacket swelling | Capped joint, compliant coil radius, away from grease and solvent |
| Busbar and wiring terminal | Oxidation, foreign matter adhesion | Terminal cover, copper bar filmed, no bare hand contact |
Shore power cable, socket and plug insulation protection
Cable damage is usually not a break but a slow drop in insulation performance and physical damage to the jacket, and both have clear causes in the transport stage. Too small a coil radius leaves residual stress in the jacket and insulation, and a sharp bend in low temperature makes the jacket micro crack. Long contact between the jacket and oily solvent or high plasticizer soft PVC causes swelling, and after volume change the interface between jacket and insulation is destroyed. Compression of the pins of an industrial plug and socket raises contact resistance and causes temperature rise.
The enforceable requirements are as follows. The cable coil radius must not be less than the manufacturer's minimum bend radius, and engineering often uses 6 to 8 times the cable outer diameter as a rule of thumb. After coiling, fix with a soft band that does not cut into the jacket. Industrial plugs and sockets (commonly the IEC 60309 series) get a protective cap on the pin end and a dust cover on the socket, and plug and socket must not squeeze each other. Cable must not share a cavity with grease, solvent or paint buckets, nor lie against rubber parts for long. Cable reel accessories should stand upright with the rim taking the load, never letting the reel side plate carry the full axial pressure of the coil. A special reminder is low temperature shipment: the jacket becomes brittle in low temperature, so handling should avoid throwing and sharp bends, and when necessary the handling window should be adjusted per the temperature change response idea given in the extreme temperature case and component protection article.
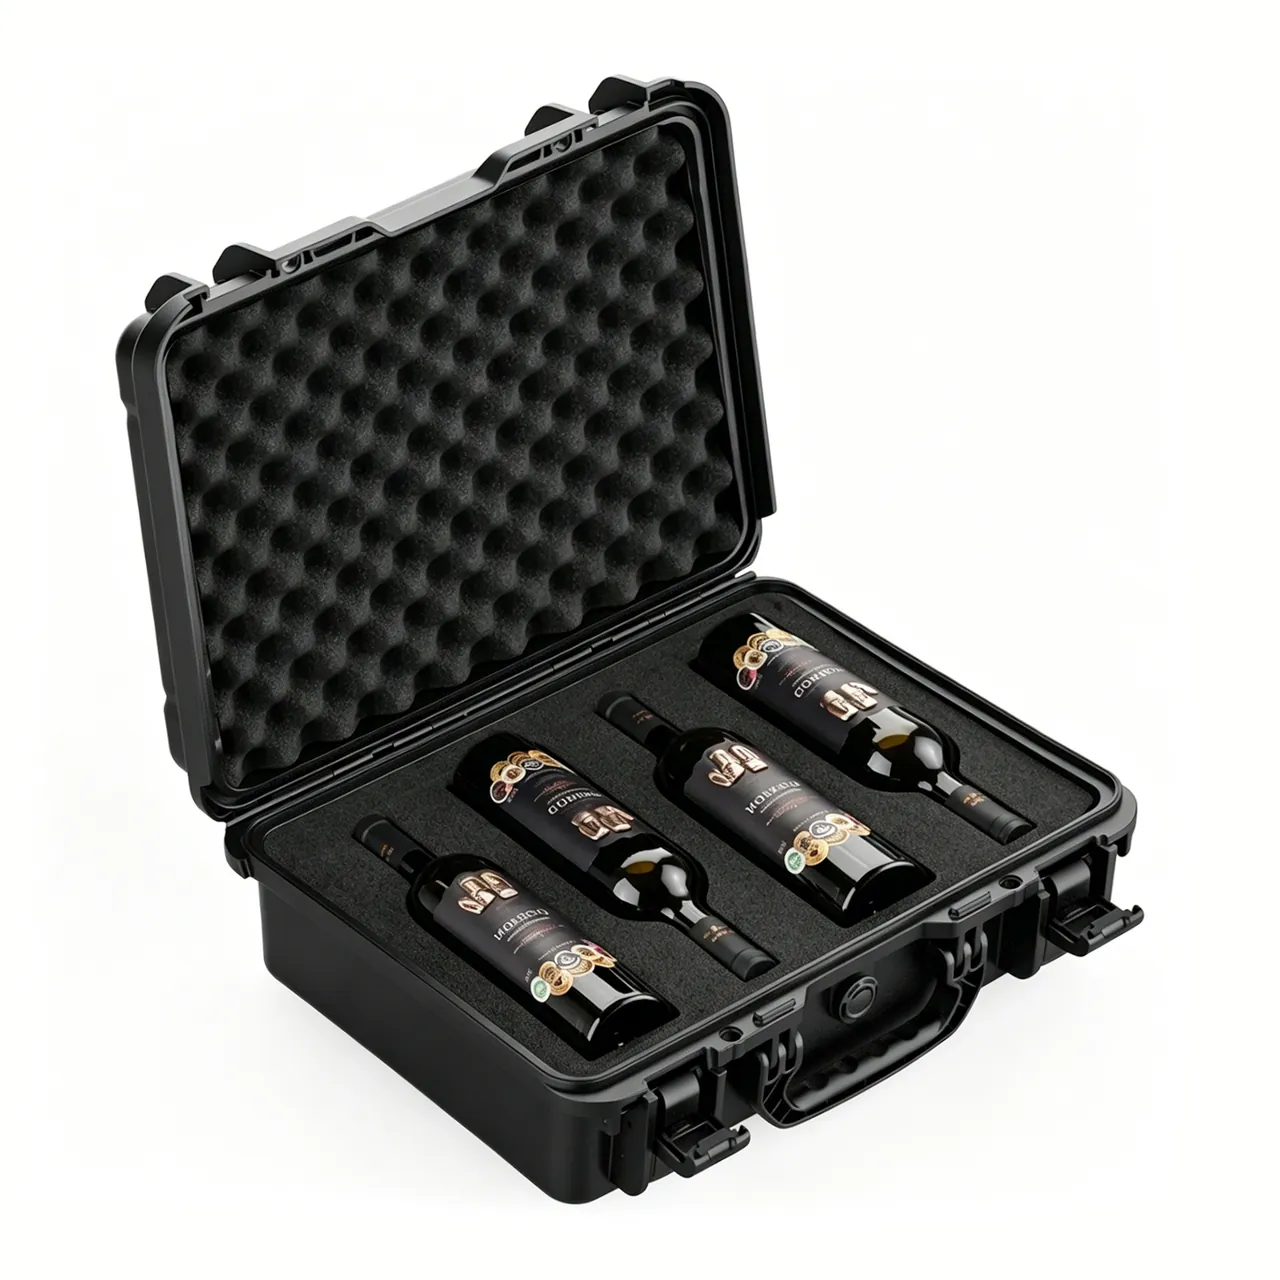
Arrival inspection should include confirmation of insulation performance, not just appearance. Use a megohmmeter to measure phase to phase and phase to ground insulation resistance per the manufacturer's method; a common requirement is no less than 5 MΩ under 500 V DC test (experience criterion, specific values obey the manufacturer and project rules), and record the ambient temperature and humidity at test. If the value is abnormally low, first move the cable to a dry environment and rest before retest, rather than directly scrapping it. If the cable was soaked by seawater in transit, the outer jacket must be rinsed with fresh water, wiped dry and rested in a dry environment before insulation test, because salt residue on the jacket surface forms a conductive path and keeps absorbing moisture.
Stainless passivated surface protection and free iron contamination control
Marinas use large amounts of 304 and 316/316L stainless steel precisely because seawater is too harsh on carbon steel. Stainless corrosion resistance relies on the thin, dense passivation film on the surface, and the formation and maintenance of this film require the surface to be clean and oxygenated. The two things that most destroy it are free iron contamination and chloride concentration in crevices. The former makes the contaminated point a pitting origin, and the latter makes pitting nucleate and grow downward within weeks. Both are amplified in the marina spray zone.
Protection measures are in four layers. The first layer is contact material: all cradles, card slots, bands and lifting gear that directly touch stainless parts should use stainless, polyurethane or engineering plastic; if carbon steel lifting gear must be used on site, a soft isolator must be placed between the gear and the workpiece, and carbon steel parts must never slide and rub on the stainless surface. The second layer is packaging material: use chlorine free, sulfur free neutral paper, and do not wrap stainless parts in chlorine containing plastic film, because chloride ions concentrate in the condensate under the film. The third layer is physical surface protection: machined, mirror and brushed faces get a low tack peelable film that leaves no adhesive residue, and edges get corner guards against mutual denting. The fourth layer is traceable inspection: on arrival, an iron ion color method can spot check the stainless surface; color development means free iron contamination, and the part should be re pickled and passivated before installation. Marina projects should also specify that stainless parts must not be rinsed with seawater during transport and storage, only with fresh water, and must be thoroughly dried after rinsing.
The placement posture of stainless parts also affects the result. Long parts such as handrail tubes, guardrail tubes and water stop profiles should be stored in vertical card slots or layered brackets to avoid flat stacking that leaves pressure marks; thin wall parts must not be supported at a single central point. If aluminum parts are also in the case, they must be in a separate cavity from stainless parts, because the potential difference between aluminum and stainless is large and the aluminum side corrodes noticeably under chlorinated humid conditions. This clean management shares ideas with near shore electronic equipment packaging and can be referenced from the cavity and humidity control treatment in the sonar transducer component case article.
Case material and hardware selection under seawater salt spray
The case at a marina is a long term exposed part, and its failure usually starts at the hardware rather than the shell. Galvanized steel hinges and latches can show white rust within tens of days in the spray zone, and rust water runs down the case wall and contaminates the surface. Ordinary carbon steel springs quickly lose elasticity in salt spray, so the latch cannot hold its clamping force. Therefore the exposed hardware should use 304 or 316 stainless, or adopt a multi layer coating system verified by scratched salt spray comparison. The load capacity, pivot clearance and corrosion resistance combination of hinges and latches directly decide the actual service life of the case in the marina environment, and the selection and acceptance points can be referenced from the toolbox hinge latch and seal article.
For case material, modified polypropylene and copolymer polypropylene perform more stably than ordinary nylon under the combined seawater salt spray and UV condition. If glass fiber reinforced material is used, its strength decay under long term UV exposure should be confirmed. The sealing strip is recommended to be EPDM or silicone, both superior to ordinary nitrile and reclaimed rubber in weather resistance and compression set. The strip should use a double compression fit with a sand draining step, because once sand grains and salt crystals are trapped under a single flat strip at a marina, the whole case seal fails. Corrosion verification usually follows GB/T 10125 for neutral salt spray, plus a UV aging test (method can reference ISO 4892 or ASTM G154). It should be noted that these two tests give scheme comparison and ranking basis, not a direct conversion to site service life.
A secondary problem from salt precipitation also needs attention: salt crystallizing in case gaps, handle pivot holes and latch mechanisms keeps absorbing moisture, keeping these positions wet for long periods and making them priority corrosion points. Design should reduce dead corners that collect water and salt, and keep handle and latch mechanisms exposed and rinsable. In use, regularly rinse exposed hardware with fresh water and dry it, and do not seal the case immediately after rinsing.
Electrical insulator moisture control: drying, heating and indication
The humidity control target of the electrical cavity is stricter than the structural cavity, because insulation performance is extremely sensitive to condensation. The common engineering practice is to keep the target relative humidity of the electrical cavity below 40 percent (experience target) and place a humidity indicator card inside the cavity, so that on opening the cavity can be read first and then opened. There are three types of means to achieve this target, each with its applicable boundary.
The first type is desiccant: low cost, passive, suitable for one time transport and medium term storage, with the dosage estimated by the free volume of the sealed cavity, and a low shedding, dust free variety chosen to avoid powder entering breakers and instruments. The second type is active dehumidification: including electric heating plate, semiconductor dehumidification and breathing dryer, suitable for long term storage with power, but it needs power and temperature control, and marina sites often can only connect power temporarily, so who supplies power should be clarified at the scheme stage. The third type is passive protection: raising the sealing grade, wrapping key parts in moisture barrier film, and placing electrical components in independent sealed small cavities. The trade off among the three should combine storage period and site conditions; the table below gives the common combination reference in engineering.
| Moisture means | Applicable storage period | Relative advantage | Use limit |
|---|---|---|---|
| --- | --- | --- | --- |
| Desiccant plus humidity card | 1 to 12 months | Passive, low cost, readable | Dosed by volume, saturation invisible |
| Electric heat or semiconductor dry | Over 6 months | Sustained low humidity | Needs power and control, condensation reversal risk |
| Breathing dryer | Over 3 months | Replaceable, simple upkeep | Needs observation window and change port |
| Sealed small cavity plus zoning | Full cycle | Risk limited to one cavity | Case complexity and cost rise |
| Moisture film plus shield bag | Single part | Compatible with anti static | Does not solve whole cavity humidity |

Anti static and moisture control must be considered together. Parts with circuit boards, communication modules and instruments should first be packed in anti static shielding bags and then placed in the electrical cavity. The shielding bag itself has limited moisture resistance, so it cannot replace desiccant and humidity indication. At the same time, do not press desiccant directly on the circuit board, and do not let volatile matter from vapor phase rust preventive enter the electrical cavity, because such substances carry compatibility risk to contacts and connectors. After opening, if the humidity card shows over the limit, first move the electrical part to a dry environment to rest, then remove the shielding bag, to avoid direct exposure in a wet state.
Insert cavity zoning and mixed loading compatibility
The insert of a marina equipment case must separate four loads of completely different nature: pressure bearing structural parts, clean stainless parts, rubber parts and electrical parts. The basis of zoning is not volume ratio but compatibility. The common four incompatible combinations are: grease and rubber (swelling and hardening), vapor phase rust preventive volatiles and electronic parts and rubber (compatibility risk), cable and solvent or coating (jacket swelling), and magnetic heavy part and instrument (magnetic field and vibration). These combinations must be broken by rigid separators at the insert design stage, not by adding a film inside the cavity.
The choice of insert material should be decided by cavity function. The pressure cavity uses high density closed cell foam or a composite rigid support seat so the heavy part load transmits to the case bottom through the seat. The electrical cavity uses a low shedding, wipe cleanable rigid separator with a soft facing to keep foam debris out of components. The stainless clean cavity uses a non absorbing, non shedding liner and avoids closed gaps that can pool liquid. The cable cavity should use a bracket with rounded transition so the cable lies naturally at the minimum bend radius rather than being pressed into a crease. The matching method of zoning and seal can be referenced from the protective case seal material selection article, whose notes on compatibility between different media and materials are especially useful for this mixed loading scenario at a marina.
Zoning design should also consider work sequence. A reasonable cavity layout lets the site work in the order of first open light parts, then take heavy parts, and first open non electrical cavities, then open electrical cavities, to avoid opening the electrical cavity and then having it polluted by dust and water from other work. If one case needs to load different part combinations in different batches, a removable divider system is better than a one piece molded insert, and the cavity map and part list of this batch should be marked on the outside of the case.
Sealing, pressure equalization and humidity control in salt precipitation environments
Sealing design in the marina scenario must additionally consider two things: the wedging effect of sand grains and salt crystals, and residual salt after seawater rinsing. If the sealing face uses a single flat strip, one grain of sand or one salt crystal precipitation can form a leakage path; therefore a double compression structure is recommended with a sand draining step outside the first compression so particles have an exit path. More critical is that before sealing the case the sequence of fresh water rinse, wipe dry, rest to dry, then reseal must be completed. If the part surface still carries salt when sealed into the case, the salt keeps absorbing moisture, keeps the cavity humidity high for long, and quickly consumes the desiccant.
Pressure equalization parts are also necessary in marina projects, but their role differs slightly from the general transport scenario: the main contradiction here is not external water pressure but the reciprocating pressure difference caused by day night temperature difference and sunlight, and the fatigue of the sealing strip under long term pressure difference. Fitting a breathable pressure equalization part lets the internal and external pressure difference balance slowly while blocking liquid water and salt mist. The desiccant dosage is estimated by the free volume of the sealed cavity; the table below gives the common experience range in the marina environment, and the actual value should be corrected by the case sealing grade and storage location.
| Sealing condition | Desiccant reference dosage | Humidity card level | Target internal relative humidity |
|---|---|---|---|
| --- | --- | --- | --- |
| Sealed cavity, inland factory transfer | 0.6 to 1.2 kg/m3 | 10/20/30/40 | <=45% |
| Sealed cavity, coastal marina short storage | 1.5 to 2.5 kg/m3 | 10/20/30/40/50/60 | <=40% |
| Open pontoon site, across rainy season | 2.5 to 3.5 kg/m3, with replaceable desiccant bay | Same as above, plus unpacking record photo | <=40%, dew point 5 K below lowest ambient |
| Electrical sealed cavity | 1.2 to 2.0 kg/m3, low shedding type | 10/20/30/40 | <=35% |
It must be clear that the desiccant and humidity card are a readable combination: the desiccant looks almost unchanged after saturation, while the card shows color by level, letting the site judge before opening whether the part needs to move to a dry environment. The unpacking record should include a card color photo, opening date and operator, as a traceable acceptance basis. For projects across a rainy season, an intermediate check node after sealing is advisable, with a reserved observation window, to avoid repeated lid opening just to check humidity.
Test basis, labeling and unpacking acceptance
The procurement specification for marina equipment cases should include four verifications. The first is corrosion resistance, a neutral salt spray test per GB/T 10125, with specimens covering the contact combination of case hardware and insert material. The second is sealing grade, IP grade verified per IEC 60529 or GB/T 4208, with separate functional confirmation of the pressure equalization part after a temperature cycle. The third is transport performance, drop and stack per the GB/T 4857 series, or a full distribution cycle simulation per ISTA and ASTM D4169. The fourth is weather resistance, UV aging per an ISO 4892 or ASTM G154 class method, with a temperature humidity cycle added when necessary to reproduce the day night duty of the pontoon site. The test profile should be tailored to the actual transport path rather than copied from a template.
Labeling follows the packaging storage and handling graphic symbols of GB/T 191, with operation prompts added for the marina scenario. Required items include: center of gravity and lift point; upward and do not invert; moisture proof, rain proof and no seawater rinse; allowed stack layers; single case gross weight and outer dimensions; per cavity part list, batch number, sealing date and latest opening date. The electrical cavity and stainless clean cavity should carry labels such as no chlorine containing cleaner, no bare hand contact with machined face, and inner pack to be opened only in dry environment. These labels seem basic but are the most direct link to avoid site misoperation.
The unpacking acceptance sequence should be written as a document. First read the humidity card of each cavity and the pressure equalization part state, then decide whether the whole case must move to a dry area. Then open cavities by number, opening non electrical cavities first to reduce dust interference. After opening the electrical cavity, immediately check desiccant state, whether the terminal mark line has shifted, and any condensation trace. After opening stainless parts, check the surface for contamination color and dent marks. After opening rubber parts, check hardening, cracking and permanent set. All checks should leave traces, including photos, measured values and operator signature.
Dockside storage and pre installation inspection
The marina site usually has no temperature controlled warehouse, so the storage condition itself is part of the protection scheme. The case must not be placed directly on the pontoon panel in the wave exposed position; it should be raised over 100 mm and kept away from the spray zone and below drainage outlets. It must not be stored with mooring ropes, fishing nets, fuel drums or cleaning agents. A heavy part case must not be stacked above an electrical case. During open storage, periodically check whether exposed hardware shows white rust, whether the latch still holds clamping force, and whether the sealing strip is wedged open by sand grains. Across a rainy season, read the humidity card once at the midpoint and record it.
The pre installation check list should cover five types of content. First, stainless parts: any free iron contamination color, any dent or scratch, whether the machined face protective film was correctly peeled. Second, rubber parts: whether hardness and rebound are normal, any permanent set and crack, whether end plates and fasteners are complete. Third, electrical parts: whether insulation resistance is qualified, whether the terminal mark line has shifted, whether the breaker operates normally, whether the desiccant needs replacement. Fourth, mooring structural parts: whether the pin bore fits smoothly, whether the thread is intact, whether the grease is within its valid period. Fifth, the case itself: whether hinges and latches still open and close normally, whether the sealing strip needs replacement, whether the case needs cleaning and resealing. If the project needs to reuse the same batch of cases for multiple cycles, the seal replacement cycle and case life evaluation should be included in the procurement document; the relevant evaluation dimensions can be referenced from the protective case service life evaluation article.
Three quick checks: whether the humidity card level and target value of the electrical cavity are written down; how stainless parts are protected from free iron contamination and seawater rinse during transport and storage; whether the cable coil radius follows the manufacturer's minimum bend radius, who measures the arrival insulation resistance and who keeps the record. Only when all three land on a specific person, a specific value and a specific record method is the scheme truly acceptable.
Frequently Asked Questions FAQ
Q: The shore power box already has an IP rating, so why does it still need a dedicated protective case for transport?
A: The IP rating of a shore power box targets the rain and spray duty after installation, and it does not cover the vibration, impact and long term condensation of the transport and storage stage. During transport the box shifts inside the truck or container and strikes neighboring objects, and the door lock, hinge, viewing window and meter glass are damaged first. During long storage, temperature difference makes the inside repeatedly condense, and droplets fall on the busbar and circuit breaker; even if the shell is intact, the internal parts can still be wetted. In addition, the terminal and component mounting screws lose part of their preload under continuous vibration, a change unrelated to the IP grade yet directly affecting the reliability after energizing. Therefore the transport stage needs mechanical positioning, six face cushioning, independent drying and a readable humidity record. The reasonable practice is to fix the shore power box as a whole in a molded insert, complete one drying treatment inside with desiccant and a humidity card placed in, set the switch to off with lock or warning label, and recheck the terminal by the torque mark line on arrival.
Q: What problems most easily appear when transporting mooring arm members on a pontoon?
A: The most typical is permanent deflection, followed by loss of pin bore fit accuracy. The member is a slender part, and if only a few wood blocks are placed at random, the support span often reaches more than one third of the full length, and the dynamic load from a vehicle crossing a bump drives the mid span bending moment far above the static estimate, leaving a residual bend once the elastic limit is exceeded. A bent member shows abnormal swing resistance and uneven pin loading after assembly, and in severe cases the whole piece must be replaced. For the pin bore, once the bore wall is dented by the sling or adjacent workpiece into burrs or an oval shape, the hinge point develops play and wears faster. Protection practices include: supports at even spacing not exceeding one eighth to one tenth of the full length; soft polyurethane support blocks shaped as V locators; support points avoiding the threaded section and pin bore machined section; for two point lifting, lift points at about 0.2 of the full length from each end; never bind the rod body directly with wire rope; and after unloading, first confirm the storage position has the same support condition before the whole piece is re lifted.
Q: Why do stainless parts show rust spots in a marina environment?
A: Stainless showing rust spots in seawater is in most cases not a material failure but a destroyed or contaminated passivation film. Three common paths exist. Free iron contamination: rust debris from carbon steel parts, scratches from carbon steel slings or iron ions left by ordinary steel bands form a micro cell with the base under humid chlorinated conditions and develop needle like pitting. Chloride concentration in crevices: condensate trapped under a gasket, under packaging film or in a structural gap raises the chloride level and destroys the passivation film. Salt residue after seawater rinse: salt crystals keep absorbing moisture on the surface and form a long term wet micro environment. Protection must start from four layers at the same time: contact material, packaging material, surface protection and traceable inspection. All cradles, card slots and bands touching stainless use stainless, polyurethane or engineering plastic. Packaging paper is chlorine free sulfur free neutral paper. Machined faces get a low tack peelable film. On arrival, an iron ion color method spot checks the surface, and color development means re pickling and passivation before installation. Also, stainless parts must not be rinsed with seawater during transport and storage, only with fresh water and thoroughly dried after.
Q: What mainly causes rubber fenders to lose elasticity in storage?
A: It comes mainly from the combined action of four paths, not a single occasional damage. Ozone attacks the stretched rubber surface first, producing fine cracks perpendicular to the stress direction, and welding work, electric motors and switchboards common at pontoon marinas keep producing ozone. Ultraviolet chalks the surface and progresses inward, and the all year unshaded sunlight at a marina accelerates this process. Continuous compression or hanging produces unrecoverable permanent set, and multi layer stacking and hook hanging are exactly the two most common wrong practices. High temperature accelerates the change of the vulcanization network and the migration of plasticizer, raising hardness and slowing rebound. The buffering ability of a fender depends on compression rebound, and once the rebound is insufficient, the impact energy at berthing cannot be effectively absorbed. For protection, store flat with separators, avoid hanging and stacking pressure, use dark polyethylene film or aluminum plastic composite film to block both UV and ozone, control storage temperature between 10 and 25 degrees Celsius by experience, and keep the fender yard away from generators, switchboards and welding zones. Before installation, check hardness, cracks and permanent set.
Q: How can shore power cable damage in transit be judged?
A: Appearance check and insulation test must be used together, and neither alone is sufficient. In appearance, focus on three places: whether the jacket has cuts and white abrasion marks from sharp edges, especially at the coil binding position and where it contacts the case corner; whether the pins of plug and socket are squeezed deformed and whether the plating has flaked, because pin deformation directly raises contact resistance and causes temperature rise; whether the coil radius is too small, because a sharp bend in low temperature may leave micro cracks invisible to the eye. For insulation, use a megohmmeter to measure phase to phase and phase to ground resistance per the manufacturer's method; a common requirement is no less than 5 MΩ under 500 V DC test (experience criterion, specific values obey the manufacturer and project rules), and record the ambient temperature and humidity at test. If the value is low, first move to a dry environment and rest before retest, then decide scrap. If the cable was soaked by seawater in transit, the outer jacket must be rinsed with fresh water, wiped dry and rested before test, because salt residue forms a conductive path and keeps absorbing moisture.
Q: Why do pontoon connectors emphasize kitting by node rather than boxing by specification?
A: Because the site works by installing node by node, while boxing by specification pushes the identification work onto the worker. A medium sized yacht marina pontoon can have hundreds of connection nodes, and two batches of pins differing by only 2 mm in diameter are almost indistinguishable by appearance. After boxing by specification, the pins, bolts, washers and insulators needed for each node must be taken from multiple box positions, and one wrong piece can cause mixed assembly, whose consequence is often not found on the spot but appears months later as abnormal wear or corrosion. After kitting by node in cells, the site only takes one cell by node number, and the cell itself holds all fasteners and insulators for that node, with quantity constrained by both insert structure and marking, so missing and mixed parts are exposed immediately. This method also binds the quantity of insulating sleeves or washers to the fastener count, avoiding on site substitution with ordinary washers, and thus cuts the galvanic corrosion path between aluminum structures and stainless fasteners. The relation between the divided insert mold cost and batch size can be referenced from the custom protective case mold cost analysis.
Q: With no dry warehouse on site, what should be watched for open air case storage?
A: The core idea of open air storage is no water pooling, no salt pooling, no pressure loss. For position, raise the case over 100 mm, avoid the pontoon wave splash face, eave discharge line and below drainage outlets, and do not place it in a deck depression that pools water long term. For stacking, do not store with mooring ropes, fishing nets, fuel drums and cleaning agents, because these bring salt, grease and mechanical damage; do not press a heavy case above an electrical case. For orientation, try to keep the sealing face away from the windward side of the dominant wind to reduce salt mist deposition in the gaps. For daily check, periodically see whether exposed hardware shows white rust, whether the latch still holds clamping force, and whether the sealing strip is wedged open by sand or salt crystals; projects across a rainy season should read the humidity card once at the midpoint and keep a record. The action order before opening also matters: first rinse the exposed surface with fresh water and wipe dry, then move into a temporary shelter to open, to avoid letting salt mist and rain enter the cavity at the moment of opening.
Q: For electrical cavity humidity control, is desiccant or electric heating better?
A: The two solve problems on different time scales, and the choice depends on storage period and site power supply. Desiccant is a one time passive scheme suited to transport and medium term storage, with dosage estimated by the free volume of the sealed cavity, but after saturation its appearance hardly changes, so a humidity card must be paired to judge whether it is still effective. Electric heating or semiconductor dehumidification is an active scheme that keeps cavity humidity low for long, suited to storage over half a year, but it needs continuous power and temperature control, and after power loss a condensation reversal risk forms on cold surfaces. Marina sites often only connect power temporarily, so who supplies power and how to act on loss should be clarified at the scheme stage. The compromise is a replaceable desiccant bay and humidity card in the electrical cavity, key parts further moisture barred in anti static shielding bags, and a higher whole cavity seal grade.
Conclusion and further reading
The protection logic of marina components is four lines: separate electrical and structural cavities, manage stainless as clean parts, preserve rubber elasticity, and protect cable radius. JUNZHIJIA builds the electrical sealed, stainless clean and pressure structural cavities as mutually isolated insert units and supplies seals and moisture consumables by component family, supporting OEM/ODM with insert schemes and test advice from drawings.
Further reading