

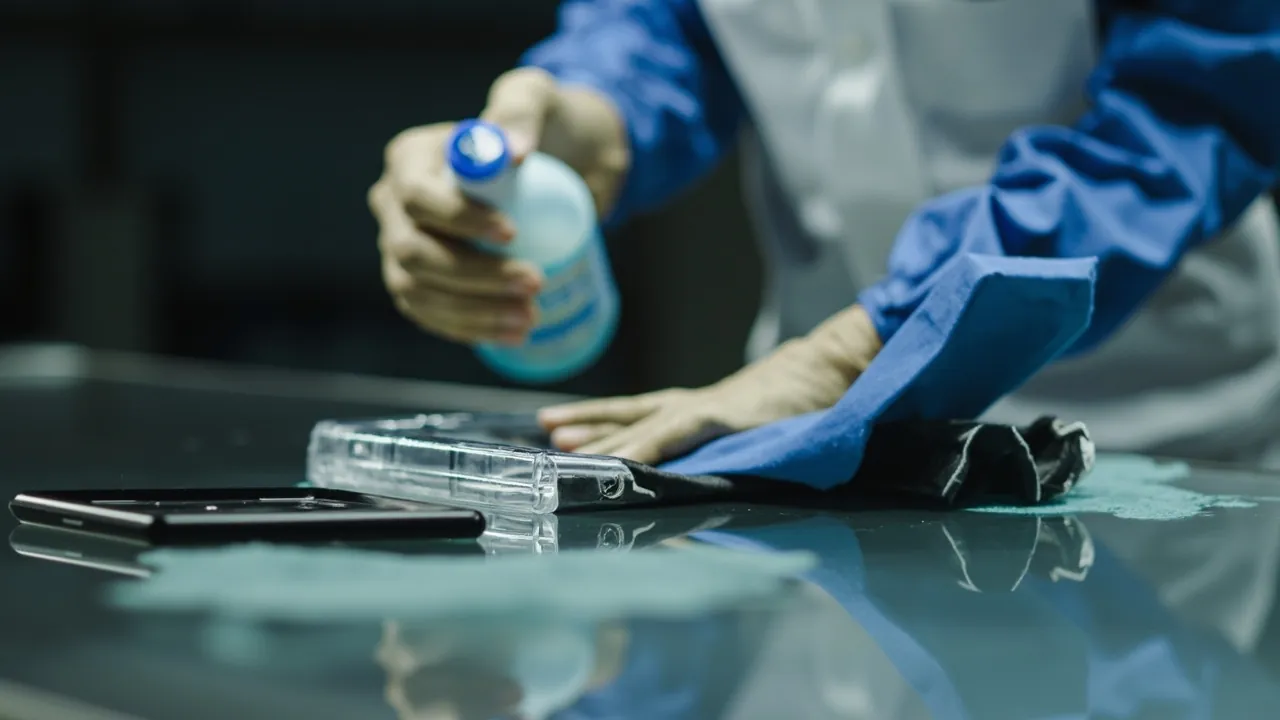
The short answer: cleaning a protective case is not just wiping it down, it is a discipline of zoning, matching the method to the material, and setting the right frequency. The outer shell can be washed, the gasket may only be gently wiped and then dressed with grease, metal parts need rust protection, and the foam insert should be cleaned dry and never soaked. Using the wrong cleaner, especially a strong solvent, a strong alkali, or a chlorine-based disinfectant, will destroy a case faster than not cleaning it at all. The key point to hold onto is this: a protective case gets its sealing performance from the seal face, and the seal face fears two things above all, being scratched by hard particles and being swollen by chemicals. Protect those two, and most of the case's service life is preserved.
This guide is written for equipment managers, laboratory staff, medical logistics teams, industrial maintenance crews, and warehouse operators. It breaks case cleaning into executable steps: first recognize the five cleaning zones, then apply material-specific methods, prohibited cleaners, and handling taboos, then handle disinfection and special duty cycles, then follow the drying and seal-face inspection workflow, and finally use a maintenance interval table. The cleaner types, temperature ranges, and intervals quoted here are typical values or rules of thumb. For any real judgment on chemical resistance, the basis should be the material supplier's chemical resistance data, of the kind produced by methods such as ISO 175 or ASTM D543, together with a physical trial. If you have a fleet of cases in service, this article can serve directly as a maintenance work instruction.
Table of Contents
- The Short Answer: Zoning, Material, and Frequency
- The Five Cleaning Zones of a Protective Case
- The Six-Step General Cleaning Method
- Cleaning the Plastic Shell: PP, ABS, PC
- Cleaning and Dressing the Gasket: The Step You Cannot Skip
- Latches, Hinges, and Metal Parts: Cleaning and Rust Protection
- Foam Inserts: EVA, PE, PU Cleaning and Odor Removal
- Cleaning Taboos by Material: Reference Table
- Disinfection and Special Duty Cycles: Medical, Food, Laboratory
- Choosing a Cleaner: Neutral, Chlorine, Alcohol, Solvent
- Drying, Seal-Face Inspection, and Reassembly
- Maintenance Intervals and Service-Life Management
- Frequently Asked Questions (FAQ)
- Conclusion and Further Reading
The Short Answer: Zoning, Material, and Frequency
Start with the logic. A protective case keeps water and dust out through one continuous contact band formed when the lid compresses the gasket and the gasket compresses the rim face. That contact band is fragile. One scratch from a hard particle, one swelling deformation from a chemical, or one grain of sand trapped on the seal face can drop the IP rating from compliant to non-compliant. So the first goal of cleaning is not "looks clean," it is "does not damage the seal."
That gives cleaning three dimensions. Zoning: the shell, the gasket, the latches and metal hinges, the foam insert, and the handle and feet each use different materials and must be handled separately. Material: PP, ABS, and PC differ widely in resistance to solvents and alkalis, and EPDM, silicone, and nitrile rubber (NBR) differ in resistance to oils and chlorine-based agents. Frequency: routine dust removal, monthly inspection, quarterly deep service, and emergency cleaning after every water or mud exposure all demand different intensity.
Hold these three dimensions in mind and every later step has its place. One line to summarize: the shell can be washed, the gasket can only be wiped, metal parts need the most rust protection, and the insert must never be soaked.
| Zone | Main materials | Common contamination | Allowed cleaning | Explicitly prohibited |
|---|---|---|---|---|
| --- | --- | --- | --- | --- |
| Outer shell | PP, ABS, PC, PC/ABS | Dust, mud, oil, salt spray | Neutral cleaner + soft cloth or brush + rinse | Strong solvents, steel wool, close-range high-pressure jet |
| Gasket | EPDM, silicone, NBR | Dust, oil film, mildew | Warm water + neutral soap, wipe dry, dress with grease | Chlorine disinfectant, mineral oil, prolonged soaking |
| Latches and hinges | PA, POM, stainless, plated parts | Sand, rust spots, salt | Soft brush to remove sand, dry cloth, rust protection | Strong acid rust remover, immersion washing |
| Foam insert | EVA, PE, EPE, PU, flocking | Debris, dust, odor, mildew | Dry brushing, vacuuming, spot wipe, air dry | Soaking, scrubbing, laundry powder, direct sun |
| Handle and feet | TPE, rubber, PA | Oil, wear, aging | Neutral cleaner wipe | Solvent wipe, forced prying |
The way to use this table is simple: before every cleaning, match your case to a row and read both the allowed and the prohibited column. Almost every sealing failure caused by cleaning came from crossing the prohibited column.
The Five Cleaning Zones of a Protective Case
Breaking the case into five zones is the precondition for understanding cleaning and maintenance.
Zone one, the outer shell. It carries mechanical protection and the external form, and it is the only zone that can be washed freely. Contamination is mostly dust, mud, oil, salt spray, and shipping markings. The taboos concentrate on two things, abrasion and strong solvents. Steel wool, stiff brushes, and gritty cleaning paste leave fine scratches, which are especially visible on light-colored parts. Strong solvents such as acetone, lacquer thinner, and chlorinated hydrocarbons will whiten, craze, or even swell ABS and PC surfaces. For how plastic materials differ in chemical resistance, see how to choose protective case plastic materials and the difference between PP, ABS, and PC cases.
Zone two, the gasket. This is the most critical part of the case, and the one most easily damaged during cleaning. Common gasket materials are EPDM, silicone (VMQ), and nitrile (NBR), which differ greatly in media and temperature resistance. Cleaning is limited to "wipe with warm water and neutral soap, then dry." Never remove the gasket and soak it in chlorine disinfectant or mineral oil. For gasket material selection and aging mechanisms, see what material is used for protective case gaskets.
Zone three, latches and hinges. These are moving parts, and their greatest enemies are sand and rust. Sand entering the hinge pin and latch groove accelerates wear, and rust on metal parts in a salt-spray environment reduces clamping force. The rule is "brush the sand out first, then wipe dry," never "flush with water and drive the sand deeper."
Zone four, the foam insert. EVA, PE, EPE, PU, and flocked surfaces each tolerate cleaning differently. Foam soaks up water and dries slowly, so once soaked it can trap moisture internally, leading to mold, powdering, and odor. Insert cleaning must therefore be dry-first.
Zone five, the handle and feet. These look like accessories, but aging and cracking affect carrying safety and case stability. Avoid solvent wipes, and do not pry them off just to clean them, which damages the mounting. For the role and maintenance of feet, see what protective case anti-slip feet do.
The Six-Step General Cleaning Method
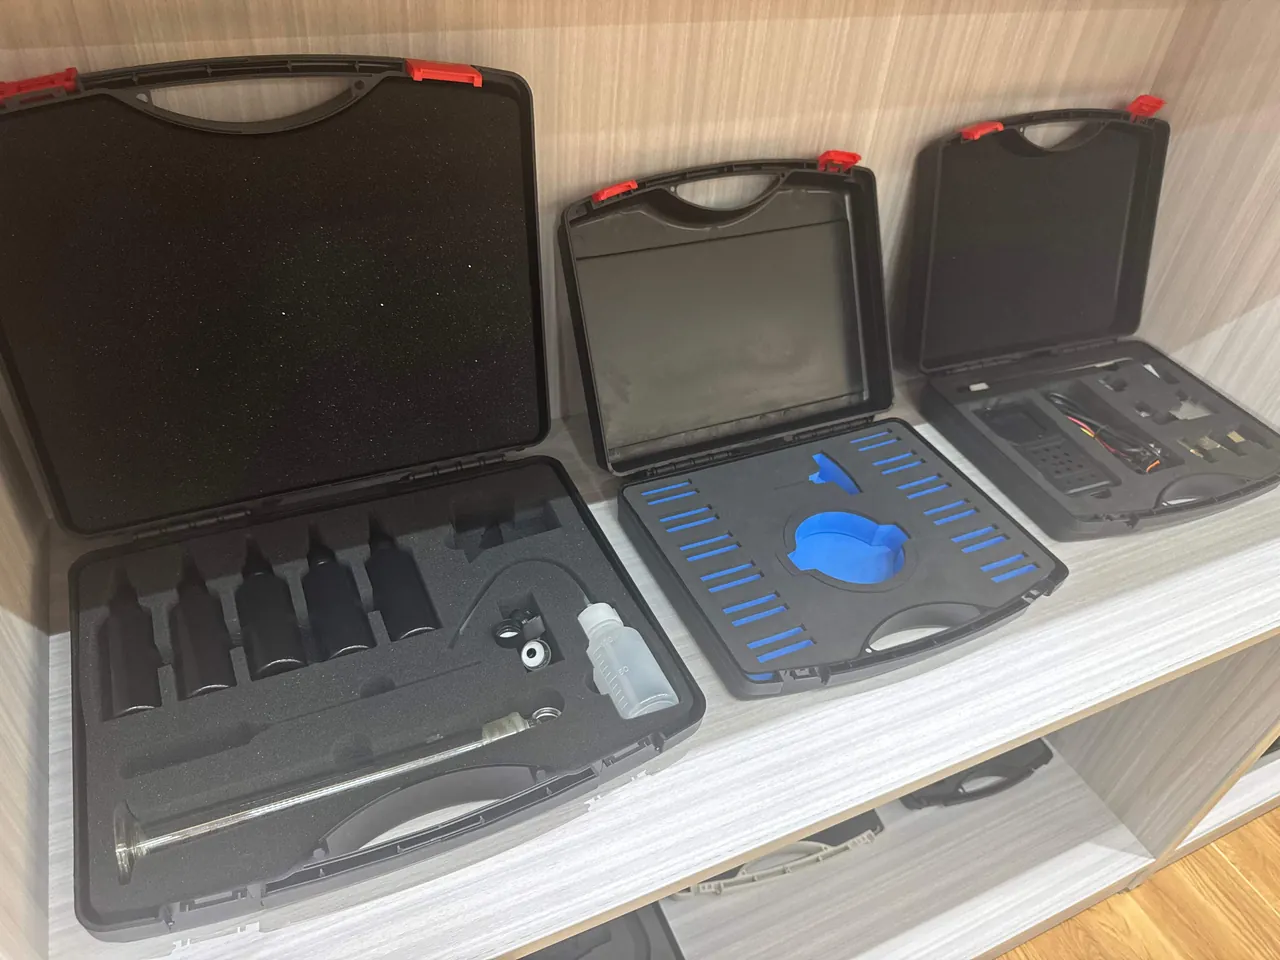
Whatever the cleaning intensity, the same six steps prevent "cleaning that makes it dirtier" or "cleaning that causes a leak."
Step one, empty and disassemble. Remove the contents, take out removable inserts, dividers, pull straps, and labels. The purpose is to expose dead corners, not to strip the case into parts. If the gasket does not need to move, do not move it; disassembly is itself a form of wear.
Step two, dry pre-treatment. Use a soft brush or vacuum to remove surface dust and sand first. This step is critical and commonly skipped. Going straight to water turns sand into an abrasive during wiping, leaving fine scratches on the shell and seal face. Cases that have seen sand or mud especially need dry brushing first.
Step three, main cleaning. Wash the shell with neutral cleaner and water, wipe with a soft cloth or brush, then rinse. Wipe the seal face with warm water and neutral soap. Clean the insert by dry brushing or spot wiping. Use only enough force to lift the contamination, and do not scrub the same spot repeatedly.
Step four, rinse and inspect. After rinsing the shell, check two things closely: whether the seal face has residual contamination or scratches, and whether the gasket is twisted, flattened, or deformed. This step combines cleaning and inspection, and many early failures are found right here.
Step five, drying. Drying is the most overlooked step in case maintenance and the most consequential. Closing the case while moisture remains creates a long-term humid micro-environment inside, accelerating gasket aging and causing insert mold. The correct method is to open the lid and air dry in a shaded, ventilated place. If necessary, blot the water in the seal groove with a dry cloth. Never dry in direct sun or with close-range hot air.
Step six, dressing and reassembly. Once the gasket is fully dry, apply a thin film of dedicated grease (commonly silicone grease or a grease compatible with the gasket material) to restore surface lubrication and elasticity. Check metal parts for rust and touch up protection if needed. Reinstall the insert and accessories, and when closing, confirm the latches engage and the gasket has not shifted.
The six steps compress into one line: dry brush first, then wet wash, focus on the seal, dry thoroughly, dress thinly, close gently. Change the order and the result degrades sharply.
Cleaning the Plastic Shell: PP, ABS, PC
The shell is the sturdiest part to clean, but the three common materials do not tolerate the same things, so the method should differ.
PP (polypropylene) has the best chemical resistance of the three, tolerates acids, alkalis, and washing well, and is the most common choice for injection-molded cases. Its weakness is relatively lower weather and UV resistance; prolonged exposure to sun accelerates aging and embrittlement, so avoid long sun exposure after cleaning.
ABS offers good rigidity and surface quality but poor solvent resistance. ABS hates strong solvents. Acetone, lacquer thinner, and chlorinated hydrocarbons rapidly whiten and crack the surface. ABS also should not stay in contact with high-concentration alkaline cleaners for long.
PC (polycarbonate) is common in transparent and high-strength parts, with excellent toughness and impact resistance, but it also fears strong alkalis and some solvents, and stress-concentration areas are especially sensitive to chemical residue. Clean PC parts with neutral cleaner and a soft cloth.
On temperature, ambient to warm water, roughly not above 40-50 C, with a neutral cleaner is the recommended practice, avoiding direct high-temperature water that creates local thermal stress. On tools, use only soft cloth, sponge, and soft brush. Steel wool, the abrasive side of a scouring pad, and gritty cleaning paste are prohibited. If a pressure washer is used, keep distance and avoid close-range direct spray at the seal face and latch gaps. For case structure and strength design, see how the shell structure of a high-strength protective case is built.
| Material | Wash resistance | Neutral cleaner | Alkali resistance | Solvent resistance | Key points and taboos |
|---|---|---|---|---|---|
| --- | --- | --- | --- | --- | --- |
| PP | Excellent | Excellent | Good | Moderate | Washable; avoid long sun exposure that ages it |
| ABS | Good | Good | Moderate | Poor | No strong solvents; surface whitens and cracks |
| PC | Good | Good | Moderate | Moderate | Neutral cleaner; avoid strong alkali and residue at stressed areas |
| PC/ABS alloy | Good | Good | Moderate | Moderate | Combines both; still no strong solvents |
| Reinforced grades | Grade-dependent | Good | Moderate | Moderate | Follow the material supplier's chemical resistance data |
The conclusion from this table is that all three materials can be washed, but ABS and PC have zero tolerance for solvents. The default instruction to frontline staff should therefore be "use only a neutral cleaner," not "use your own judgment."
Cleaning and Dressing the Gasket: The Step You Cannot Skip
The gasket is the consumable heart of a protective case and the part that needs the most delicate handling during cleaning. Its failure is rarely sudden; it usually begins with improper cleaning.
Cleaning method: use warm water with a little neutral soap, wipe the gasket surface and seal groove gently with a soft cloth or cotton swab to lift the oil film, dust, and mildew, then blot dry with a cloth. For a gasket seated in the seal groove, do not remove it frequently just to clean it. Repeated removal causes installation deformation and scratches and makes it harder to reseat correctly, which actually reduces sealing reliability.
Dressing method: once the gasket is fully dry, apply a thin film of grease compatible with the material (silicone grease or a dedicated rubber grease) to restore surface lubrication and elasticity and slow hardening. Never use mineral oil, machine oil, or chlorine-based grease, which swell or age EPDM and silicone. Chlorine-based disinfectants, such as sodium hypochlorite products, should also not contact rubber parts for long periods.
Inspection points: at every cleaning, check three things in passing: whether there are permanent flat spots, indicating compression set; whether there are cracks or crazing; and whether the rubber has hardened and lost resilience. Any of these means the gasket is near end of life, and it should be replaced rather than "wiped back to life." For aging judgment and replacement cycles, see how often should the gasket be replaced and how to replace a protective case gasket.
Remember one line: the gasket is the only part in the case that is destined to reach end of life first. Skimping on it during cleaning sets a hidden shelf life for the whole case.
Latches, Hinges, and Metal Parts: Cleaning and Rust Protection

Latches and hinges are the moving parts of a protective case, carrying the fatigue load of repeated opening and closing and the impact load of drops. Wear and rust from poor cleaning directly reduce clamping force, which in turn affects gasket compression.
The cleaning order is dry first, wet second: use a soft brush to sweep sand and debris out of the hinge pin, latch groove, and spring area, then wipe with a slightly damp cloth, then dry completely. Never jet water into the gaps, which pushes sand deeper and leaves moisture in the bores.
Rust removal and protection must be cautious. Stainless parts such as hinge pins and some latch shafts can still show rust spots in salt spray, which can be wiped with a soft cloth and a little neutral cleaner, then dried and given a thin coat of anti-rust oil. Never use a strong acid rust remover, which corrodes the metal and can migrate to rubber parts. When white rust appears on plated parts, remove it gently and reapply protection; if the corrosion has thinned the structure, replace the part rather than continue using it.
Lubrication must be judged by location. A small amount of grease compatible with plastic can be applied to a metal-to-plastic rotating pair, avoiding greases that cause stress cracking in PA or POM. Rubber-to-plastic contact surfaces should stay clean, with no excess oil that would attract dust and form an abrasive paste.
Life checks should be part of the deep service. Test latch opening and closing for smoothness, binding, and noise, and check the hinge for axial play. Signs of looseness or impending fracture mean the part should be replaced per the spare parts plan. For latch and hinge selection and matching, see how to choose protective case latches and how hinge, latch, and seal work together.
Foam Inserts: EVA, PE, PU Cleaning and Odor Removal
The insert is the part users touch most and the hardest part to clean. The core rule is simple: clean the insert dry whenever possible, and never soak it.
Dry cleaning applies to all foams: use a soft brush or vacuum to remove debris and dust. For flocked surfaces, use a lint roller or a soft cloth, pressing lightly so the flocking layer does not pull off. EVA and PE foam have flat cut faces and high closed-cell content, resist water absorption, and respond well to dry brushing.
Spot wet cleaning is for oil and stubborn stains: wipe lightly with a slightly damp cloth and a little neutral soap, then blot dry immediately and air dry in a shaded, ventilated place. Do not use laundry powder, strong alkali, or chlorine disinfectant on the insert. Residue corrodes the foam, leaves odor, and can react with the surfaces of protected equipment.
Odor treatment: foam that has absorbed odor is hard to fully refresh. Ventilation and air drying, activated carbon or desiccant for adsorption, and avoiding fragrance-based masking agents, which only add another odor, are the practical options. If mildew appears, it means moisture was trapped internally; the approach is local removal followed by thorough air drying. If mildew covers a large area or the foam has powdered, replace the insert, because its structural strength and cushioning have already dropped.
PU (polyurethane) foam deserves a special note. Some PU foams are subject to hydrolytic aging, gradually softening, powdering, and becoming tacky in humid conditions. PU inserts should therefore be cleaned dry and protected from moisture in storage.
Flocked surfaces require "no scrubbing, no soaking, no solvents." The flocking is a short-fiber layer bonded to the foam, and friction or soaking will cause peeling.
Cleaning Taboos by Material: Reference Table
Here is the consolidated taboo table for posting at the maintenance station.
| Material / part | Recommended cleaning | Explicitly prohibited | Consequence |
|---|---|---|---|
| --- | --- | --- | --- |
| PP shell | Neutral cleaner + soft cloth + water | Long sun exposure, stiff abrasive brush | Embrittlement, surface scratches |
| ABS shell | Neutral cleaner + soft cloth | Acetone, lacquer thinner, chlorinated hydrocarbons, strong alkali | Surface whitening, cracking |
| PC shell | Neutral cleaner + soft cloth | Strong alkali, strong solvent, chemical residue at stressed areas | Stress cracking, hazing |
| EPDM gasket | Warm water + neutral soap + silicone grease | Mineral oil, chlorine disinfectant, prolonged soaking | Swelling, hardening, seal failure |
| Silicone gasket | Warm water + neutral soap | Strong alkali, some aromatic solvents | Swelling, lower tear strength |
| NBR gasket | Warm water + neutral soap | Polar solvents, ozone exposure | Hardening, crazing |
| Metal hinge / latch shaft | Dry brush, wipe dry, thin rust protection | Strong acid rust remover, immersion washing | Corrosion, structural thinning |
| EVA/PE foam | Dry brush, vacuum, spot wipe, air dry | Soaking, scrubbing, laundry powder | Deformation, powdering, mold |
| PU foam | Dry method mainly | Soaking, humid storage | Hydrolysis, powdering, tackiness |
| Flocked insert | Light wipe, lint roller | Scrubbing, soaking, solvent | Peeling, shedding |
| Handle / feet | Neutral cleaner wipe | Solvent wipe, forced prying | Aging cracks, structural damage |
The most useful column here is "consequence." When frontline staff know that the wrong cleaner will whiten and crack a shell, rather than just being told it is "not allowed," compliance improves markedly.
Disinfection and Special Duty Cycles: Medical, Food, Laboratory
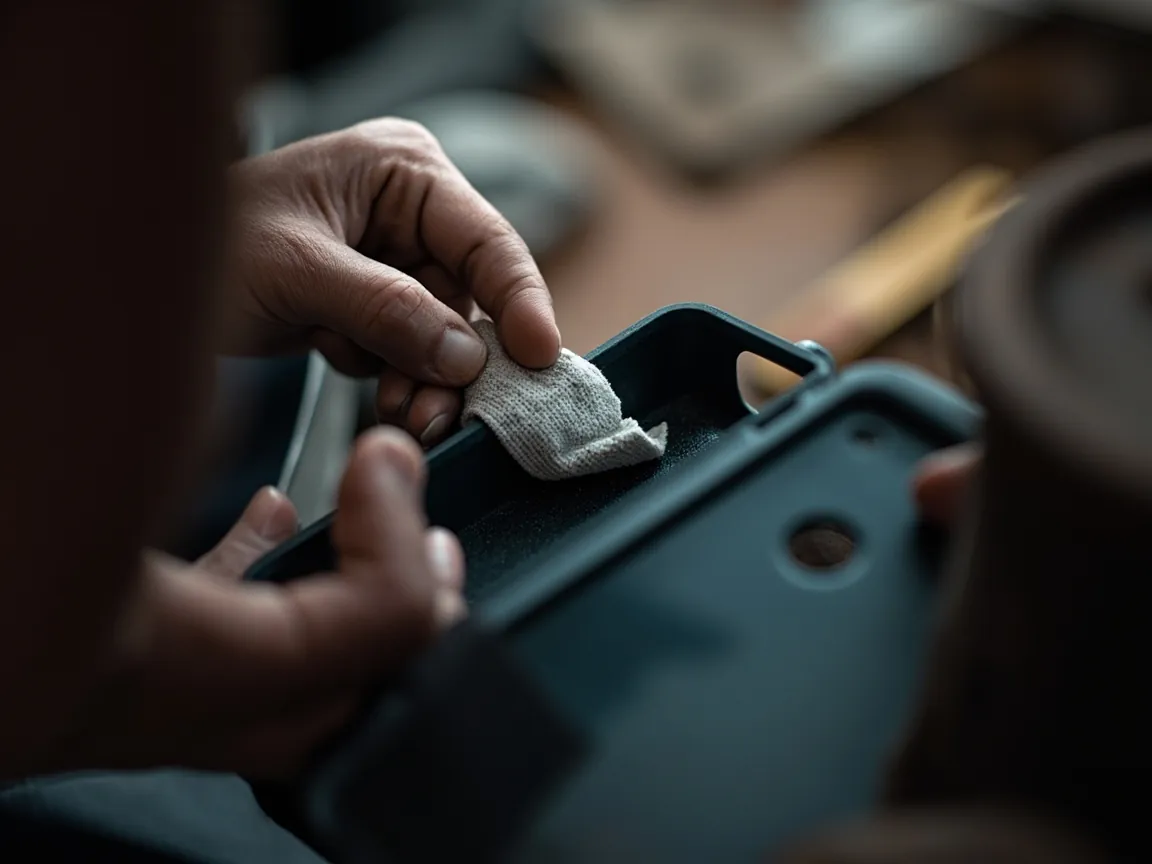
In medical, food, and laboratory settings, a protective case must not only be clean but also satisfy disinfection or cleaning validation requirements. Three extra points apply.
First, compatibility between disinfectant and rubber parts. Chlorine-based, peroxide-based, and alcohol-based disinfectants affect plastics and rubber differently. Alcohols such as ethanol and isopropanol are relatively mild on PP and PC but can dull or discolor some ABS and flocked surfaces. Chlorine disinfectants corrode metal parts and accelerate rubber aging. Medical settings should therefore confirm compatibility between the disinfectant and the shell and gasket materials, and run a small-area trial.
Second, drying after cleaning and disinfection. Disinfectant residue and moisture both damage the seal and the insert just as dirt does. After disinfection, remove residue with water where the process requires it, then dry fully before closing.
Third, validation and records. In regulated settings, cleaning and disinfection often need records: agent used, concentration, contact time, operator, date, and sometimes periodic seal performance confirmation. These requirements should be written into the work instruction. For confirming the protection level, see how to read an IP rating, from IP67 to IP68 and how to verify an IP67 test report.
In a regulated setting, cleaning and maintenance is not just an action, it is a traceable record. Maintenance without records counts as maintenance that never happened during an audit.
Choosing a Cleaner: Neutral, Chlorine, Alcohol, Solvent
Cleaner selection is the easiest step to get wrong. Thinking from mild to aggressive helps.
Neutral cleaner, the first choice. Soaps or dedicated plastic cleaners with a pH near neutral are relatively mild on plastic, rubber, and metal, and are the default. Dilute before use and avoid high concentration over long contact.
Alkaline cleaner, use with care. Effective on oil, but strong alkali attacks ABS and PC surfaces and also affects aluminum and plated parts. Use only when necessary, at low concentration, with thorough rinsing.
Chlorine disinfectant, restricted use. Strong biocidal power, but clearly corrosive to metal parts, an aging risk to rubber, and its residue can react with contamination. Rinse thoroughly and dry after use.
Alcohol-based cleaner, judge by material. Ethanol and isopropanol evaporate quickly with low residue and are friendly to PP and PC, but can dull some ABS surfaces and lift the adhesive of flocked layers. Suitable for local quick wipes, not for large-area repeated use.
Strong solvents, prohibited. Acetone, lacquer thinner, chlorinated hydrocarbons, and toluene dissolve or swell ABS and PC and attack rubber. Prohibited unless the material supplier confirms suitability in writing.
Abrasive cleaners, prohibited. Gritty paste and scouring powder leave scratches on the shell and seal face. Any scratch on the seal face can become a leak path.
Judging chemical resistance should in principle rely on the material supplier's data. Common industry methods that describe how a material behaves in a given medium include immersion and property-retention tests such as ISO 175 and ASTM D543 for the resistance of plastics to liquid chemicals, and ISO 4611 for exposure to damp heat. These methods describe material behavior under specified conditions, not a licence for a particular cleaner. The safest workflow is therefore: choose the cleaner, trial it on an inconspicuous area of the shell, observe for 24 hours, then roll it out.
Drying, Seal-Face Inspection, and Reassembly
Three things after cleaning decide whether the maintenance worked.
First, thorough drying. Prefer open-lid, ventilated, shaded drying. Prohibited methods include direct sun, which ages plastic and hardens the gasket, close-range hot air, which creates local overheating and deformation, and closing the case while wet, which creates a humid interior. Water in the seal groove should be blotted with a dry cloth or swab, because trapped water sits against the gasket once the case is closed.
Second, seal-face inspection. After drying, check three things: whether the seal face has scratches, dents, or embedded foreign matter; whether the gasket is flat, untwisted, and free of permanent flat spots; and whether the rim face is deformed. Foreign matter should be removed, and scratches or deformation should be assessed against the protection requirement, with a seal verification if needed.
Third, correct reassembly and storage. When reinstalling the insert and accessories, confirm the seats are engaged and there is no lifting. For storage, keep the lid slightly open or follow the manufacturer's recommendation, so the gasket is not left under compression, which accelerates compression set. The storage environment should be ventilated, shaded, and away from heat sources and chemicals. For storage practice, see protective case warehouse storage rules.
Fourth, verification. For projects with a defined IP rating, run a seal verification after a deep service or gasket replacement, such as a negative-pressure quick check or a sampling immersion, to confirm the protection level has not dropped because of the maintenance action.
Maintenance Intervals and Service-Life Management
Turning cleaning and maintenance into a periodic routine moves you from reaction to prevention. The table below offers intervals that can be adjusted to the duty cycle.
| Maintenance level | Interval (typical) | Main actions | What to watch |
|---|---|---|---|
| --- | --- | --- | --- |
| Routine cleaning | After each use or each shift | Dry brush dust, wipe surfaces, check latches | Foreign matter trapped on the seal face |
| Weekly check | Weekly | Wipe shell, inspect gasket appearance, clear hinge gaps | Gasket deformation or hardening |
| Monthly service | Monthly | Deep clean seal face, dress gasket with grease, check metal parts | Flat spots, cracks, rust spots |
| Quarterly deep service | Quarterly | Full cleaning, opening and closing life check, insert odor removal | Latch tightness, hinge play |
| After water or mud | After each event | Dry brush sand, rinse, dry fully | Sand abrasion, water in the groove |
| Annual assessment | Yearly | Seal verification, wear part replacement assessment, life judgment | Whether end of life is approaching |
The way to use this table is to shift a level by duty cycle: salt spray, sand, chemicals, and high-frequency handling should move up one level, while low-frequency indoor use can relax somewhat. For the actual service life and how to judge it, see how many years does a protective case last.
JUNZHJIA is manufactured by KeXin New Materials (Guangdong) Co., Ltd., serving wholesale, distribution, OEM/ODM, and global supply, with a product line covering protective cases, toolboxes, military-spec storage boxes, and waterproof junction boxes. The company configures shell material, gasket, and insert to the duty cycle, provides material statements, chemical resistance information, and test documents, and can supply gaskets, latches, handles, feet, and other wear parts long term by model, making it easy for users to fold cleaning, maintenance, and parts replacement into their equipment management system.
Frequently Asked Questions (FAQ)
Q: Can a protective case be rinsed with water, and are there parts that must not be rinsed? A: The shell can be rinsed, but several areas need separate handling. The shell, handle, and feet can be rinsed directly with water and wiped with a neutral cleaner and a soft cloth. The seal face can be wiped wet but must not be hit by a close-range high-pressure jet, because the jet forces water into the seal groove and presses sand into the groove to act as an abrasive. Latch and hinge gaps should not be jetted either, since the water drives sand deeper and leaves moisture in the bores. The foam insert must never be rinsed or soaked, because foam holds water and dries with great difficulty, creating a long-term humid environment inside that leads to mold, powdering, and odor, and PU foam can hydrolytically degrade. So the correct order is: dry brush off dust and sand first, then wet wash the shell, wipe the seal face separately, and treat the insert by dry method or spot damp wipe only. After rinsing, air dry with the lid open and confirm the seal groove holds no water before closing.
Q: Why should the gasket not be removed and soaked in disinfectant? A: Because immersion cleaning does damage to rubber that is often irreversible. First, chlorine disinfectants, strong alkalis, and some solvents make EPDM, silicone, and nitrile rubber swell, harden, or craze, and these changes may not be visible immediately but clearly reduce resilience and sealing ability. Second, repeated removal of the gasket causes installation deformation, scratches, and local stretching, and after reassembly it is difficult to return to the original fit, which introduces a leak risk. Third, if drying after soaking is incomplete, residual liquid in the seal groove sits against the rubber for a long time and accelerates aging. The correct method is: do not remove the gasket, wipe the surface and the groove gently with warm water and a little neutral soap, blot dry, and once fully dry apply a thin film of compatible grease. Only when the gasket already shows cracks, hardening, or permanent flat spots that require replacement should it be removed, and then the seal groove should be inspected at the same time.
Q: If a musty or odd odor appears inside the case after cleaning, what should be done? A: Odor usually has two sources: moisture and odor absorbed by the foam insert, and residual water in the seal groove or crevices. Find the source first, then treat it. If the odor comes from the insert, take it out, clean it dry with a soft brush or vacuum, and air dry in a shaded, ventilated place; activated carbon or desiccant can help adsorb odor, but do not use fragrance-based masking agents. If mildew has appeared and covers a large area or the foam has powdered and shed, replace the insert rather than continuing to use it, because mildewed and powdered foam has reduced cushioning and can contaminate the equipment inside. If the odor comes from the seal groove or case crevices, clear contamination and water from the groove with a swab, dry fully, then dress with grease. If the odor comes from hydrolyzed PU foam, it is usually accompanied by tackiness and softening, and replacement is again the answer. Prevention is to dry fully after every water exposure before closing, and to keep storage ventilated and shaded.
Q: Can alcohol be used to wipe a protective case? A: It can be used locally, but judge by material and location. Alcohol-based cleaners such as ethanol or isopropanol evaporate quickly with low residue and are relatively mild on PP and PC, so they suit local quick wipes and disinfection. Note three cautions. First, ABS surfaces can dull or slightly whiten after repeated alcohol contact, so large-area repeated use on ABS is not advised. Second, flocked inserts should not be wiped with alcohol, because it can break the bonding adhesive and cause peeling. Third, gaskets should not contact high-concentration alcohol for long, and after wiping they should be dried promptly and re-dressed with grease. The overall principle is to treat alcohol as a tool for local, short, low-residue use, not as a routine cleaning solution. Daily cleaning should still be neutral cleaner and water; use alcohol only when fast disinfection or removal of oily fingerprints is needed, and afterwards confirm there is no residue and no dulling.
Q: If the seal face has been scratched, can the case still be used? A: It cannot be judged as simply usable or scrap. Assess the depth, direction, and location of the scratch. Three steps help. First, look at depth: if it is a light surface mark with no noticeable catch when a fingernail is drawn across it, it usually does not affect sealing and the case can stay in service. Second, look at direction: if the scratch is a continuous groove crossing the seal contact band, even a thin one can become a leak path and the risk is clearly higher than a fine mark running along the band. Third, run a verification: for projects with an IP requirement, do a seal verification after cleaning, such as a negative-pressure quick check or a sampling immersion, and let the measured result decide whether the requirement is still met. If the scratch has already produced a leak, it usually cannot be restored to the design protection level by simple repair, and shell replacement should be assessed. The most direct prevention is to dry brush sand off before wet washing, prohibit steel wool and abrasive paste, and prohibit close-range high-pressure jets at the seal face. Writing these into the maintenance work instruction markedly lowers the chance of seal-face damage.
Q: If the foam insert is dirty, can it be machine washed or left in the sun? A: Neither is advisable. Machine washing means soaking, scrubbing, and high-speed spinning, which pulls the foam out of shape and damages its internal structure; once the cell structure is opened up, absorbed water is even harder to dry, and a flocked surface can peel off entirely during scrubbing. Direct sun brings ultraviolet and high temperature that accelerate surface aging and cause the foam to become brittle and shed, and the flocking adhesive can also fail under heat; for PU foam, heat and humidity accelerate hydrolysis. The correct method is dry-first: remove debris and dust with a soft brush or vacuum, spot clean oil with a slightly damp cloth and a little neutral soap, then blot dry immediately and air dry in a shaded, ventilated place. Activated carbon or desiccant can help with odor. If the foam has mildewed, powdered, become tacky, or clearly lost its resilience, its cushioning is insufficient and the insert should be replaced rather than cleaned further.
Q: After a deep clean, should a waterproof test be performed? A: It is advisable, especially after the gasket has been cleaned, removed, or replaced. Cleaning actions themselves can change the position, compression state, or surface lubrication of the gasket, so one verification confirms that the protection level has not dropped. Choose the method to suit the project. A negative-pressure quick check, drawing a vacuum inside the case and watching pressure retention or soap bubbles, is good for fast screening. An immersion test is closer to actual IP67 conditions but must follow the agreed depth and duration. Record the sample, conditions, and result and file them in the equipment maintenance record. For cases that do not require a defined IP rating and are only needed for dust and splash protection, verification frequency can be reduced, but at minimum check that the gasket is flat and no foreign matter is trapped on the seal face. In practice, making "verify after cleaning" a standard action catches gasket aging and seal-face damage early, before a leak shows up in a critical application.
Q: How can the service life of a protective case be extended? A: Extend life by working three lines at once: reduce physical damage, reduce chemical attack, and reduce gasket aging. On the physical side, avoid dragging, avoid drops from height, carry by the handle rather than the latch, dry brush before wet washing, and ban steel wool and abrasive paste. On the chemical side, use neutral cleaner as the rule, avoid prolonged contact with strong solvents and strong alkalis, and never soak the insert or use solvents on it. On the gasket side, dress with compatible grease periodically, avoid storage that keeps the gasket compressed, keep chlorine disinfectants and mineral oil off rubber, and check periodically for cracks, hardening, and permanent flat spots, replacing at end of life. For storage, keep the case ventilated and shaded, away from heat and chemicals, and avoid leaving heavy loads on the lid for long periods. For management, set a maintenance interval table with records and bring wear part replacement into the plan. For what to stock and how much, see protective case spare parts stocking list.
Conclusion and Further Reading
Back to the title question: how should a protective case be cleaned and maintained? The answer is zone it, match the method to the material, set the frequency, and make protecting the seal the precondition of every action. The shell can be washed but must be protected from abrasion and strong solvents. The gasket may only be wiped gently, dried fully, and dressed with a thin film of grease. Metal parts need rust protection and moderate lubrication. The foam insert must stay on the dry method and must not be soaked or sun-dried. Add the four closing steps of drying, inspection, reassembly, and verification, and a proper cleaning cycle is complete.
Three actions you can take immediately: First, post the six-step general method and the cleaning taboo table at the maintenance station, so frontline staff work from a table rather than from habit. Second, put the gasket on a periodic inspection and replacement plan, because it is the part that reaches end of life first. Third, run a seal verification after every deep clean, using a measured result to confirm the protection level has not dropped because of maintenance.
JUNZHJIA is manufactured by KeXin New Materials (Guangdong) Co., Ltd., with a product line covering protective cases, toolboxes, military-spec storage boxes, and waterproof junction boxes, serving wholesale, distribution, OEM/ODM, and global supply. The company configures shell material, gasket, and insert to the duty cycle, supplies material statements and test documents, and provides gaskets, latches, handles, feet, and other wear parts long term by model, helping users turn cleaning, maintenance, and parts replacement into a sustainable equipment management routine.
Further Reading