

A family of four drives across three provinces with a camera bag, trekking poles, a portable stove and a child's drawing board competing for the same boot space. A touring act travels by high-speed rail with instrument accessories, a mixing desk and lighting cable spread across six people. A service engineer spends two weeks on the road with a coach operator, carrying instruments and a change of clothes in the same case. These are luggage situations, and their priorities differ from air freight: a luggage case cares more about walkability across several transport modes, about storage efficiency through dozens of open-and-close cycles, and about reliability through long exposure to damp and dirty environments than about drop protection or pressure differential.
JUNZHIJIA states the guiding principle for luggage cases as follows: protection is not about turning the case into a safe — it is about returning to the same storage order every time the lid opens, with exactly one defined place for each item. Order is itself protection. When every position is fixed, collisions cannot accumulate; when zones are clear, tools never end up mixed with electronics; and when dividers can be rearranged, capacity stretches with the trip instead of forcing a second case for one extra pair of shoes.
Table of Contents
- How a Luggage Case Differs Fundamentally from an Ordinary Suitcase
- Capacity Planning: Deriving Net Internal Volume from Item Count
- Hard Shell and Soft-Hard Hybrid Structures: Two Load Paths
- Compartment Systems: Removable Dividers, Mesh Pockets and Straps
- Separation Strategy for Mixed Clothing and Equipment
- Wheel Systems and Base: Walkability in Multimodal Travel
- Handle and Grip: Ergonomics and Fatigue Life
- Closure, Identification and Anti-Tamper: Tags, Barcodes and Seals
- Rail, Coach and Ferry: How Baggage Handling Differs
- Stacking, Check-In and In-Vehicle Restraint
- Humidity, Mould and Odour Control
- Cleaning, Disinfection and Long-Term Storage
- Selection Checklist, Acceptance and Custom Delivery
- Frequently Asked Questions FAQ
- Conclusion and Related Reading
How a Luggage Case Differs Fundamentally from an Ordinary Suitcase
The two look similar, but their design inputs are entirely different. An ordinary suitcase is designed so that packed clothing can be dragged along smoothly, so walls are thin, the liner is soft and weight is the first constraint. A luggage case is designed so that contents survive and remain retrievable in order even when the load configuration is uncertain, opening frequency is very high and the environment is uncontrolled. That difference shows up in four concrete measures: whether the wall can resist a local concentrated load, whether the interior has a reconfigurable separation system, whether the opening is sealed or at least dust and water resistant, and whether the wheel system still tracks straight when fully loaded over a long distance.
The quickest way to tell which category a case belongs to is to look at interior wall flatness and divider interfaces. A luggage case typically keeps a full array of divider slots or modular mounting points so the user can redivide the space for each trip, whereas the interior of an ordinary suitcase is stitched fabric with no reconfigurable interface. Another indicator is whether the wall can tolerate point loads. Stand the case on end with weight on top, or press a heavy item directly against an inner wall: a protective structure takes it without local denting or tearing, while ordinary luggage usually shows a permanent mark the first time.
| Comparison | Ordinary suitcase | Luggage case |
|---|---|---|
| --- | --- | --- |
| Design input | Clothing load and rolling | Uncertain load plus frequent opening |
| Interior wall | Stitched fabric, not reconfigurable | Modular slots or mounting points |
| Point load tolerance | Weak, permanent dents | Ribs and reinforced corners |
| Opening | Zipper, no seal | Gasket or dust lip |
| Dividers | None or fixed | Removable and rearrangeable |
| Mixed-load separation | Improvised pouches | Hard compartment separation |
| Typical life limit | Fabric wear | Seals and wheel system |
A luggage case is not automatically better the harder it is. In passenger transport an overly rigid case is awkward in a crowded carriage and heavier. The balance is to concentrate rigidity in the base, the top face and the four corners, and let the side walls flex slightly so the case can deform without damage when squeezed into a full rack.
Capacity Planning: Deriving Net Internal Volume from Item Count
The most common selection error is choosing a case by exterior volume, only to run out of space half way through packing. The correct sequence is to list the luggage first and then plan net volume. Net volume is not exterior volume: wall thickness, rib structures, divider thickness, foam layers and wheel-mount bosses all consume space. A loading factor gives a workable estimate — 0.65 to 0.75 for regular items, and 0.45 to 0.60 for irregular ones such as trekking poles, instrument fittings and tripods. A case rated 60 L externally therefore offers roughly 27 to 45 L of usable space.
A more practical technique is the bounding-box method. Reduce each item to its smallest enclosing cuboid and add the dimensions in three directions. The total along the length must not exceed the net internal length, the stacked heights must fit under the net internal height, and the transverse width must accommodate the widest item's required clearance. If any dimension exceeds the net internal figure by more than 3 cm, change the case or reduce the item count instead of hoping that it will compress.
| Load type | Loading factor | Note |
|---|---|---|
| --- | --- | --- |
| Clothing and soft bags | 0.70–0.78 | Compressible, gaps can be filled |
| Mixed luggage | 0.60–0.70 | Hard and soft items combined |
| Hard equipment cases | 0.55–0.65 | Cushioning clearance needed between boxes |
| Long rod-shaped items | 0.40–0.55 | Poles, tripods, lighting stands |
| Irregular apparatus | 0.35–0.50 | Instruments, models, samples |
Internal height is the other critical variable. Common net heights are 200, 250, 300 and 350 mm, corresponding to arrangements such as one equipment layer plus one clothing layer, two equipment layers, or one equipment layer plus a spare layer. Note that many luggage cases lose 15 to 25 mm of net height once a lid compression block is fitted, so selection must use the actual usable height rather than the nominal figure, otherwise the case will be hard to close or the top layer will be crushed. The layered and bounding-box accounting method is described further in toolbox capacity calculation.
Hard Shell and Soft-Hard Hybrid Structures: Two Load Paths
Luggage case shells fall broadly into full hard shell and soft-hard hybrid categories. A full hard shell in injection-moulded PP, ABS or rotomoulded LLDPE offers a clear load path, high stacking capacity, mature sealing technology, and exteriors whose function survives scratches. The drawbacks are higher weight, rigid capacity and no ability to take on a little extra. A hybrid structure typically pairs rigid front and rear shells with fabric expansion sides, which allows capacity to stretch by 10 to 25 percent, weighs less and suits irregular luggage better; the weakness is that the sides resist compression poorly, fabric seams become the starting point for water ingress and abrasion, and sealing rarely reaches IP65 or above.
Three questions decide the choice: will other bags be stacked on top during the trip, is the largest item rigid with a fixed dimension, and will the case sit exposed to rain or wet ground for long periods. If two of the three answers are yes, specify a full hard shell. If the load is mainly clothing, soft bags, toys and books and travel is mostly by car and short rail legs, the capacity and weight advantages of a hybrid are more valuable.
In a hybrid structure, three weak points deserve attention. The joint between the expansion layer and the rigid shell should use a double-row stitched edge with an internal reinforcement strip, because a single stitch line pulls open under full load. The expansion zipper should have a coarse tooth pitch with a water-resistant coating and end stops. And the transition where rigidity meets fabric should be softened with a chamfer or elastomer part, since repeated flexing will otherwise crack in the same place every time. For full hard shells, the priorities shift to fillet radii at rib roots, corner reinforcements and continuity at the hinge and wheel mounts.
Compartment Systems: Removable Dividers, Mesh Pockets and Straps
Compartments are the real technical core of a luggage case, because they determine whether the case becomes easier to use over time or steadily more chaotic. A complete system usually has four layers: a rearrangeable divider skeleton at the bottom, modular inserts or foam blocks above it, elastic mesh pockets or straps in the upper layer, and document and card slots inside the lid. Each layer has a distinct role — the skeleton defines the space, the inserts locate individual items, the upper layer restrains small high-frequency items, and the lid interior stores documents and lists within easy reach.
Divider interfaces have several measurable requirements. Divider thickness is normally 6 to 12 mm; too thin and it bows when loaded, too thick and it consumes usable volume. Slot pitch defines the smallest reconfigurable unit, commonly 25, 30 or 50 mm; a finer pitch gives more flexibility but raises structural complexity and cost. Fixing methods include drop-in, snap-in and rail-mounted types, with snap-in least likely to release under vehicle vibration and rail-mounted best for items that are frequently pulled out. There should be 0.5 to 1 mm of interference between divider and wall, or a flexible sealing edge, so small items cannot slip through the gap into the next compartment.
| Component | Function | Key measure | Common failure |
|---|---|---|---|
| --- | --- | --- | --- |
| Removable divider | Divides space | 6–12 mm thick, 25–50 mm pitch | Bowing, releasing under vibration |
| Modular insert | Locates one item | 1–2 mm interference | Edge collapse after repeated use |
| Elastic mesh pocket | Restrains small items | Rebound loss under 30 percent | Elastic fatigue |
| Hook-and-loop strap | Secures long items | Shear strength, temperature range | Reduced grip when cold |
| Lid card slot | Stores documents | Anti-slip, retention | Too loose to hold |
The compartment system also makes loading visual. Once every item has a defined position, packing changes from arranging to verifying, and a missing piece is immediately obvious. That matters especially for teams, where equipment is spread across several people and fixed positions turn "who has what" into a checklist question rather than a memory test. Compared with a fully foam-cut liner, dividers suit luggage that is rearranged often; the boundary between the two approaches is examined in divider versus foam selection and removable divider system design.
Separation Strategy for Mixed Clothing and Equipment
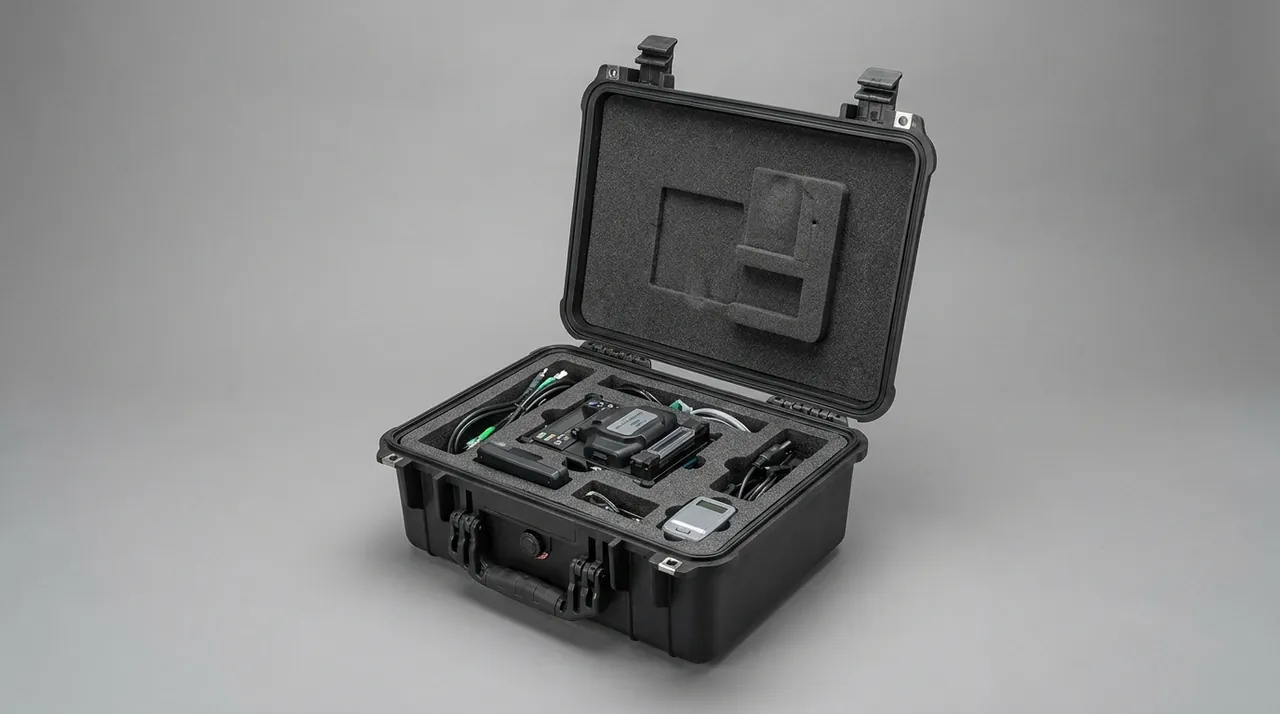
Mixed loading is the most common and most problematic way a luggage case is used. Four failure modes dominate: hard items abrading fabric or equipment surfaces under vibration; liquids leaking from toiletries or damp towels and contaminating electronics and clothing; dust and grit migrating from a tool compartment into a clean zone; and odour cross-contamination, particularly sportswear sharing space with formal clothing. The answer is not more plastic bags but structural separation.
Three rules apply. First, hard items and electronics must be separated by a physical divider or closed-cell foam at least 20 mm thick, never by fabric alone. Second, liquids deserve their own washable well with a shallow tray base and an absorbent layer so a leak stays inside, and that well should sit downstream in the drainage path when the case stands upright, so liquid never flows past the electronics compartment. Third, the dirty zone for shoes, wet clothing and tools should be a separate compartment positioned away from the clean airflow direction, with a lip along the compartment wall to stop solid particles crossing over.
For trips that combine equipment and clothing, a three-zone arrangement works well: a clean zone for clothing, a buffer zone for soft bags and shoes, and an equipment zone for electronics and cables. The buffer zone is not just storage; it separates the two item classes most likely to damage each other. Where volume is short, fall back to two zones plus an insert: equipment travels in a modular insert that comes out as a unit, while the clothing zone stays undivided. Textile and odour-absorbing material choices are covered in outdoor case inner cushion design and cushion liner case selection.
Wheel Systems and Base: Walkability in Multimodal Travel
A luggage case wheel system faces far more than one surface: platforms, carriage aisles, pavements, gravel and ferry ramps. A four-wheel castor arrangement turns easily on flat ground but only two wheels carry load when crossing an obstacle, so clearance depends on individual wheel diameter and base ground clearance. A two-wheel plus foot arrangement is steadier when pulled in a straight line and clears obstacles better, but turning requires tilting the case, which asks more of the user when it is heavy. The choice follows the frequency of turning versus the height of obstacles.
The relationship between diameter and obstacle clearance can be estimated as roughly one third of the wheel diameter. A 50 mm wheel comfortably clears about 16 mm, while a 75 mm wheel clears about 25 mm. Platform and carriage gaps and older pavement steps are typically 15 to 30 mm, which is the practical basis for choosing diameter. Base ground clearance matters just as much: too little turns the base into a sled on gravel or grass.
| Configuration | Advantage | Drawback | Best fit |
|---|---|---|---|
| --- | --- | --- | --- |
| Four twin castors | Easy turning, low push effort | Weak obstacle clearance, less stable | Airports, stations, indoors |
| Two wheels plus foot | Good clearance, stable tracking | Tilting needed to turn | Intercity rail, long pulls |
| Four wheels plus centre foot | Mixed terrain capability | Complex, higher cost | Multimodal journeys |
| Fixed hand grips, no wheels | Lightest, most durable | Not viable over distance | Short trips, storage |
Wheel mounts are the most failure-prone location because they take vertical load and a bending moment during towing. The base plate for each mount needs continuous ribs running into the side wall rather than being isolated on the bottom panel. Fixings should use metal inserts rather than screws driven into plastic, and axles should be replaceable so a worn bearing does not scrap the whole case. The base also needs to be cleanable: deep inaccessible grooves trap grit and salt, which accelerates ageing of the bottom panel. Related details appear in outdoor case dustproof design and the purpose of a dustproof toolbox.
Handle and Grip: Ergonomics and Fatigue Life
The goal of a handle system is not that it can be pulled but that the wrist is not aching after two hours. Three parameters govern this: handle width, grip hardness and stage count. Handle width normally sits at 140 to 160 mm; narrower concentrates pressure in the palm, wider is awkward in tight aisles. Grip hardness of 55 to 70 Shore A balances feel against wear, since softer grips feel better but abrade faster while harder grips last but press into the hand. Three or four stages should match user height, with the top stage letting the wrist hang naturally rather than hunching the shoulder.
Fatigue life depends on three details. First is tube straightness: a visibly bowed tube loads one side of the detent mechanism and wears it unevenly. Second is detent material and spring preload, with button release force ideally under 30 N, since more becomes tiring over a long day. Third is the stiffness of the joint between handle mount and case body; if it wobbles more than 2 mm when loaded, the mount lacks rigidity and will eventually crack at the root. A combined test of 3,000 loaded extension cycles plus an 8 km tow exposes far more than either test alone.
One ergonomic relationship is easily missed: extending the handle moves the centre of gravity forward, and a case whose heavy items sit high will lean noticeably when towed. The answer is not a stronger handle but an internal layout that places heavy items near the axle and near the centre line, keeping the centre of gravity low. This shows why storage and structural design must be considered together — storage determines the centre of gravity, and the centre of gravity determines the real load on the wheels and handle.
Closure, Identification and Anti-Tamper: Tags, Barcodes and Seals
A luggage case lock serves two distinct purposes: preventing accidental opening and preventing deliberate opening. Preventing accidental opening depends on catch reliability and anti-release features such as double-point latches, retaining hooks and a tension point in the middle of the long side. Preventing deliberate opening requires a complete anti-tamper approach including seal holes, single-use seals and a numbered log. In multimodal passenger travel the case is often out of sight for hours, and a seal is the only way to confirm afterwards whether it was opened.
Identification is part of protection too. Three information positions on the exterior work well: a luggage tag slot for contact details that can be changed at any time, a fixed barcode or QR position for team roll-calls and asset tracking, and a colour band that is visible without being garish for quick recognition in a pile of bags. For group travel, colour plus number dramatically shortens roll-call time. Large clear windows are best avoided, because transparent parts become brittle and crack in the cold and lose legibility once scratched.
| Anti-tamper level | Measures | Visibility | Typical use |
|---|---|---|---|
| --- | --- | --- | --- |
| Basic | Double-point latches plus retaining hooks | Visible after opening | Short trips carried personally |
| Enhanced | Seal hole plus single-use seal | Verifiable on arrival | Intercity multimodal |
| Full | Numbered seal plus opening notice | Fully traceable | High-value equipment |
| Supplementary | Internal position marking | Requires opening to compare | Valuable samples |
The value of a routine seal check is often underestimated. Record the seal number and photograph it before departure, then compare the number and the physical condition before opening at destination. If the number does not match or the adhesive shows signs of being reapplied, document it before opening. This costs almost nothing and provides a clear timeline when a dispute arises, removing the unanswerable question of where the case was opened.
Rail, Coach and Ferry: How Baggage Handling Differs
What multimodal travel makes easy to overlook is that each mode imposes different physical constraints. Rail luggage racks have fixed height and depth limits, so a case has to slot in on its side or upright, and an over-thick case may not fit at all. Coach luggage bays are low transverse spaces where cases lie flat and stack about two high. Ferries and ro-ro vessels add deck humidity, salt spray and manual handling, so the case needs reliable top and side grips. Writing these constraints into the selection requirement avoids the frustrating result of a good case that will not go into the vehicle.
| Mode | Main constraint | Key dimension | Protection priority |
|---|---|---|---|
| --- | --- | --- | --- |
| High-speed rail | Rack depth and height | Thickness under 300 mm is safer | Dust and crush resistance |
| Long-distance coach | Low bay, flat stacking | Height under 400 mm to double-stack | Stacking capacity |
| Ferry and ro-ro | Deck humidity and salt | Top and side grips required | Sealing, hardware corrosion |
| Private car | Boot depth and belt anchors | Fits with seats folded | In-vehicle restraint |
| Taxi and ride-hailing | Boot height | Easy one-person lift | Weight control |
Impact inputs also differ. Rail shocks are frequent and moderate, from items sliding on the rack and longitudinal push under braking. Coach bay shocks come from speed bumps and emergency braking, producing high longitudinal peaks. Ferry inputs are low-frequency sway with persistent moisture. Where coach and ferry dominate the itinerary, stacking capacity and hardware corrosion resistance come first.
Stacking, Check-In and In-Vehicle Restraint
Stacking is the most common static load in passenger travel. Coach bays commonly hold two or three layers, so a 30 kg case at the bottom carries about 60 kg on its top face, and cases in a loaded car boot can slide forward under braking and strike each other. Structurally, the answers are a rib array on the top face, thickened corners or metal inserts, an anti-slip pattern on the base, and a marked maximum stacking tier count and single-case weight on the exterior.
In-vehicle restraint is even more often neglected. At a braking deceleration of 0.8 g, a 30 kg case generates about 240 N of inertial force, and with nothing holding it, it moves at a meaningful speed into the seat backs or boot wall. Sensible practice is to use a strap or mesh partition in the boot, place the case above the rear axle to lower the centre of gravity, and fit an anti-slip mat to raise the friction coefficient. For cases that travel in a vehicle permanently, drain or strap holes in the base make ratchet-strap fixing easier.
General principles for stacking and stackable design appear in toolbox stackable design benefits and stacking height limits, while the differences between industrial and household requirements are covered in industrial versus household toolboxes.
Humidity, Mould and Odour Control
On long journeys a luggage case regularly meets high humidity: rainy seasons, coastal regions, ferry decks and storage in humid interiors. Moisture causes damage along two paths. The first acts on electronics and metal parts, producing corrosion and intermittent contacts. The second acts on textiles and leather, producing mould and odour. Once mould forms, spores remain in liner fibres and are difficult to remove completely, so control must focus on preventing entry rather than cleaning afterwards.
Control works on three levels. Structurally, the case seal sets the rate at which moisture enters, and a compliant gasket with adequate compression points is the foundation. At material level, closed-cell liners such as EVA, IXPE or closed-cell PE are preferred over moisture-absorbing open-cell foam and natural fibres. Operationally, desiccant is sized to net internal volume, and luggage containing leather or textiles gets additional odour-absorbing material. Typically 10 to 20 g of silica gel per 10 L of net volume is used; for trips beyond four weeks or with a sea leg, take the upper figure and carry spare sachets. Activated carbon handles odour from shoes and sportswear well but absorbs little moisture, so it does not replace silica gel. Ageing seals accelerate moisture ingress significantly; the criteria are set out in case seal ageing and outdoor case seal ring selection.
Cleaning, Disinfection and Long-Term Storage
Cleaning requirements have risen sharply, especially where a case shares transport with food, children's items or medical supplies. The design principle is removable and washable: dividers and mesh pockets come out as a set, the interior avoids inaccessible corners, and the seal groove can be cleaned with a soft brush. Material compatibility matters during cleaning. Chlorine-based disinfectants attack stainless steel, and alcohol-based products can cause stress cracking in some plastics, so follow the material supplier's compatibility table and dry thoroughly afterwards, particularly in the seal groove and inside latches.
Long-term storage has three essentials. Clean and dry the case completely before putting it away, because any residual moisture stays sealed inside. Avoid leaving the latches fully locked, since releasing them lets the gasket recover its elasticity and extends its life. And avoid continuous stacking load, because plastics creep under sustained static load and the shell changes shape slowly. Where stacking is unavoidable, reduce the tier count or add internal supports. Storage temperature matters too: above 40 °C accelerates both plastic ageing and gasket hardening.
| Maintenance item | Interval | Criterion | Action |
|---|---|---|---|
| --- | --- | --- | --- |
| Liner cleaning | After each long trip | Visible dust or odour | Remove, wash, dry fully |
| Seal groove check | Quarterly | Scratches, debris | Soft brush and visual check |
| Gasket condition | Half-yearly | Hardening, cracks | Replace at 2–3 years |
| Wheel lubrication | Half-yearly | Noise, rising drag | Clean then relubricate |
| Latch check | Quarterly | Inconsistent feel | Adjust or replace |
| Humidity indicator | Every opening | Reading above 40 percent | Replace desiccant |
Selection Checklist, Acceptance and Custom Delivery
Selection runs in five steps. First, define the itinerary structure and the share of each transport mode. Second, list the full luggage inventory, marking hard and soft items and the most sensitive piece. Third, use the bounding-box method to size net volume and choose internal capacity and height. Fourth, set the protection level and hardware grade, including whether sealing and salt spray resistance are required. Fifth, define the storage system: divider pitch, insert count and mesh pocket count. Only then discuss appearance and colour; reversing the order produces a good-looking case that will not fit the load.
Incoming acceptance should be recorded item by item. Visually, check for through-wall cracks, whitened ribs and corner dents. Functionally, check consistent latch feel, positive detent at every handle stage, and wheel rotation without noise or axial play. For sealing, check that the gasket is flat and untwisted and that the groove is free of debris. For storage, check that divider insertion force is consistent and mesh pockets rebound properly. For team orders, add a same-batch consistency spot check and file the results with the acceptance record.
Custom delivery usually involves exterior colour, printed numbering, divider pitch and insert layout. Colour and printing are the easy parts; real lead time sits in divider tooling and insert moulds. Where team members need to distinguish their cases, a colour and number combination works better than complex graphics. The boundary between minimum order quantity and tooling cost is discussed in custom case MOQ baseline and protective case colour customisation.
Frequently Asked Questions FAQ
Q: How should I size a luggage case, by exterior volume or by what it actually carries?
A: Size it from the actual load and use exterior volume only as a rough screen. List every item, reduce each to its smallest enclosing cuboid, and add the dimensions in three directions using the bounding-box method. Then divide by a loading factor to obtain the net volume needed. The factor depends on how regular the items are: 0.70 to 0.78 for clothing and soft bags, 0.60 to 0.70 for mixed luggage, 0.55 to 0.65 for hard equipment, and 0.40 to 0.55 for long rod-shaped items. For example, if occupied volume totals 40 L and the load is mainly mixed luggage, a factor of 0.65 calls for roughly 62 L of exterior volume. Also remember that net height must be taken after the lid compression block is fitted, which is usually 15 to 25 mm less than the nominal figure, otherwise the top layer will not fit when the case is closed. Allow roughly ten percent of margin on top of the calculated figure, so that items picked up during the trip do not force a second bag.
Q: For luggage use, should I choose removable dividers or a single foam-cut liner?
A: Luggage use normally favours removable dividers, because the inventory changes between trips and the ability to rearrange directly determines how many scenarios one case can cover. A foam liner offers better single-item positioning and cushioning, which suits equipment with fixed geometry that must be protected from vibration, but once cut it matches only the current size combination, and any change in the load leaves either a hollow or an item that will not fit at all. A practical compromise is a divider skeleton plus local foam blocks: dividers define the large zones, and replaceable foam blocks provide location and cushioning for the few sensitive items. Keep both capabilities rather than choosing one. If an item's dimensions are stable for a year and its value is high, make a dedicated insert for it; if the load changes often, stay with dividers and standard modules. The deciding question is simple: will the geometry of the load stay stable for the next twelve months, or will it change with every trip?
Q: With mixed luggage, how do I stop tools from scratching clothing or equipment?
A: The answer is structural separation rather than extra layers of bags. First, hard items must be separated from electronics and optical gear by a solid divider or closed-cell foam at least 20 mm thick, because a single layer of fabric or a pouch will be worn through by vibration. Second, sharp tools need guards or edge protection and should be strapped down inside their compartment so they cannot travel across an empty space. Third, place the two item classes that damage each other most at opposite ends, using soft bags or shoes as a buffer layer in between, since those items also absorb impact. Fourth, where the case has removable dividers, use them to fully separate the tool compartment from the clean compartment, and check that the gap between divider and wall does not let small tools slip through into the clean zone. A useful check before departure is to shake the closed case gently and listen: any rattling means something is free to move, and whatever moves will eventually wear.
Q: How should liquid leakage be prevented by design rather than by care?
A: Design on the assumption that leakage will happen. Provide a washable liquid well with a shallow tray base, an absorbent layer and a lip around the perimeter so a broken container stays contained. Do not use absorbent fabric or open-cell foam in that well, because once soaked they become a permanent contamination source. Position the well downstream in the drainage path when the case stands upright, so liquid cannot flow through the electronics compartment. Pack bottles with both a screw cap and a secondary seal, and wrap them in a sealed bag before loading. If the case has a gasket, leaked liquid will also pool in the seal groove and accelerate ageing, so the liquid well should be sited away from the sealing faces, or the liner should be removed and the groove washed immediately after any leak. Keeping a photograph of the packed layout inside the case also helps, since anyone repacking later can restore the same arrangement without a written explanation.
Q: Are more wheels always better, and how do I choose between four and two?
A: More is not better; the deciding factors are terrain and the need to turn. A four-wheel castor arrangement turns most easily and pushes with least effort on hard flat surfaces such as airports, station halls and interiors, but only two wheels carry load over an obstacle, so clearance depends on diameter and the case has to be tilted at platform gaps and steps. A two-wheel plus foot arrangement is better in a straight line and over obstacles, because the foot lifts the case to a useful angle, which suits intercity rail and long pulls; the drawback is that turning requires tilting, which is tiring with a heavy load. Obstacle clearance can be estimated as one third of the wheel diameter, so a 50 mm wheel clears about 16 mm and a 75 mm wheel about 25 mm. Where the route includes gravel, grass and ferry ramps, choose the larger diameter and check base ground clearance. Where the case must handle both smooth floors and rough ground on the same trip, a four-wheel arrangement with a centre foot is the usual compromise.
Q: What practical limits do coach and rail luggage spaces put on case dimensions?
A: Rail racks typically have defined depth and height limits, so an over-thick case may not fit even when the length is fine; holding thickness under 300 mm is the safer choice. Coach luggage bays are low transverse spaces where case height should generally stay under 400 mm, otherwise two layers will not stack. Ferry and ro-ro handling is usually manual, so the case needs reliable top and side grips, and because deck humidity and salt spray are high, hardware should be stainless steel or have validated corrosion protection. Write these constraints into the requirement rather than solving them on site. Where coach and ferry dominate the itinerary, stacking capacity and hardware corrosion resistance should rank above appearance. A practical test is to load the case, pull it across 200 m of the worst surface on the itinerary, then inspect the wheel mounts and base ribs for whitening, which is the first visible sign that the structure is working beyond its design load.
Q: What matters most when storing a luggage case long term?
A: Three things go wrong most often. First, cleaning and drying: clean thoroughly and dry completely before storage, including the seal groove and the inside of the latches, because any residual moisture stays sealed in and becomes a long-term corrosion source. Second, do not leave the latches fully locked; releasing them lets the gasket recover and avoids permanent compression set, which noticeably extends gasket life. Third, avoid long-term stacking load, because plastics creep under sustained static load and the shell deforms slowly, so reduce tiers or add internal supports where stacking is unavoidable. Storage temperature also matters, since above 40 °C accelerates plastic ageing and gasket hardening. Keep a maintenance card inside the case recording cleaning dates and humidity indicator readings so the next user can judge its state quickly. Storing the case with the latches released rather than clamped shut also lets the gasket recover between trips. Where a case is stored for months at a time, noting the storage location and the last inspection date prevents it being forgotten until it is suddenly needed. A single spare latch, carried with the case, turns a broken latch from a lost trip into a minor repair, and a note of the latch part number makes reordering quick.
Q: How do I manage several identical cases for a team trip?
A: Build a two-level system with identifiable exteriors and verifiable interiors. Externally, use colour bands plus numbers: colour for recognition at a distance and numbers for checking at close range, and add a fixed barcode or QR position for scanning against a list. Complex graphics are best avoided, because recognition speed falls sharply with distance and poor light. Internally, give every case the same divider pitch and insert layout, and put a packing list inside the lid so packing becomes item-by-item verification rather than free arrangement. Add numbered seals to high-value equipment cases, record and photograph the seal number before departure, and check it before opening on arrival. The team should also agree a standard opening and roll-call procedure that names who is responsible for which case and who checks which item, so responsibility never falls into a gap. A short written handover at the end of the trip, listing anything damaged or missing, closes the loop before the next journey.
Conclusion and Related Reading
A luggage case competes on whether its storage order survives repeated trips.
Related Reading