

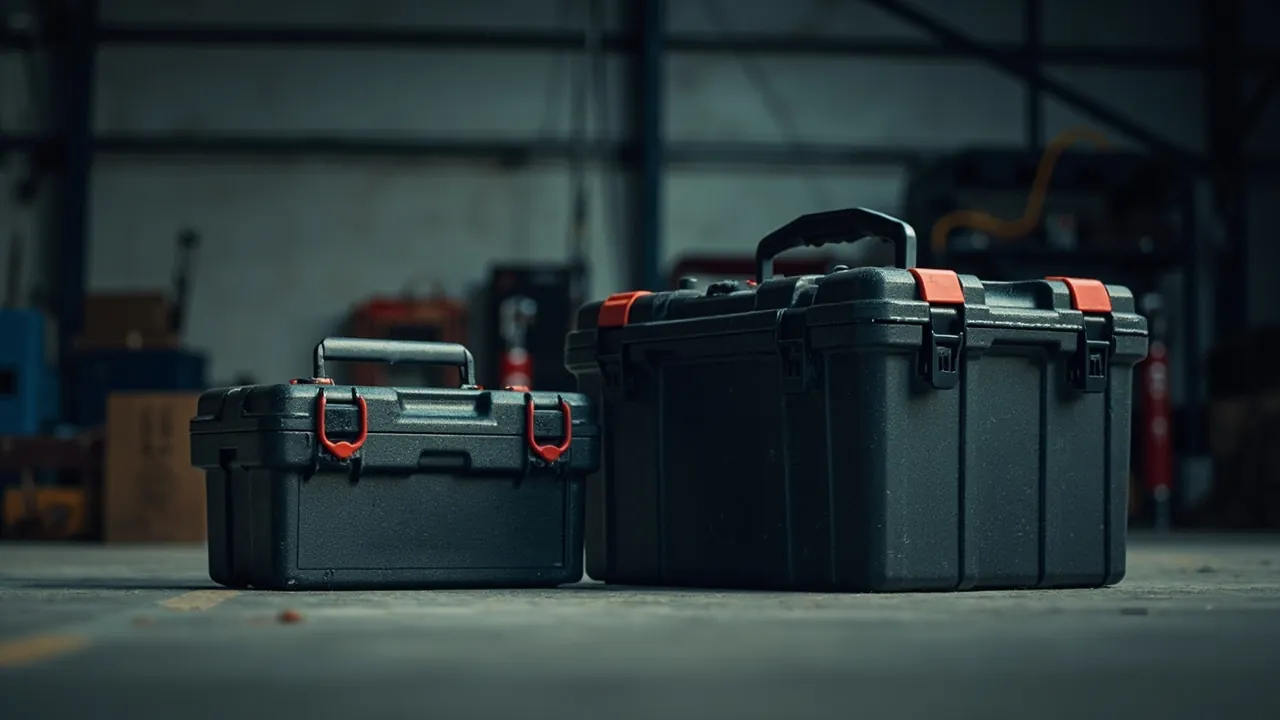
Start with the conclusion: the line between a tool organizer box and a toolbox is not drawn by size. It is drawn by two dimensions - the scale of the items being stored (small consumables counted in pieces versus large tools counted in units) and the frequency of movement (a short cycle at the bench versus transport between sites). An organizer box solves the problem of how screws, drill bits, terminals, circlips and washers - things counted in pieces - stay found, sorted and visible at a glance; its core value is compartment density and visual control. A toolbox solves the problem of how rotary hammers, spanner sets, gauges and instruments - things with volume, mass and a need for protection - are moved and stored safely; its core value is structural strength, ingress protection and carrying ergonomics. Mixing the two up is the most common waste on site: put a rotary hammer in a parts organizer and the box cracks within months; put screws loose in a large toolbox and they intermingle into one mass during transport, so finding a single M4 washer takes three minutes.
In engineering terms these are two entirely different design targets. The design inputs for a toolbox include drop height, rated load, ingress protection (the IP code of IEC 60529 / GB/T 4208) and impact resistance (the IK code of IEC 62262 / GB/T 20138). The design inputs for an organizer box are compartment count, cell dimensional tolerance, stacking stability and open-close cycle life. Holding an organizer to toolbox standards wastes money; holding a toolbox to organizer standards causes field failures. This article works through the definitions, item scale, mobility, structural strength and protection, internal organisation, capacity and load, stacking and modularity, materials, cost, industry scenarios and finally a combined architecture - giving engineers and buyers the basis to allocate both container types optimally within one budget.
Table of Contents
- The Short Answer: The Line Is Item Scale and Movement Frequency
- Definitions and Boundaries: What Is an Organizer, What Is a Toolbox
- Item Scale Dictates the Container: From M3 Screws to a Rotary Hammer
- Mobility Compared: Bench-Side Cycle Versus Cross-Site Transport
- Structural Strength and Ingress Protection: Why Organizers Rarely Need an IP Rating
- Internal Organisation: Fixed Cells, Adjustable Inserts and Visual Control
- Capacity and Load: The Engineering Difference Mass Distribution Makes
- Stacking and Modularity: Two Systems, Two Logics
- Material Differences: Thin-Wall Moulding Versus Heavy-Wall Engineering Resin
- Cost Structure: Unit Price, Service Life and Total Cost of Ownership
- Industry Scenarios Compared: Six Configuration Patterns
- The Combined Approach: A Three-Layer Architecture
- Purchasing Checklist and Ratio Guidance
- Frequently Asked Questions
- Conclusion and Further Reading
The Short Answer: The Line Is Item Scale and Movement Frequency
Before any detail, here is the decision tree. For any item you need to store, answer four questions in order and you will know which container it belongs in.
- What is its characteristic dimension? If the longest edge is in the tens of millimetres and it is counted in pieces rather than units - screws, nuts, washers, circlips, terminals, drill bits, blades, fuses, connectors - it is a small part and belongs in an organizer. If the longest edge is in the hundreds of millimetres and it is counted in "one spanner," "one tool," "one set," it is a large item and belongs in a toolbox.
- Does it need protection from impact, crushing or moisture? Power tools, gauges, instruments and optics all do - toolbox, probably with a custom insert. Standard fasteners generally do not - organizer.
- How far and how often does it move? Repeated use at one bench or workstation is a short cycle, and an organizer suits it better because opening is fast and the cells are visible. Movement between workshops, to site, in and out of vehicles is cross-site transport, and a toolbox suits it better because it has a handle, latches and the strength to survive being carried.
- Does it need to be counted and replenished? The core management action for small consumables is "seeing at a glance what is missing," which depends on fixed cells and visual control - the organizer's strength. The core action for large tools is "put it back after use," which depends on insert outlines and a checklist - the toolbox's strength.
Combine those four and the great majority of items classify quickly. The genuinely difficult cases sit in the middle: boxed drill bit sets, small cordless screwdrivers, multimeters, compact spirit levels. That "medium scale plus some protection plus some compartmentalisation" group is exactly what a modular tool system exists to solve, and the three-layer architecture section addresses it directly.
One point worth stressing: these two container types are complements, not substitutes. A well-configured tool system normally contains several small-parts organizers together with one or more large toolboxes, with the former nested inside or transported alongside the latter. The classic mistake is buying only one type. A crew with only toolboxes ends up with small parts rolling loose and impossible to count. A crew with only organizers has nowhere to put the heavy items, and the boxes split when carried.
Definitions and Boundaries: What Is an Organizer, What Is a Toolbox
Let us fix the terms before going further.
A tool organizer box (parts box, compartment box) is characterised by: many cells, from a handful to several dozen; relatively thin walls; a hinged lid, often transparent; one-handed opening; fixed or adjustable dividers; and specifications expressed primarily as cell count and cell dimensions. Common forms include hinged-lid multi-cell parts boxes, drawer-type parts cabinets, stackable tiered organizers, and mid-size compartment cases with a handle. Its design goal is the maximum number of distinguishable cells in the minimum volume.
A toolbox is characterised by: one or a few large-volume compartments; heavier wall sections; a handle and latches; optional trays and inserts; and specifications expressed as volume in litres, rated load in kilograms, and IP/IK ratings. Common forms include hand-carried toolboxes, tiered toolboxes with trays, wheeled trolley toolboxes, and protective cases. Its design goal is protecting larger, heavier or more sensitive items while they are moved.
| Dimension | Organizer box | Toolbox |
|---|---|---|
| --- | --- | --- |
| Primary specification | Cell count, cell size, overall size | Volume, rated load, IP/IK rating |
| Typical wall thickness | Thinner (lightness and cell density) | Heavier (stiffness and impact) |
| Opening method | Hinged lid, drawer, snap clip | Latch, over-centre draw latch |
| Carrying method | Handled, or placed inside another container | Integral handle, or telescopic handle and wheels |
| Protection required | Dust, preventing scatter | Dust, water, impact |
| Internal organisation | Fixed or adjustable cells | Trays, foam inserts, dividers |
| Unit price band | Low relative to toolboxes | Mid to high |
| Typical service life | Limited by cycle count; hinges wear | Longer; the seal is the consumable |
There is a grey zone between the two: mid-size compartment cases with a handle, fitted with multi-cell trays, that carry both cells and a latch. The market files these under both headings. When you meet one, go back to item scale and movement frequency rather than to what the catalogue calls it. If it is mainly used for cross-site transport of heavy items, hold it to toolbox requirements. If it is mainly used for parts sorting at a workstation, hold it to organizer requirements.
For the standard classification of toolboxes, see common toolbox types and how to select them and what a toolbox is.
Item Scale Dictates the Container: From M3 Screws to a Rotary Hammer
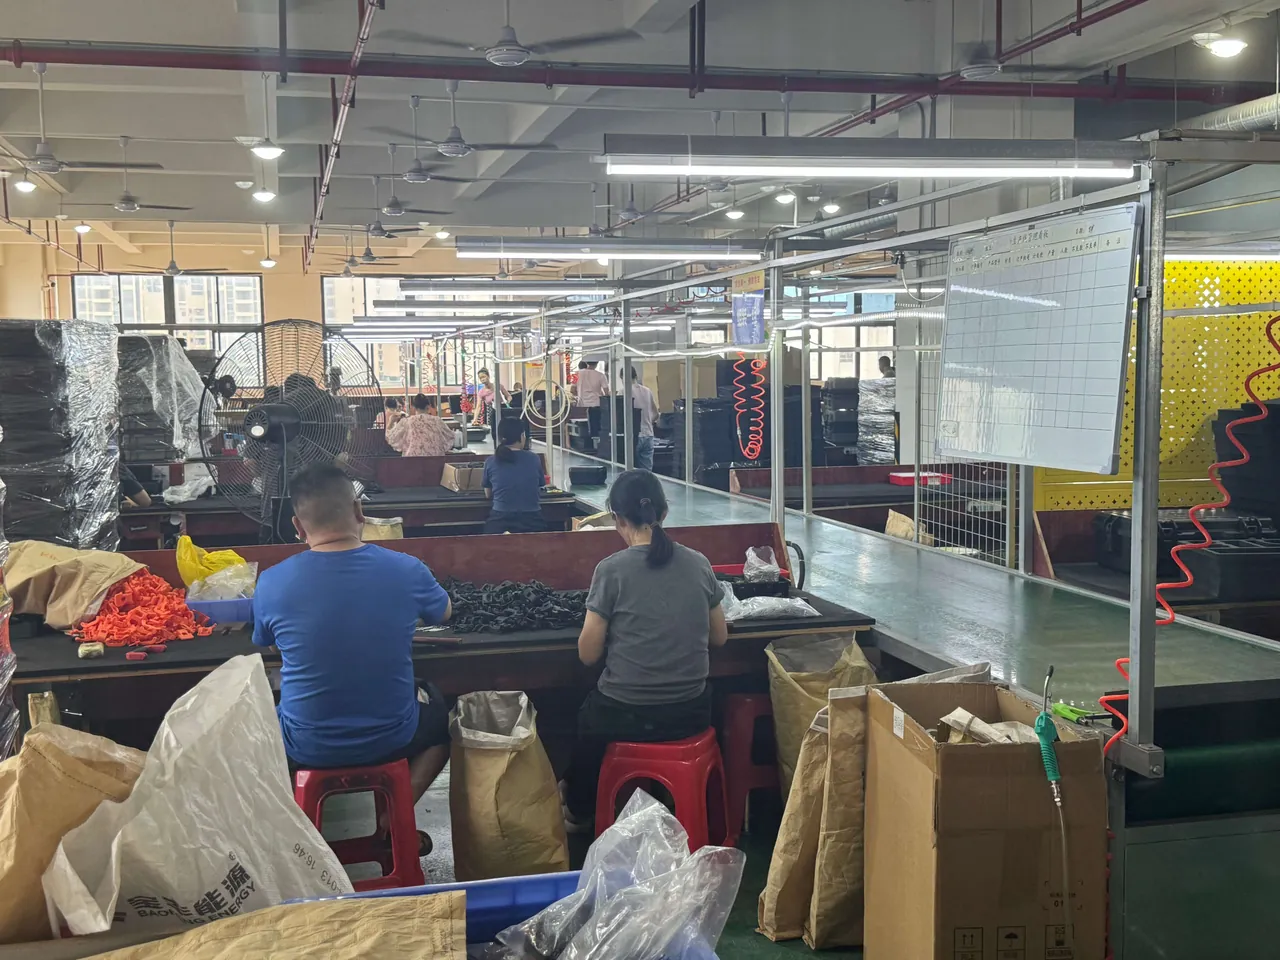
The physical scale of an item determines the compartment strategy, and this is the most fundamental design logic in the whole subject.
For small parts - characteristic dimension from millimetres to a few tens of millimetres - the central problem is mixing and loss. A single M3 screw loose among M4 screws is almost impossible to distinguish by eye, yet installing the wrong one is an assembly defect. So the first principle for small parts is physical separation: each specification gets its own clearly labelled cell. Two design requirements follow. Cell count must be adequate, sized by number of specifications rather than by total quantity. And cell size must match: too large and items tumble and mix inside the cell, too small and they are awkward to pick out.
A useful working rule is to size cell count at roughly 1.3 times the number of specifications - the 30% margin absorbs new specifications and finer categorisation later. Managing 20 fastener specifications suggests an organizer of 26 cells or more. For cell size, the internal clear dimension should be modestly larger than the largest edge of the item, typically by 20% to 50%: tighter makes picking difficult, looser lets items roll in transit.
For large items - characteristic dimension in the hundreds of millimetres - the central problem is collision and movement. A rotary hammer rolling loose damages itself, damages the gauge beside it, and cracks the case wall. So the first principle for large items is positional fixing: routed foam, dividers, straps or trays giving one place per item.
Medium-scale items, from a few tens of millimetres up to around a hundred, are the group that most needs deliberate design - boxed drill sets, compact cordless screwdrivers, multimeters, small spirit levels, hex key sets, socket sets. They need compartmentalisation or they mix, and they need some protection or they get damaged. The usual answer is a small-parts organizer or a divided tray placed inside a toolbox, which is exactly the three-layer architecture described later.
| Item category | Characteristic size | Main risk | Recommended container | Key design requirement |
|---|---|---|---|---|
| --- | --- | --- | --- | --- |
| Fasteners (screws, nuts, washers) | mm to tens of mm | Mixing, loss | Multi-cell organizer | Separate by specification, label cells |
| Electronics, terminals, connectors | mm | Mixing, ESD, oxidation | Divided organizer (anti-static option) | Small cells, desiccant |
| Drill bits, blades, taps | Tens of mm | Edge damage, mixing | Dedicated divided box or routed insert | One slot per item |
| Hand tools (spanners, pliers, screwdrivers) | 100 mm to several hundred | Collision, scatter | Toolbox with tray or insert | Locating slots, weight layering |
| Power tools (hammer drill, angle grinder) | Several hundred mm | Collision, drops, moisture | Toolbox with custom insert | Routed fixing, moisture control |
| Gauges and instruments | Tens to several hundred mm | Loss of accuracy, moisture | Toolbox with EVA insert | Cushioning, desiccant, dedicated slot |
Pin that table to the stores wall. It works better than any verbal instruction.
Mobility Compared: Bench-Side Cycle Versus Cross-Site Transport
The second key dimension is mobility. It determines how the container trades opening convenience against carrying safety.
A bench-side cycle means items are taken and replaced repeatedly at one workstation: fastener supply at an assembly station, components at a repair bench, cutters and gauges at a machine. The characteristics are very high cycle counts - tens to hundreds per day - very short travel distance, within a metre or so, and essentially no transport shock.
The design trade-off that follows is: opening speed first, structural strength second. In practice that means a hinged or drawer opening that works one-handed, cells visible at a glance through a clear lid or open top, no latch or only a simple clip, low weight for easy repositioning, and stackability to save bench area. This is why organisers are generally thin-walled with simple clips: in this duty, heavy walls and industrial latches add cost and effort for no benefit.
Cross-site transport means items move with people between locations: stores to site, vehicle to work face, workshop to customer. The characteristics are low cycle counts - a few times a day - long distances, and real drop and vibration risk.
Here the trade-off inverts: carrying safety first, opening speed second. That shows up as reliable latches that cannot open accidentally in transit, handle ergonomics under full load, structural stiffness for stacking and shock, an ingress rating for weather, and optional wheels for heavy loads. The engineering behind handles and balance is discussed in portable toolbox handle balance; heavy-duty wheeled options are in wheeled toolbox industry applications.
| Scenario characteristic | Bench-side cycle | Cross-site transport |
|---|---|---|
| --- | --- | --- |
| Openings per day | Tens to hundreds | A few |
| Travel distance | Within a metre | Tens of metres to kilometres |
| Main risks | Mixing, loss, lost time | Drops, vibration, water ingress, theft |
| Priority design goal | Opening speed, visibility | Latch reliability, carrying ergonomics, protection |
| Suitable container | Organizer, drawer cabinet | Toolbox, protective case |
| Common failure mode | Hinge fatigue, clip wear | Shell cracking, latch release, seal failure |
One intermediate scenario is easily overlooked: working from a vehicle. Tools carried in a van are neither a bench cycle nor standard cross-site transport. There is vibration, there are large temperature swings, there is jolting - yet the cycle count may be high. The right answer is a toolbox with organizers inside: the outer case absorbs vibration and temperature, the inner boxes give compartmentalisation and fast access. The effect of in-vehicle heat is analysed in heat deformation of toolboxes stored in vehicles.
Structural Strength and Ingress Protection: Why Organizers Rarely Need an IP Rating
This is where the two product families diverge most in technical requirement.
A toolbox has systemic protection needs. A case for outdoor or site duty normally has to satisfy several things at once: dust protection (IP5X or IP6X), water protection (IPX4 to IPX7 under IEC 60529 / GB/T 4208-2017), impact resistance (IK rating, IEC 62262 / GB/T 20138), plus drop and load capacity. Those requirements drive wall thickness, ribbing, sealing geometry and latch design - which is why a toolbox costs far more per litre than an organizer.
An organizer's protection needs are usually local and low grade. On the bench it faces dust settling and items scattering, not rain and drop impact. So:
- Dust: relevant but low grade. Keeping shop dust out of the cells is enough, normally achieved by a lapped lid with no gasket.
- Water: usually unnecessary. There is no liquid water impact at a bench. But if organizers travel inside a toolbox to outdoor sites, basic splash resistance helps - and more importantly the outer case carries the waterproof duty.
- Impact: a low requirement. An organizer is not falling off a truck; its impact risk is being knocked off a bench, which is low height and low energy.
There is an important engineering conclusion here: put the protection duty on the outer layer rather than stacking it at every level. A common mistake is demanding IP67 on every organizer, which roughly doubles cost for no benefit. The correct architecture is: the outer toolbox or protective case carries the IP and IK duty; inner organizers handle only compartmentalisation and location. That is the economics behind the three-layer architecture.
| Protection requirement | Toolbox (outer) | Organizer (inner) |
|---|---|---|
| --- | --- | --- |
| Dust | IP5X or IP6X, usually required | Basic settling dust only |
| Water | IPX4 to IPX7 by scenario | Usually not required; splash resistance optional |
| Impact | IK rating and drop testing | Usually not required |
| Load | Rated load stated | Light per-cell load |
| Latching | Reliable latch, resists accidental opening | Simple clip is enough |
| Seal | EPDM or silicone, replaceable | Usually no seal at all |
One exception matters: organizers used on their own. If an organizer is carried to site by itself rather than inside a toolbox, it needs real structural strength and basic dust and splash resistance. Choose a mid-size compartment case with a handle - thicker walls, proper latches and a handle, unlike a pure bench organizer. The test returns to mobility: once it leaves the bench it needs a handle and latches; once it goes outdoors it needs an ingress rating.
Internal Organisation: Fixed Cells, Adjustable Inserts and Visual Control
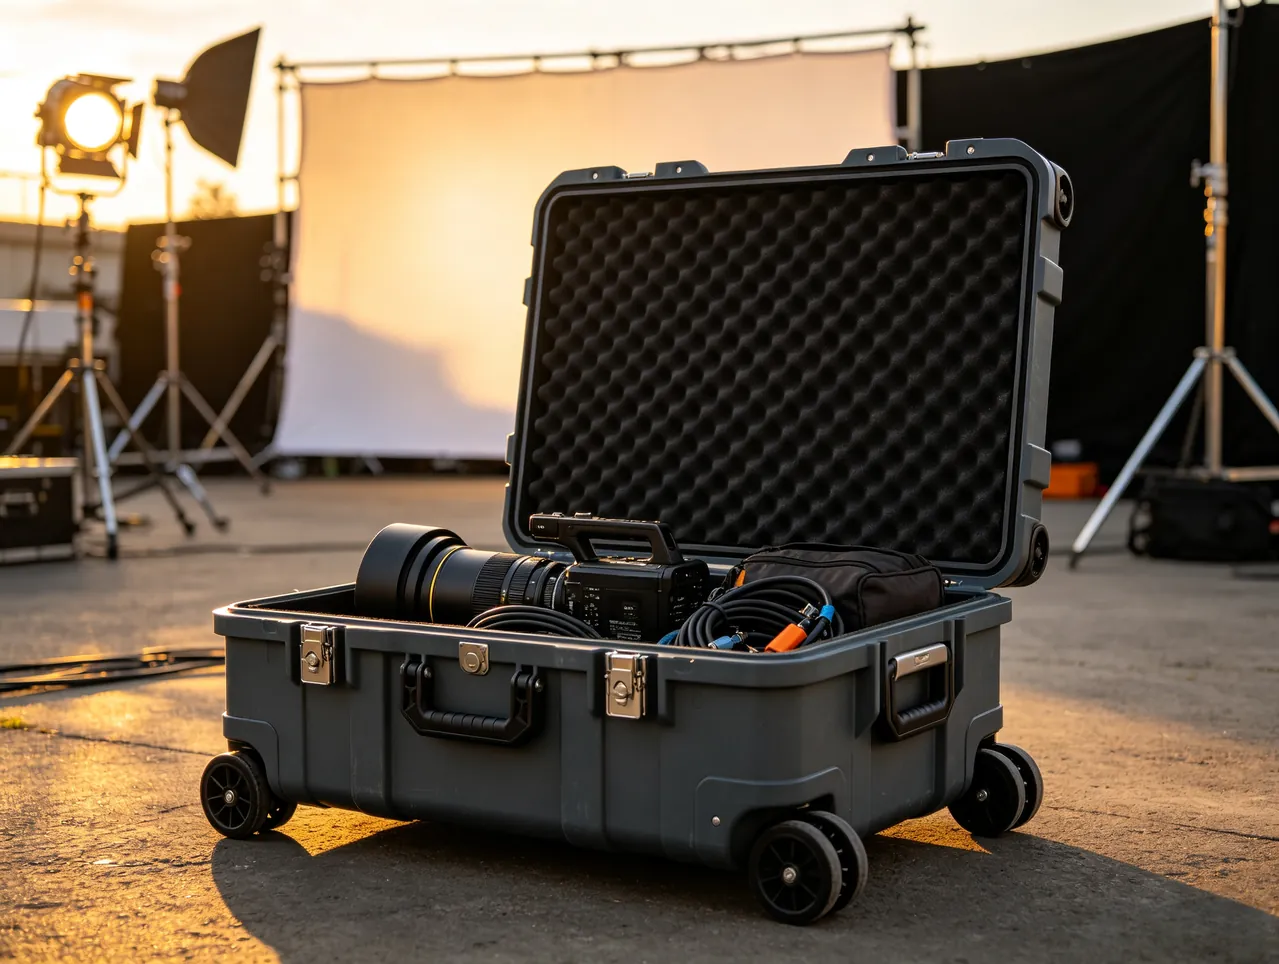
Internal organisation is where the two families differ most visibly, and it drives field efficiency directly.
The organizer's logic is "one cell equals one specification." Three main forms:
| Form | Structure | Strengths | Limitations | Best for |
|---|---|---|---|---|
| --- | --- | --- | --- | --- |
| Fixed cells | Dividers moulded in | Lowest cost, stable cell size, strong | Not adjustable; replace when specs change | Stable standard parts |
| Adjustable cells | Insertable dividers, added or removed | Flexible as specifications change | Dividers can loosen; tolerances accumulate | Frequently changing specs |
| Drawer type | Multiple independent drawers | One cell removable, whole unit swappable | Higher cost, slightly lower volume efficiency | Precision small parts, electronics |
Fixed cells suit stable specifications - standard fasteners, common terminals - with the lowest cost and longest life. Adjustable cells suit specifications that change often - development builds, spare parts. Drawers suit items you need to take out wholesale - carrying a few cells to the point of work.
The toolbox's logic is "one position equals one tool." Three main forms:
- Trays: shallow pans in the upper part of the case for frequently used small items and the tool currently in hand. Very fast access, but contents move in transit unless the design restricts them.
- Fixed foam insert: EVA or EPE routed to the tool outlines. Precise location, good protection, and easy counting because a gap is obvious - but it is cut to a specific tool list, so changing tools can invalidate it. See choosing toolbox internal foam and the advantages of EVA foam.
- Modular divider systems: plug-in dividers and standard modules that combine flexibility with order. Good for teams whose tool set changes - see modular internal design for toolboxes.
Visual control is the organizer's core value and the reason it is hard to replace. Three practices that work:
- Standardised labels. Every cell carries a label with the specification (M4x12), the grade or material (8.8, 304) and the part code. Labels must resist water and oil, and handwritten ones fade - print them.
- Shadow boards and outlines. Draw the outline of the tool or part on the insert or cell floor, so a missing item is instantly visible. This is one of the most effective visual tools in 5S practice.
- Colour zoning. Colour-code cell areas by use or category - red for electrical, blue for mechanical, yellow for consumables - to cut search time.
A quantitative view: in assembly and repair work, time spent locating tools and parts is a meaningful share of total task time. Moving small parts from "loose in one big box" to "sorted by specification and labelled" typically cuts per-item search time from tens of seconds to a few. At a station that picks hundreds of times a day, that difference accumulates into real labour cost - which is why investing in organizers for small parts often returns more than upgrading a toolbox.
Capacity and Load: The Engineering Difference Mass Distribution Makes
Comparing capacity and load means separating volume from weight.
An organizer's capacity is expressed in cells, and its load is low. A box full of M6 screws weighs from a few hundred grams to a kilogramme or two. That means an organizer needs no load-bearing stiffness, no ribbing designed for carrying, and no handle engineered around a full load. Its main load constraint is the lower box in a stack - when organizers are stacked, the bottom one carries everything above it, so the body needs adequate vertical stiffness and positive stacking location.
A toolbox's capacity is expressed in litres, and load is the governing design constraint. A mid-size case loaded with hand tools and power tools can reach well over ten kilograms. Three engineering requirements follow:
- Base stiffness. The base must not sag excessively when full, or the lid becomes hard to close and stacking becomes unstable. That depends on rib design - see toolbox durability and rib design.
- Handle strength and balance. A loaded handle carries a large force, so the handle roots must be reinforced; and the centre of gravity affects grip comfort, because an offset centre loads the wrist. See portable toolbox handle balance.
- Weight layering. Heavy items go low, directly beneath the handle; light and frequently used items go in the upper tray. That is both an ergonomic and a stability requirement - a high centre of gravity makes the case tip while carried.
One very practical configuration rule: a weight ceiling per case. From a human factors standpoint, weight carried one-handed repeatedly should stay low; beyond that, move to a wheeled solution or split the load. That is why professional crews typically run "several small and mid-size cases plus one wheeled case" rather than one enormous box. Capacity calculation is covered in toolbox capacity calculation and how to choose the right toolbox size.
| Parameter | Organizer | Toolbox |
|---|---|---|
| --- | --- | --- |
| Capacity expressed as | Cells x cell size | Litres |
| Typical load | Several hundred grams to a few kg | Several kg to tens of kg |
| Main load constraint | Lower box in a stack | Base stiffness, handle strength |
| Centre of gravity | Not a factor | Critical (carrying and stability) |
| Consequence of overload | Cell distortion, lid will not close | Base cracking, handle failure, injury |
Stacking and Modularity: Two Systems, Two Logics
Both product families talk about stacking, but they mean different things.
Organizer stacking is vertical expansion. The goal is more total cells on a fixed bench or shelf footprint. The critical requirements are: precise stacking location between the base of the upper box and the top of the lower one, or the stack shifts and tilts; adequate vertical stiffness in the lower boxes, or a long-term stack deforms; and the ability to withdraw one box from the middle without disturbing the others. Drawer-type cabinets do this best, because pulling one drawer leaves its neighbours untouched.
Toolbox stacking is transport and storage stability. The goal is that several fully loaded cases sit in a truck bed or store without sliding or deforming. The critical requirements are: cooperating stacking bosses and recesses; a load path that carries the upper case's weight through the side walls and ribs to the ground rather than pressing on the centre of the lower lid; and control of overall stack height and centre of gravity. See the benefits of stackable toolbox design.
Modularity is where the two meet, but they get there differently:
- Organizer modularity is about adjustable cells, add-or-remove boxes, and integration with shelving or drawer cabinets. It adapts to changing specifications.
- Toolbox modularity is about swappable inserts, plug-in dividers, add-or-remove trays, and case-to-case connection and stacking systems. It adapts to changing tasks - electrical today, mechanical tomorrow, swap the insert.
| Modularity dimension | Organizer | Toolbox |
|---|---|---|
| --- | --- | --- |
| What is modular | Cells, boxes | Inserts, dividers, trays |
| Adapts to | Specification change | Task change |
| Typical implementation | Adjustable dividers, drawer units | Swappable EVA inserts, plug-in dividers |
| How it combines | With shelving or cabinets | With case stacking and connection systems |
| Cost to extend | Low (add another box) | Medium (another insert or another case) |
The purchasing implication: buy organizers in one standard specification, sized for current specification count plus margin, so they stack and interchange. Buy toolboxes by task type, with a dedicated insert per task, rather than expecting one case to serve every job.
Material Differences: Thin-Wall Moulding Versus Heavy-Wall Engineering Resin

Material selection follows directly from the design targets.
Organizers: predominantly PP (polypropylene), thin wall, low cost, high flow. The choice is rational. Loads are light, so high stiffness is unnecessary. PP has low density, so the box is light for its size. PP has outstanding hinge performance - an integral living hinge survives a very large number of flex cycles, which matters enormously for a hinged-lid organizer. And PP is inexpensive in volume. Walls are kept thin to cut material and cycle time.
The weakness of PP is low-temperature toughness and modest stiffness, which barely matters at a bench. But note: if organizers go outdoors in the cold, PP embrittlement needs assessing, and a copolymer or impact-modified grade is the answer. See PP versus ABS toolbox materials for the full comparison.
Toolboxes: ABS, reinforced or modified PP, and PC/ABS blends - heavier walls, ribbed, protection-oriented. The logic is a balance of stiffness and toughness. ABS brings higher stiffness, surface hardness and heat resistance (higher HDT, measured per the GB/T 1634 series). PP brings better toughness and low-temperature behaviour when a copolymer or impact-modified grade is chosen. PC/ABS blends deliver the highest impact strength across a wide temperature range. Wall thickness and rib design are decisive, as set out in toolbox durability and rib design.
| Material | Density | Stiffness | Toughness | Heat (HDT) | Low temp | Cost | Typical use |
|---|---|---|---|---|---|---|---|
| --- | --- | --- | --- | --- | --- | --- | --- |
| PP homopolymer | Low | Lower | Fair | Lower | Poor (embrittles) | Low | Bench organizers |
| PP copolymer / impact modified | Low | Medium | Excellent | Medium | Good | Medium | Toolboxes, outdoor cases |
| ABS | Medium | High | Good | Higher | Fair | Medium-high | Professional toolboxes |
| PC/ABS blend | Medium | High | Excellent | High | Good | High | Premium protective cases |
A pragmatic recommendation: do not use one material across both duties. PP is entirely adequate for bench organizers, and switching to ABS is waste. Ordinary PP homopolymer in an outdoor toolbox is risky; specify a copolymer or impact-modified grade. The wider material discussion is in plastic material selection for protective cases.
One more point that is often missed: transparency. Organizers frequently use clear or translucent lids for visibility, in materials such as PP random copolymer, PS or PC. Toolboxes are normally opaque for light blocking, weatherability and colouring. If your process depends on seeing contents without opening, a clear-lid organizer is irreplaceable.
Cost Structure: Unit Price, Service Life and Total Cost of Ownership
Judging on unit price alone is the biggest purchasing error. Here is how total cost of ownership breaks down.
Organizer TCO is: low purchase price, plus moderate replacement frequency (the main failures are hinge fatigue and clip wear), plus low management cost (clear cells mean fast counting), plus loss cost - and that last one can be large, because poor compartmentalisation leads to lost small parts and mixing, which causes rework.
Toolbox TCO is: mid to high purchase price, plus low replacement frequency (long life; the seal is the main consumable), plus maintenance (periodic gasket replacement), plus contents-loss cost - and if protection is inadequate and a tool is destroyed or an instrument loses calibration, that loss dwarfs the cost of the case itself.
| Cost element | Organizer | Toolbox |
|---|---|---|
| --- | --- | --- |
| Purchase price | Low | Mid to high |
| Typical life | Medium (depends on cycle count) | Long (years) |
| Main consumable | Hinge, clip | Gasket, latch |
| Consequence of failure | Mixed cells, lost small parts | Damaged tools, out-of-calibration instruments |
| Hidden cost | Search time, rework | Contents loss, downtime |
| Return on upgrading | High from better compartmentalisation | High from better protection |
Three cost optimisation suggestions:
- Spend on small-parts management first; the return is usually higher. A typical crew's pain is finding things, not broken cases. Moving small parts from mixed to sorted and labelled usually saves more time than upgrading the case.
- Work backwards from the value of the contents. The more valuable the contents, the higher the case grade. A case holding instruments worth thousands deserves an IP67 protective case and a custom insert; a case holding ordinary spanners does not. Using a percentage of contents value - say 5% to 10% - as a container budget guide is simple and effective.
- Count the savings from standardisation. One standard organizer specification interchanges, stacks and reorders easily; one standard toolbox model shares inserts, spares and accessories. Standardisation cuts management complexity and spares inventory rather than unit price.
Industry Scenarios Compared: Six Configuration Patterns
The balance between the two container types varies sharply by industry. The following are experience-based starting points to be adjusted against a real tool list.
| Industry / work type | Small-parts character | Large-item character | Suggested balance | Key requirements |
|---|---|---|---|---|
| --- | --- | --- | --- | --- |
| Electrical and electronics assembly | Terminals, components, screws, many specs | Soldering iron, multimeter, small power tools | Organizers dominant plus one mid-size case | Anti-static, small cells, dry |
| Equipment maintenance | Spares, seals, fasteners | Spanner sets, pullers, gauges | Balanced organizers and toolbox | Clear sorting, portable |
| Construction and fit-out | Anchors, blades, drill bits | Hammer drill, angle grinder, level | Toolbox dominant plus few organizers | Impact, dust, load capacity |
| Vehicle repair | Clips, fuses, connectors | Socket sets, torque wrench, diagnostics | Drawer cabinet plus trolley or case | Fast access, heavy load, oil resistance |
| Telecom base station work | Connectors, patch leads, fasteners | Test sets, fusion splicer, power supply | Protective case with internal divided modules | High protection, custom insert |
| Home and facilities maintenance | Miscellaneous hardware | Basic hand tools, small drill | One general case plus one organizer | Cheap, adequate, easy to store |
A few notes:
- Electrical and electronics assembly carries a very large number of small specifications - a single station may manage over a hundred - so cell count is the key metric, and multi-cell organizers or drawer cabinets are indicated. Large items are few and light, so one mid-size case suffices.
- Equipment maintenance uses both families heavily. The typical pattern is "one toolbox with a tray plus several compartment organizers," the former for frequently used tools, the latter for spares and fasteners. See toolboxes for industrial maintenance.
- Construction and fit-out is dominated by large, heavy items in hostile conditions, so impact resistance and load capacity are central and organizer use is limited, mostly to consumables such as anchors and screws.
- Telecom base station work involves high-value instruments in complex environments, so an IP65 or IP67 protective case with internal divided modules is the standard answer - a textbook application of the three-layer architecture.
- Home and facilities maintenance is about value and easy storage; one general toolbox plus one multi-cell organizer is normally enough. See household versus electrician toolboxes.
The Combined Approach: A Three-Layer Architecture
Everything above converges into one executable architecture.
The three layers:
- Layer one, the outer: toolbox or protective case. Carries the protection duty - dust, water, impact, load, carrying. Specified by mobility and environment: IP rating, IK rating, volume, rated load.
- Layer two, the middle: trays, inserts or divided modules. Carries the location duty - fixed places for large items, mounting space for the small-parts boxes. Specified by the tool list.
- Layer three, the inner: small-parts organizers. Carries the compartment duty - separating small parts by specification, visual control, fast access. Specified by the number of small-part specifications.
Three advantages of this architecture:
- Lowest cost. Protection is bought once, at the outer layer. Inner organizers need no sealing or impact performance, so the total is far below a scheme where every box is individually protected.
- Genuine flexibility. When the task changes, swap the layer-two insert or reconfigure layer three; the outer case keeps working for years. Electrical job today, mechanical tomorrow - change the insert.
- Clear management. The outer layer answers "where does this case go," the middle answers "where is the big tool," the inner answers "where is the small part." No overlap, and counting responsibility is unambiguous.
Four design points when implementing it:
- Work the dimensional chain carefully. Organizer outer dimensions must fit the layer-two cells or tray, and those must fit the internal clear dimensions of the layer-one case. Draw the chain and check it layer by layer at selection time, rather than discovering on delivery that the box will not go in the case. This is why the "internal clear dimension" concept in toolbox capacity calculation matters so much.
- Keep the access path short. Frequently used items belong in the easiest position - the upper tray, a lid pocket, an external side pocket. If retrieving one common small part takes four steps - open case, lift tray, find organizer, open lid - the process will be bypassed, small parts will end up loose in the case, and the system fails.
- Layer the weight sensibly. Heavy items (power tools, large spanners) go low and directly under the handle; medium items in the middle; light organizers on top or in the tray. That protects the case and reduces carrying fatigue.
- Leave expansion margin. Buy with 20% to 30% spare cell and volume capacity. A configuration sized exactly to today's list will be short within six months.
For precision tools and instruments: if layer three carries gauges or electronic modules, add cushioning and moisture control - routed EVA for cushioning, desiccant for humidity. See shockproof toolboxes for precision tools.
Purchasing Checklist and Ratio Guidance
Finally, an executable purchasing sequence.
Step one: list the tools. Every item to be stored, with three attributes: characteristic dimension (longest edge in millimetres), weight, and whether it needs protection from impact or moisture. This step cannot be skipped; everything else is calculated from it.
Step two: split by size and protection need. Small parts (tens of millimetres, counted in pieces) go to organizers; large items to toolboxes; medium items according to their protection need. Total up the counts and volumes in each group.
Step three: calculate organizer cell demand. Cells = number of specifications x 1.3. Then choose a box whose internal clear cell dimension exceeds the item's longest edge by roughly 20% to 50%. With many specifications - several dozen or more - consider drawers or a multi-box arrangement.
Step four: calculate toolbox volume and load. Sum the large-item volumes and apply a 1.2 to 1.3 margin to get required volume, using internal clear dimensions rather than external size. Sum the weights to get required capacity, then divide by 0.75 so you are operating at roughly 70% to 80% of rating.
Step five: fix the ingress rating and mobility. Indoor bench cycle: ordinary organizer. Cross-site carrying: toolbox with a handle. Outdoors or water exposure: IP54 or better; possible immersion: IP67. Heavy loads of tens of kilogrammes: wheeled.
Step six: design the three-layer dimensional chain. Check organizer-to-case fit, and check that frequently used items sit in the easiest positions.
Step seven: set quantities and standardise. Prefer one specification so units stack, interchange and reorder cleanly. Buy current need plus 20% to 30% margin, and keep a proportion of wearing spares - hinges, clips, gaskets.
Step eight: write the acceptance clauses. For organizers: cell dimensions, lid cycle life, stacking stability, label legibility. For toolboxes: volume and internal clear dimensions, rated load, ingress rating (both digits stated), drop and latch life, and gasket replaceability.
For what a professional-grade toolbox should offer, see key features of a professional toolbox.
Frequently Asked Questions
Q: Can I just use one big toolbox for all the small parts and skip organizers altogether? A: Technically yes, and it is almost always wrong. Three reasons. First, mixing: a toolbox interior is one or a few large compartments, so hundreds of screws tumble together in transit, and once different specifications are intermingled they are effectively impossible to separate quickly - and installing the wrong specification is an assembly defect. Second, search efficiency: finding one particular washer in a mixed mass takes tens of seconds to minutes; in a labelled cell it takes seconds. At a station picking hundreds of times a day, that difference is real labour cost. Third, wasted case capacity: filling a large toolbox with small parts gives high weight and poor volumetric efficiency, because there is a lot of air between screws - heavy to carry, low value carried. The correct approach is a divided tray or multi-cell organizer inside the case, so the outer layer protects and the inner layer sorts. If you only have two or three specifications, a divided tray is enough; more than that and you need proper organizers. What must be avoided is the zero-management state of tipping all small parts into one box.
Q: Do small-parts organizers need to be waterproof? Will they let water in if left on an outdoor site? A: It depends whether they are independently exposed. If organizers live inside a toolbox or protective case - the recommended architecture - they do not need independent waterproofing, because the outer case carries that duty and the inner box only needs splash resistance. If an organizer is carried outdoors on its own and set down on site, it needs basic dust and splash resistance, and you should choose a thicker-walled mid-size compartment case with proper latches rather than a thin-wall bench organizer. One common misunderstanding is worth clearing up: an IP rating is a test result for a complete enclosure; it does not describe "a box inside another box." Demanding IP67 on inner organizers is usually wasted money when the outer case already provides it. What you should do instead is match the outer case rating to the environment - IPX4 and above for ordinary rain, IPX5 and above for splash and washdown, IP67 only where immersion is possible - and build the habit of minimising openings and relatching promptly in wet weather. Regardless of the inner box, moisture-sensitive items such as electronic components and precision terminals should always travel with desiccant.
Q: Fixed cells or adjustable dividers - which should I choose? A: It depends on how stable your specifications are. If the set rarely changes - common standard fasteners, dedicated spares for one machine model - fixed cells are better: cell dimensions stay put, the dividers are strong, cost is lowest, and there is no risk of a divider working loose and letting cells merge. If specifications change often - development builds, high-mix low-volume repair, spares that vary by project - adjustable dividers are better, because you can add or remove cells as new specifications appear. A good compromise is a mixed configuration: fixed-cell boxes for the stable core specifications, adjustable boxes for the volatile ones. One more judgement that is easy to miss: the reliability of the adjustable divider itself. Poor-quality dividers can work loose or tip over when the box is full, merging cells - which is worse than fixed cells being inflexible. So when you choose adjustable, check how tightly the divider seats in its slot, and test by filling the box and shaking it. For precision electronic components, drawers are often more reliable than dividers, because each drawer is a physically isolated unit.
Q: How many trays should a toolbox have? Are more trays better? A: No, more is not better. A tray earns its place by lifting frequently used items to the easiest position, and it costs volume and adds steps. As a working guide: one tray for a mid-size toolbox, one to two for a large one, and beyond two it is rarely worth it. Three tests. Access path length: if reaching a bottom tool means open lid, lift tray one, lift tray two, the bottom tools will simply not be used, and people will start leaving them elsewhere - the system fails. Volume loss: every tray and its supports consume height, so more trays means less usable loading height. Stability: multi-tier trays are less stable when carried or opened, and tip or slide more easily. A better approach is a flip-out or hanging tray that deploys automatically or hooks onto the case rim when the lid opens, so one action exposes every level instead of lifting layers one at a time. Also secure tray contents with dividers or elastic straps, or transit will mix them and cancel out the access benefit the tray was meant to deliver.
Q: Roughly how many organizers versus toolboxes does a complete tool system need? A: There is no fixed ratio, because it depends entirely on what you own. But you can estimate from two metrics. Organizer count follows the number of small-part specifications: roughly "total specifications divided by cells per box, times 1.3." Managing 60 specifications with 12-cell boxes gives 60 / 12 x 1.3 which is about 6.5, so seven boxes. Toolbox count follows large-item volume and task type: sum the volumes, add 20% to 30% margin, divide by usable case volume, then split by task - one set for electrical work, one for mechanical, and so on. Typical crew patterns: electronics assembly skews to organizers, perhaps several boxes to one case; construction skews to toolboxes, perhaps one case to one organizer; general maintenance sits roughly balanced. Also weigh fixed versus mobile: a system that stays at a workshop station can carry more organizers and drawer cabinets because nothing has to move, while a mobile crew should limit the box count and consolidate into a few cases.
Q: Clear lid or opaque lid on an organizer - which is better? A: A clear lid is a clear management advantage: you confirm contents and stock without opening, which is exactly the "see at a glance what is missing" visual control that matters most when cells are numerous and specifications look alike - several sizes of black screws, for example. But there are three trade-offs. Material constraints: transparent parts are typically PP random copolymer, PS or PC, whose toughness and weatherability differ from opaque engineering grades, so impact resistance and weathering are usually weaker. Scratching and oil: a scratched clear surface destroys visibility, and in an oily workshop it needs frequent cleaning. UV ageing: prolonged sun exposure yellows and embrittles transparent parts faster. Recommendation: choose clear lids for indoor stations with many cells, similar-looking specifications and high management requirements; choose opaque lids for outdoor use, rough handling and strong sun, and use labels to deliver visual control instead. A middle path is a clear lid plus labels, so identification survives even if the lid gets scratched. If you do go opaque, standardised labels are essential, because you have given up the transparency advantage.
Q: We have a very large number of small parts across a very wide range. How do we manage that systematically? A: This is a real pain point at many repair and assembly stations, and five steps systematise it. First, build a specification register: log every small part with category and specification - name, size, material or grade, code, typical quantity, storage location. That is the basis for everything else and the basis for reordering. Second, layer by usage frequency: high-frequency specifications go in the most accessible boxes and cells, at eye height and close to the station; low-frequency ones can be further away or sealed up together. Third, ABC classification: split parts by annual usage or value into A (few but critical), B and C (many but low value), then manage A tightly - precise cells, low-stock alerts, regular counts - and C loosely - larger cells, bulk reorder. Fourth, visual minimum-stock alerts: mark a minimum line in each cell, or paint the cell floor a contrasting colour so that dropping below it triggers a reorder. Fifth, count and prune periodically: quarterly or half-yearly, retire specifications no longer used and merge duplicated cells. On tools, beyond divided organizers, consider drawer cabinets when the specification count is very high and printed labels for consistency. The governing principle: match management intensity to specification count, value and usage frequency - do not apply one level of control to everything.
Q: What should I tell a supplier to get the right combination of both product types? A: Give them three things: a list, a scenario, and a dimensional chain. The list: every item with name, characteristic dimension, weight, quantity and protection need - not a vague "I need to carry tools." An inaccurate list guarantees an inaccurate proposal. The scenario: is it used at a station or carried between sites, indoors or outdoors, does it go in a vehicle, roughly how many open-close cycles per day, is there dust or moisture. The scenario decides material, ingress rating and mobility features. The dimensional chain: if you already have shelving, a vehicle or existing cases, state the constraints - "shelf height must not exceed X millimetres," "it must fit the internal clear space of our existing X case" - so nothing arrives that cannot be put where it belongs. On top of that, state acceptance terms: for organizers, cell dimensions and tolerances, lid cycle life, stacking stability; for toolboxes, internal clear volume, rated load, IP and IK ratings, drop and latch life, and gasket replaceability. For OEM/ODM customers, JUNZHJIA can supply custom inserts and layered configurations against a list and scenario, and will state the applicable model range.
Conclusion and Further Reading
Back to the original question: the difference between an organizer box and a toolbox is essentially that they answer two different demands - compartmentalised management of small parts versus protected movement of large tools. The dividing line is item scale and movement frequency, not volume.
Remember three rules and the configuration will be right: items counted in pieces that must be separated by specification go in organizers; items counted in units that need impact and moisture protection go in toolboxes; medium items needing both go into the three-layer architecture of organizers inside a toolbox.
Remember three cost rules and the budget will not be wasted: buy protection once, at the outer layer; derive the container grade from the value of the contents; and spend on small-parts compartmentalisation first, because the time lost finding things usually exceeds the cost of a broken case.
JUNZHJIA is manufactured by KeXin New Materials (Guangdong) Co., Ltd. at its Zhongshan facility, supplying protective cases, toolboxes, military and ammunition cases and IP67 waterproof enclosures to wholesale, distribution and OEM/ODM customers worldwide. Standard models and custom programmes are both available, with inserts, trays and layered configurations engineered to a submitted tool list. Provide the list and the scenario and you will get a better combination than picking items one by one from a catalogue.
Further Reading